How to Add Zoho Mail to iPhone with Simple Steps?
Are you facing an issue when trying to access Zoho Mail emails to iPhone? Wondering how to add Zoho Mail to iPhone with ease? Looking for a technique to implement the process immediately? Not to worry, read the article carefully and you will find different solutions that will efficiently add Zoho Mail to your iPhone in a few seconds.
You can get access of Zoho Mail account on any mobile device by directly navigating to https://mobile.zoho.com if you have a decent browser. But, in case you are using local email client on your mobile then you can fetch Zoho Mail emails via POP or IMAP. Zoho recently introduced IMAP support in Zoho Mail and thus in the following segment we have discussed the instructions to configure Zoho Mail account on iPhone.
Generic Steps
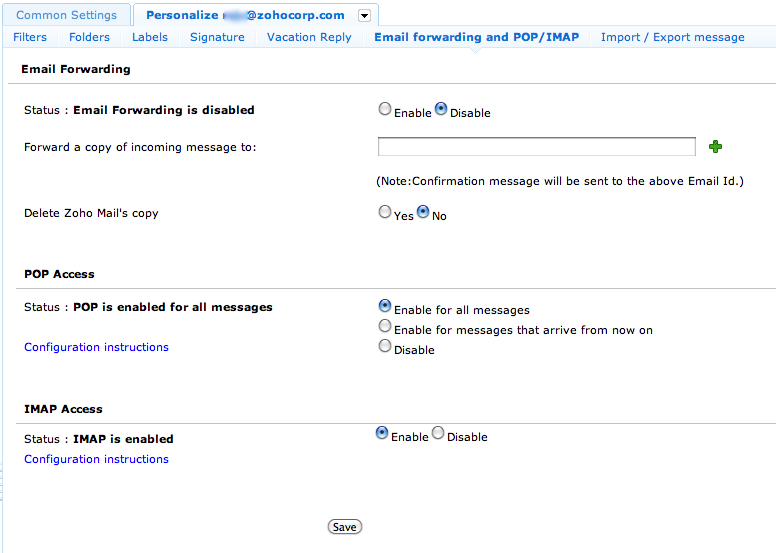
However, before configuring Zoho Mail on mobile, first, enable POP/IMAP access for the email account. To do the same, move to Email Settings, select Personalize choose Email Forwarding and POP/IMAP option, and enable POP or IMAP as per your preference.
After enabling IMAP, follow the instructions on the iPhone required to receive/send emails.
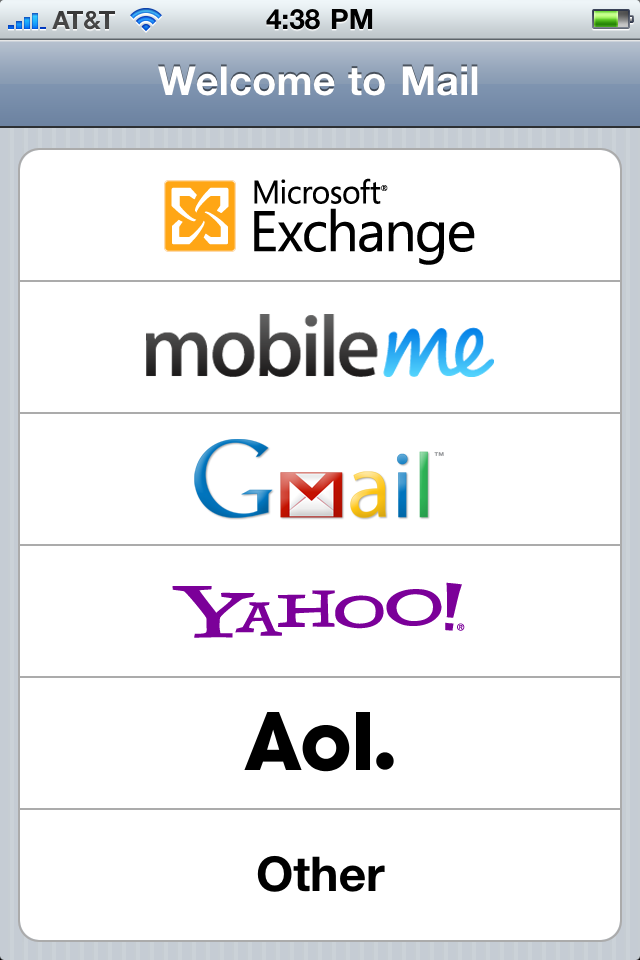
Navigate towards Settings, go to Mail, select Contacts, Calendars, and choose “Add Account” and “Other” options.
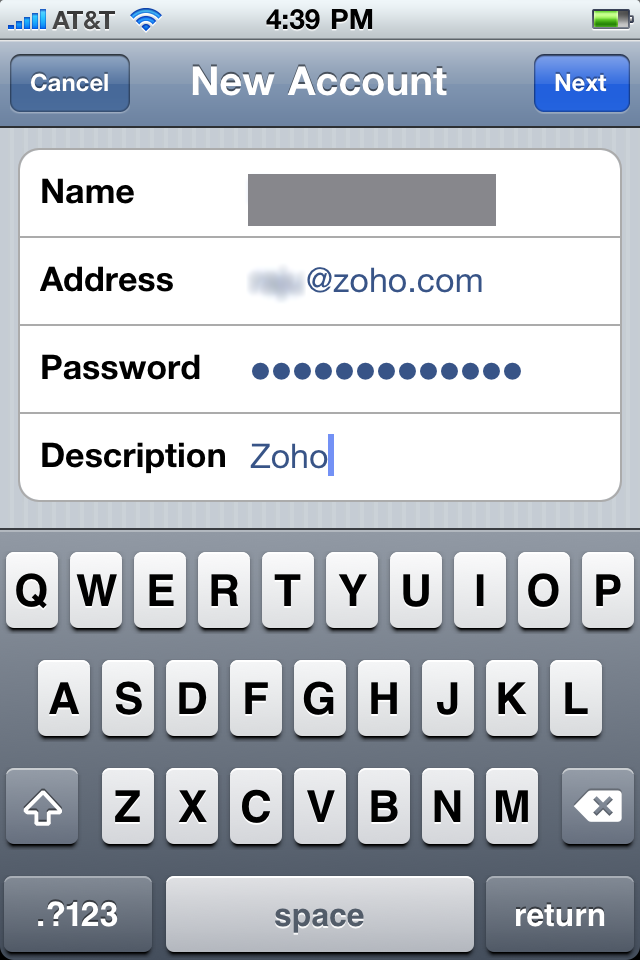
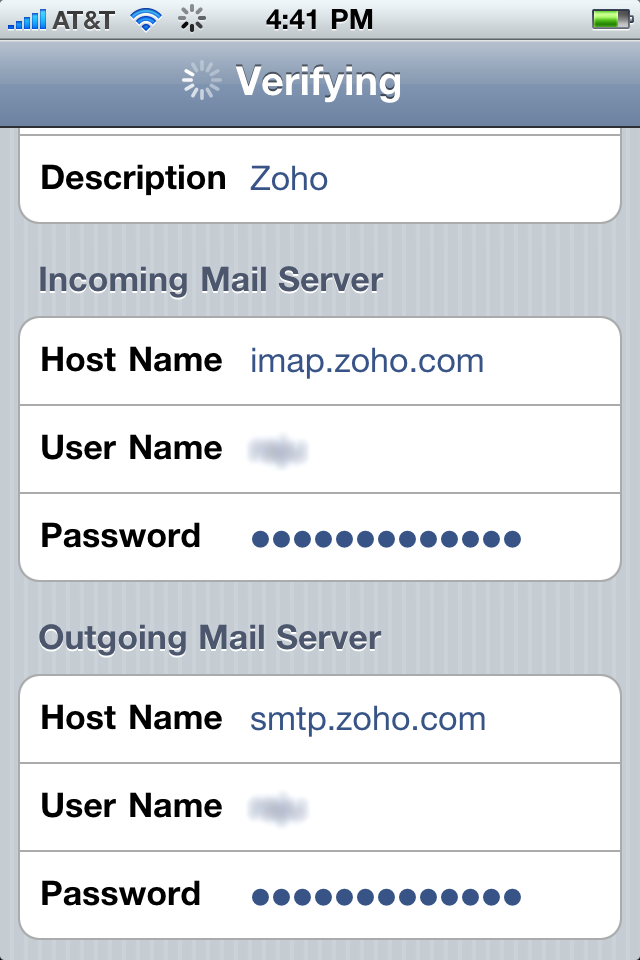
In the next window, go with the “Add Mail Account” option and provide the details accordingly i.e. Name, email address (username@zoho.com), your Zoho password, and account description.
In the next window, specify Incoming Mail Server (imap.zoho.com) and Outgoing Mail Server (smtp.zoho.com)
After verifying the details, you are all set to configure Zoho Mail on your iPhone. Now open the Mail app to extract Zoho Mail emails. In the case of IMAP, emails you read on the email client will marked as read on the Zoho Mail profile as well.
The above instructions are similar for iPad as well. If you require additional details for IMAP configuration, then go through it:
- Incoming Port: 223
- Outgoing Port: 465
- SSL: Yes
- Outgoing Mail Server Requires Authentication: Yes
Using Spark Application
Step 1. Download and install Spark on iPhone.
Step 2. The intro screen will appear, add your Zoho Mail email address, and click the Login button.
Step 3. Add a Zoho Mail password, and tap Advanced Settings.
Step 4. Now, specify IMAP (Incoming Mail Server) and SMTP (Outgoing Mail Server) for account configuration as provided by Zoho Mail support.
Step 5. Click Login using the Zoho Mail email account with Spark.
Zoho Mail account is now ready to be used with Spark for iOS. You can follow the steps mentioned below to add additional Zoho Mail email accounts by Spark.
Steps to Add Zoho Mail using Spark on iOS
Step 1. Launch Spark App on iOS.
Step 2. Tap the Sidebar button (three horizontal lines) appearing at the top left of the screen.
Step 3. Scroll until you see Settings and tap on the same.
Step 4. Click Email Accounts and go to Add Account appearing at the bottom of the screen.
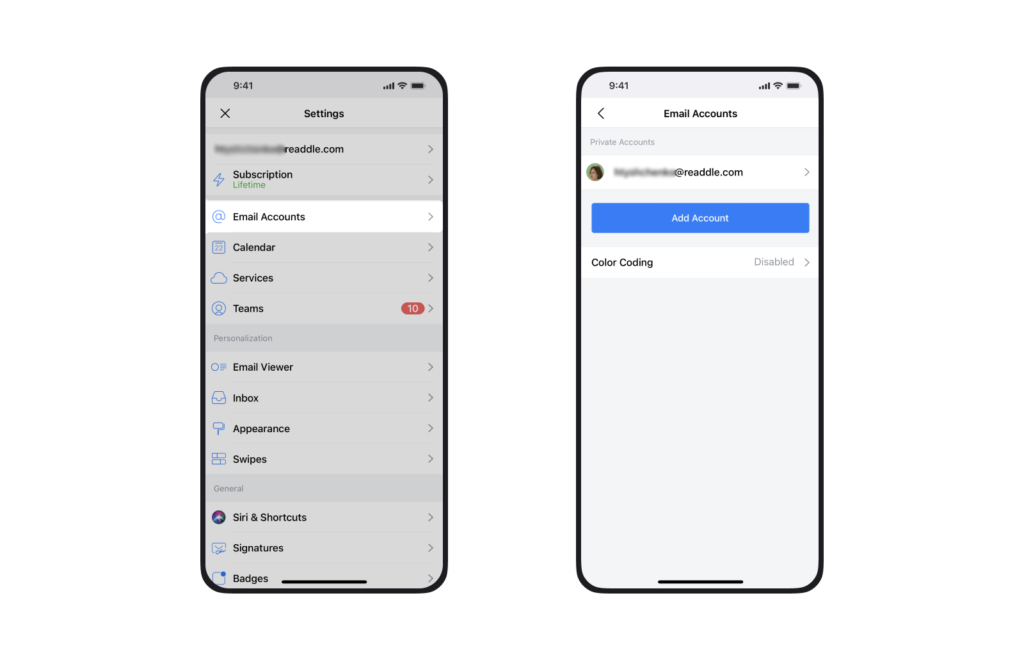
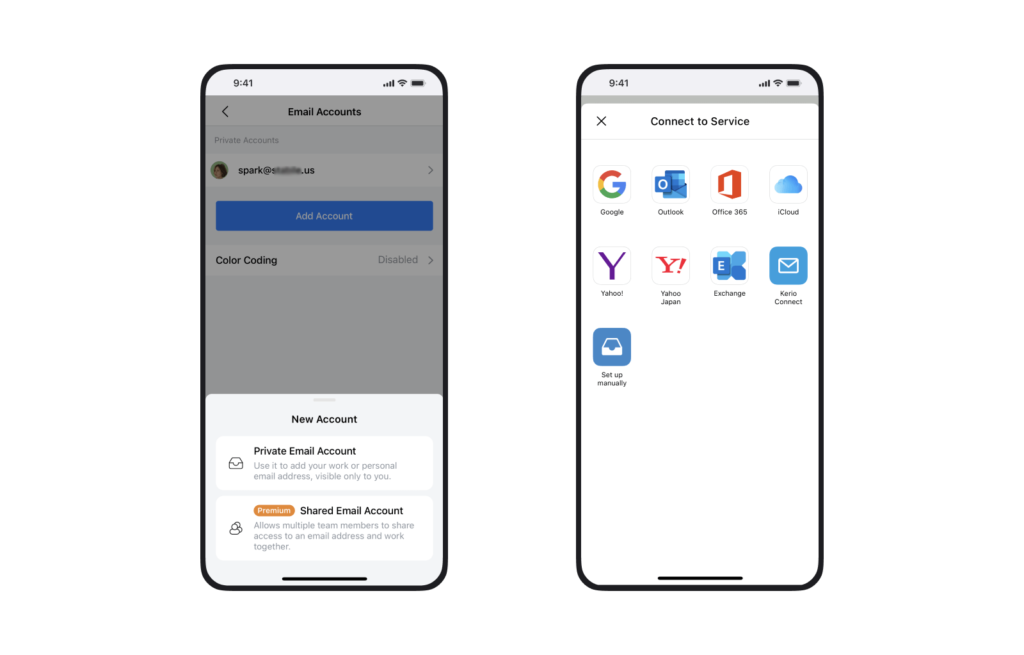
Step 5. Choose Private Email Account and click Set up Manually.
Step 6. Specify Zoho Mail email & password and then continue by providing Incoming Mail Server and Outgoing Mail Server details.
Step 7. Tap Login button to allow Spark to access Zoho Mail account so that you can use Zoho Mail services with Spark on iPhone.
Step 8. Choose the necessary option to receive notifications and click Done.

Spark successfully configured the Zoho Mail account on iPhone. Now, you can access Zoho Mail emails on your iPhone easily.
Epilogue
In the write-up, we have discussed different solutions to add Zoho Mail to iPhone or iPad. You can opt for a suitable method and configure Zoho Mail on iPhone accordingly. However, we have MacMister Zoho Email Backup Software Mac & Windows that you can utilize to add Zoho Mail into 15+ saving options such as PST, PDF, MSG, EML, EMLx, MHT, HTML, DOC, IMAP, Gmail, G Suite, Thunderbird, OLM, Google Drive, Dropbox, and more. For any issues, you can contact MacMister Support.