How to Export Gmail Emails to Google Sheets on Mac & Windows?

Are you deciding to transfer all your Gmail emails to Google Sheets as a record for a better data management? But finding difficulty in doing so? Wondering how to export Gmail emails to Google Sheets in an easy and quick way? Searching for a trouble-free method that can effortlessly perform the task? No worries, read the complete segment and you will come across a solution which will help you to directly and successfully export Gmail emails to Google Sheets on both Mac & Windows OS.
Exporting Gmail emails to Google Sheets is beneficial in many different ways. It helps in analyzing email subscriptions, tracking communication history with customers or simply as a backup. However, there is no direct option available to export Gmail emails to Google Sheets. Yet, you still have some options and workaround which you can opt to get the job done. Read on and use the solution that suits you the most.
Different Ways to export Gmail Emails to Google Sheets
- Export Gmail Data locally using Google Takeout.
- Exporting Gmail to Google Sheets using Automated Solution.
Method 1. Extract Emails from Gmail to Google Sheets Manually
The first method is divided into three categories i.e.
- Export Gmail Data using Google Takeout.
- Import exported database into CSV.
- Uploading CSV to Google Sheets.
Step 1. Use Google Takeout to Export Gmail Emails Locally
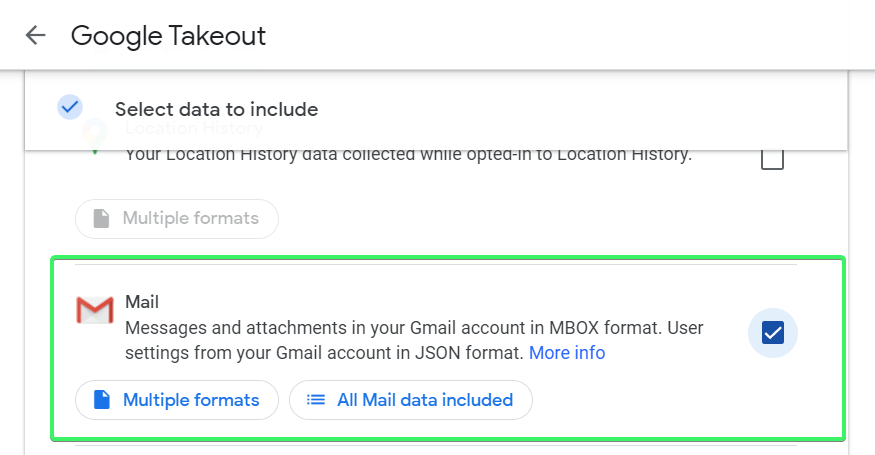
Go to https://takeout.google.com/ and tap Deselect all option.

Scroll down until you see Mail option. Click on its checkbox and select it.
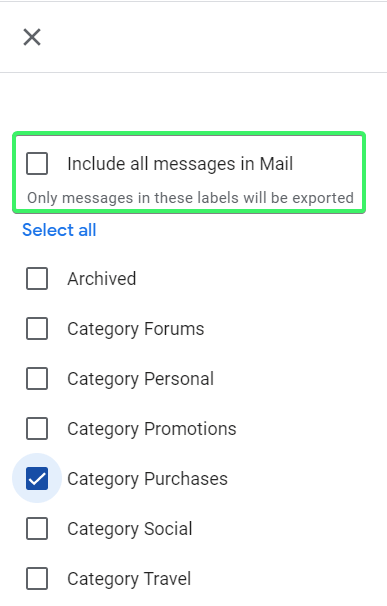
In case you unable to export data from Gmail, click All Mail data included button and then deselect Include all messages in Mail. Choose the particular label for export and click OK appearing in the top-right corner of the screen.
After this, click on Next button.
Apply File Type, Frequency, and Destination
Choose the necessary delivery option to receive the exported file:
- Send download link via Email
- Add to GDrive
- Add to Dropbox
- Add to OneDrive
- Add to Box
Select the Frequency type
- Export Once
- Export in every two months per year.
Select the required file type for download. You will see two options i.e. Zip and TGZ with size (1, 2, 4, 10, or 50GB). Choose the required file type as well as size as per the requirements for download.
Create the Export
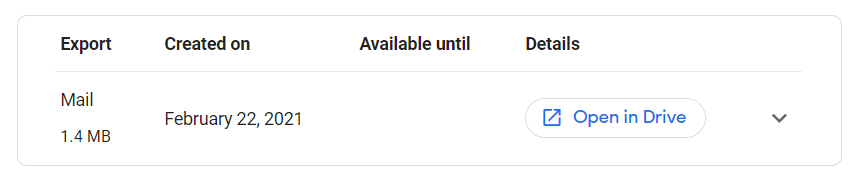
Click Create Export button and Google will start creating a copy of files from Gmail account. The process can take a long time to complete, depends on the amount of data you have selected for download. After this, you will receive an email showing that the export process is completed. And, here is how it will look once the process is finished.

Now, download the MBOX file on your system. In case you have selected export to cloud storage then you can directly open the file from it. You will get the option like this if you have chosen export to GDrive option.
Step 2. Convert Exported MBOX File into CSV
You can download MacMister MBOX to CSV Converter Tool to convert exported MBOX file to CSV on Mac & Windows in batch at once. The application is easy, quick, and 100% safe to use. Any user can download it and complete the conversion in three seconds. The steps are limited and so the tool will take minimum time to finish the entire process.
Moreover, there are numerous beneficial features which you can use to perform the conversion according to your own requirements. Download the trial edition now and test the complete working process of the software for free. Look at the steps discussed below and convert exported files accordingly.
Working Steps to Convert Exported .mbox File to CSV on Mac
Step 1. Download the application on your Mac.
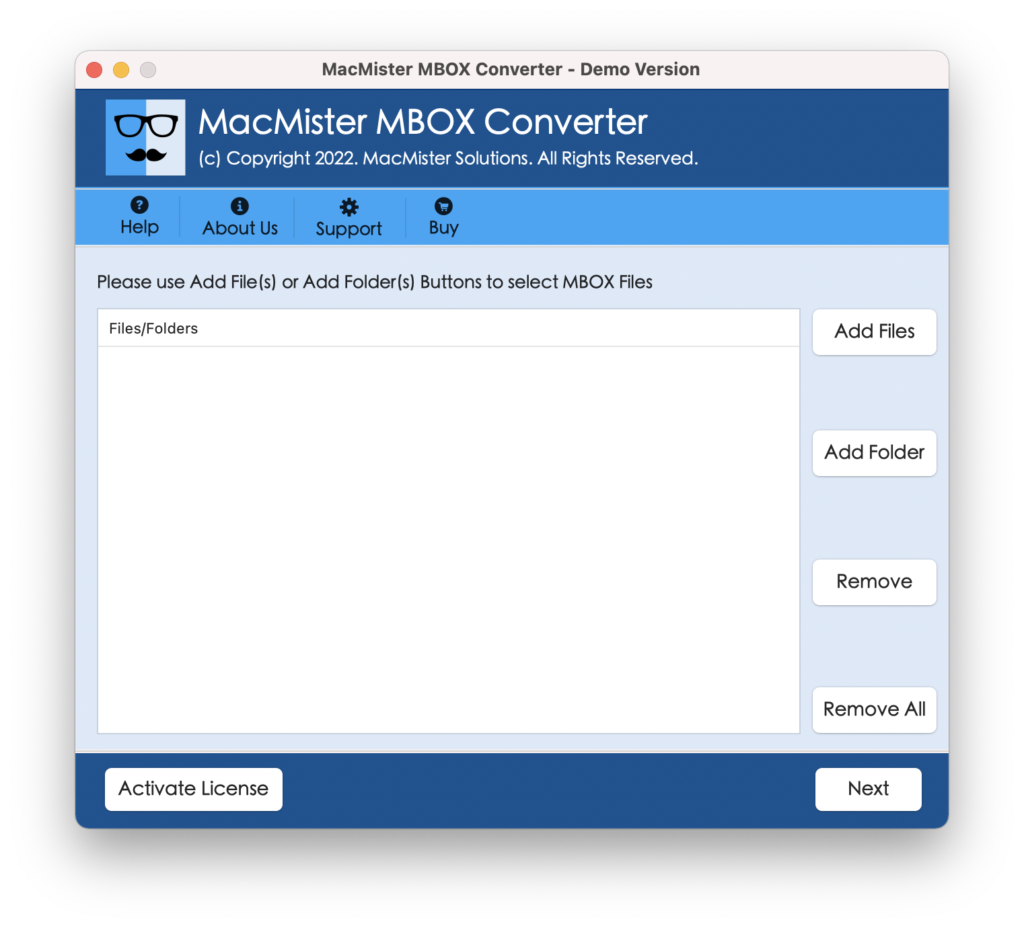
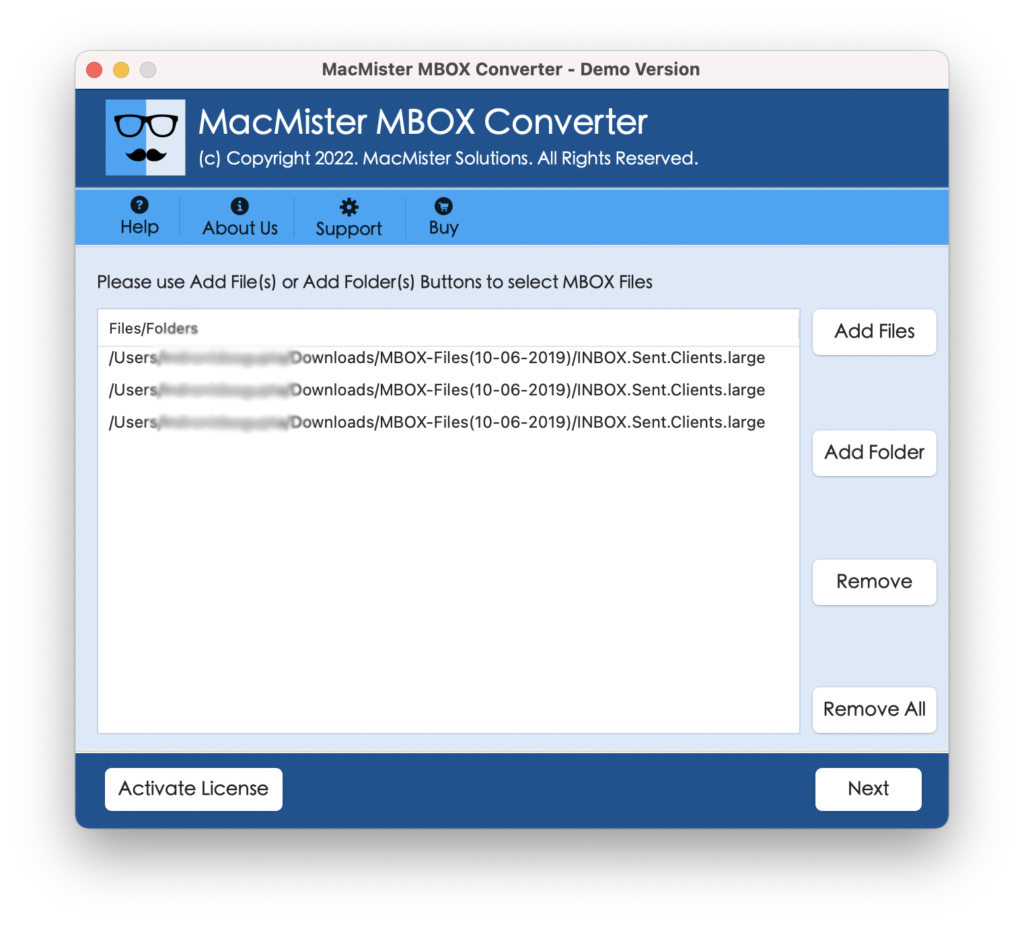
Step 2. Get the help of Add File(s) button to add required MBOX files on the tool. Or you can use Add Folder button to add a folder containing unlimited .mbox files on the app for batch conversion and click on Next.
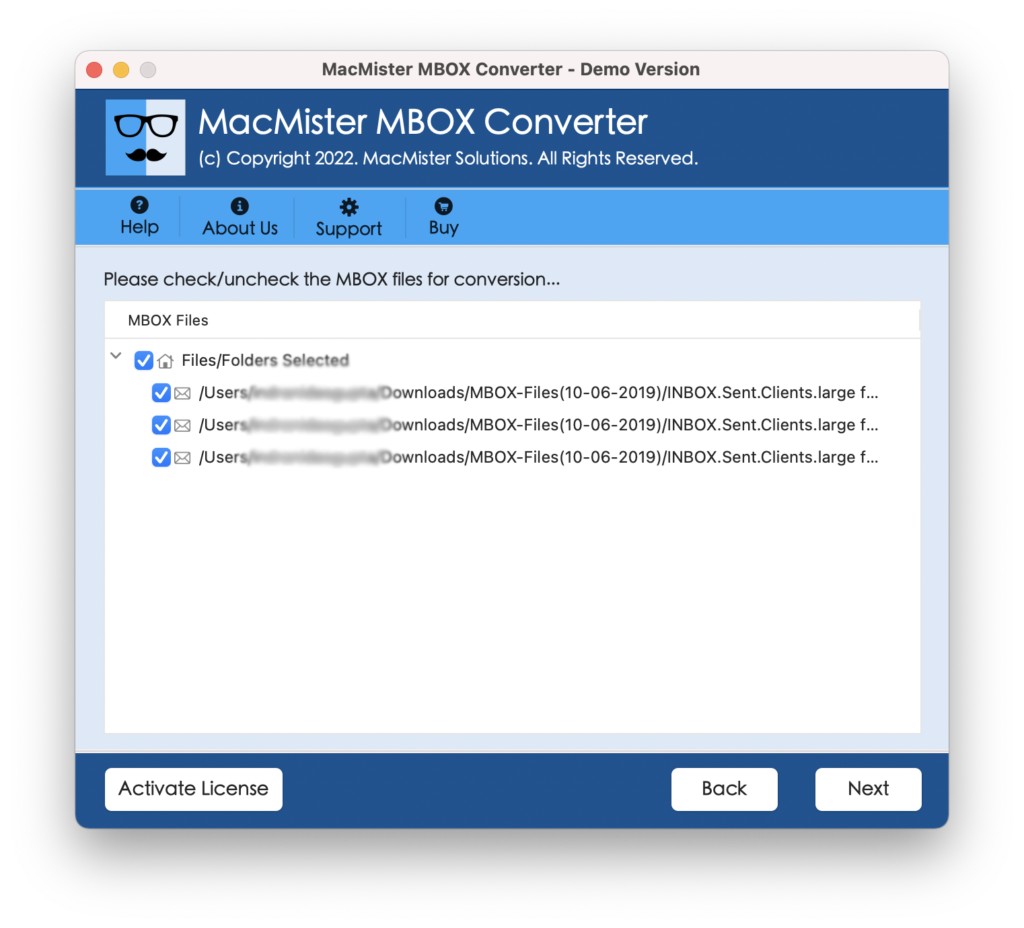
Step 3. The software will start listing the selected MBOX files on the tool with checkboxes. However, you can use a checkbox for executing the selective conversion if you want. Otherwise click on Next to continue.
Step 4. Now, click on Select Saving Options and choose CSV file format from the drop-down.
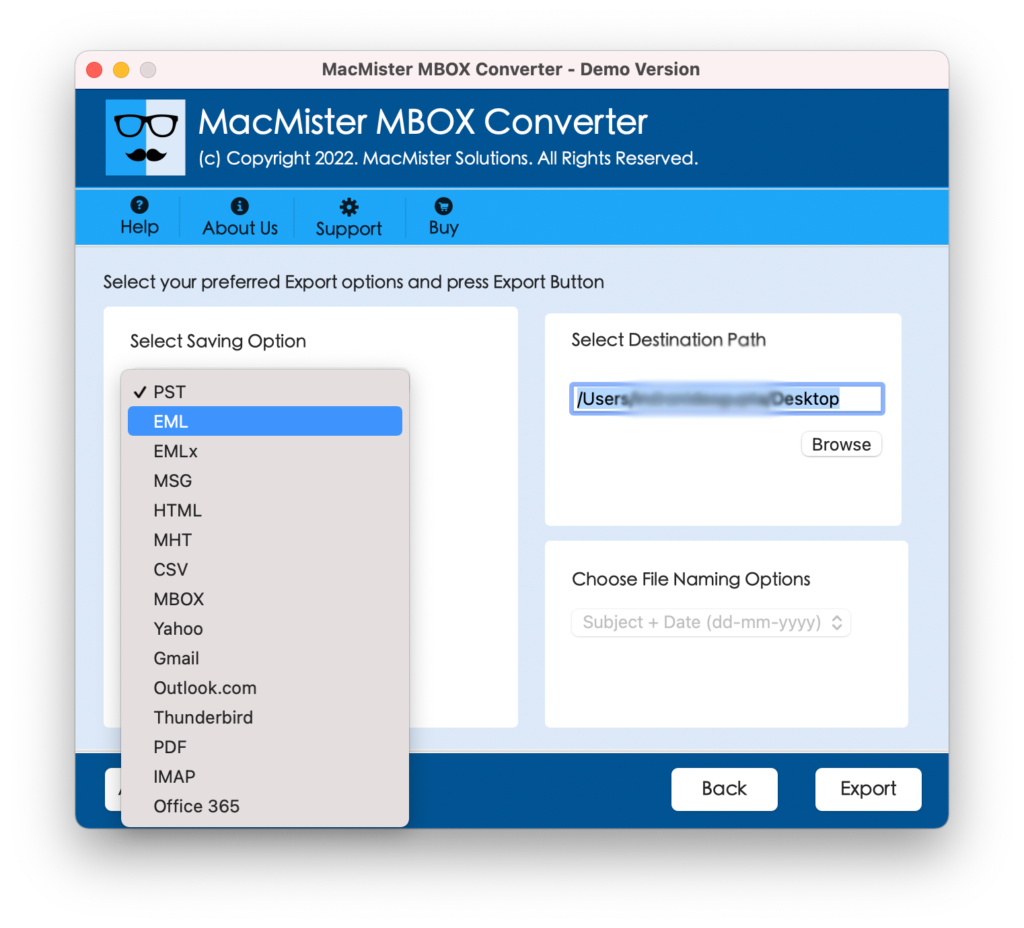
Step 5. You can set the CSV sub-options according to the requirements and click on Export button to start the process.
Step 6. The conversion will start and the app will show Live Conversion Report with the help of users can track the conversion status of MBOX files.
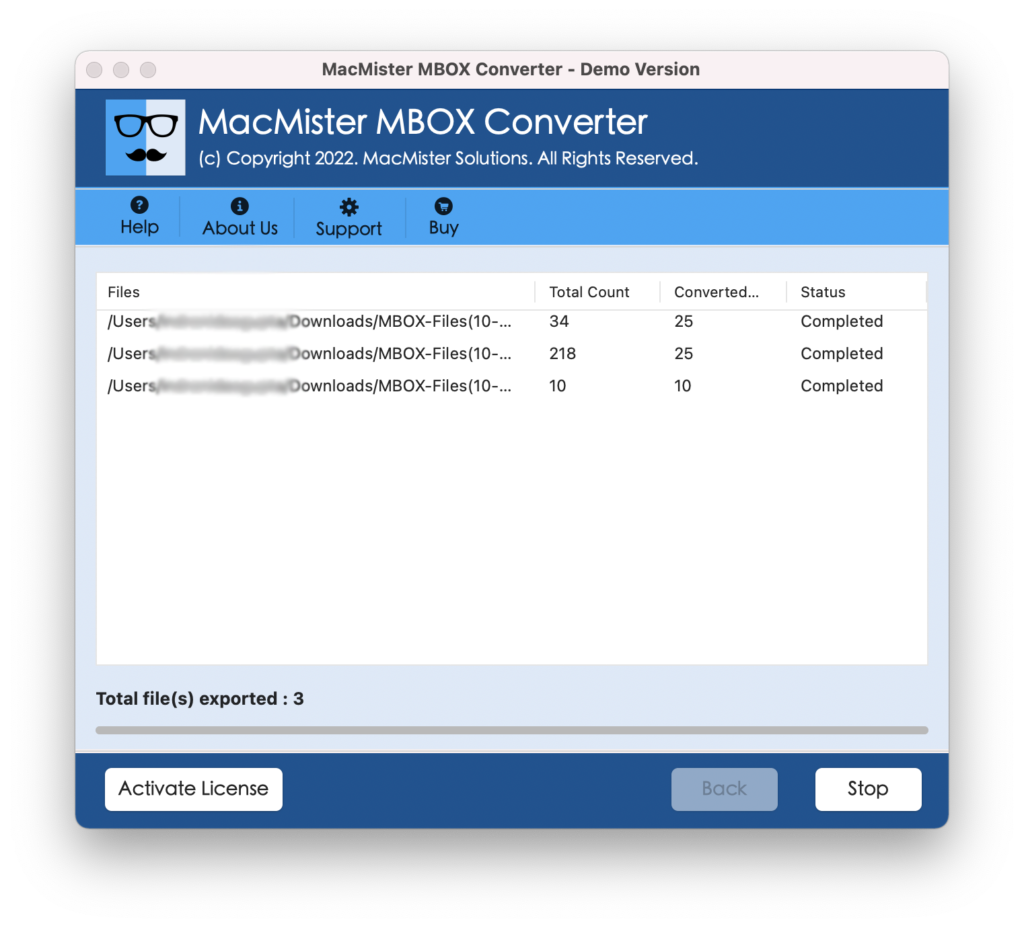
The entire task will finish in few seconds and then the tool will show Conversion Completed pop-up window on the screen. Click on OK and import converted CSV to Google Sheets.
Step 3. Import Converted CSV to Google Sheets
The last step is to import CSV to Google Sheets. Open Spreadsheet on the system, go to File and click on Import. Go to location where resultant CSV files are saved. Click on them to upload in the Spreadsheet. The exported data will look like this.
Image
Method 2. Directly Export Gmail Emails to Google Sheets
By making use of MacMister Gmail Backup Tool for Mac & Windows, you can instantly export unlimited Gmail emails to Google Sheets with attachments. The software has a simple GUI which any user can effortlessly access to export multiple Gmail emails to Google Sheets at once. The steps are short and time-saving and will help to complete the entire task within few seconds.
Moreover, it is equipped with many powerful options and features with the help of users can export Gmail emails to Google Sheets according to their specific requirements. However, the freeware version is available with the help of users can test the steps of the software for free.
Working Steps to Export Gmail Emails to Google Sheets on Mac
Step 1. Download and run MacMister Gmail to CSV Tool on macOS.
Step 2. Enter Gmail credentials in Email ID and Password and click on Login Button. Quick Note. Use the App Password in the password field.
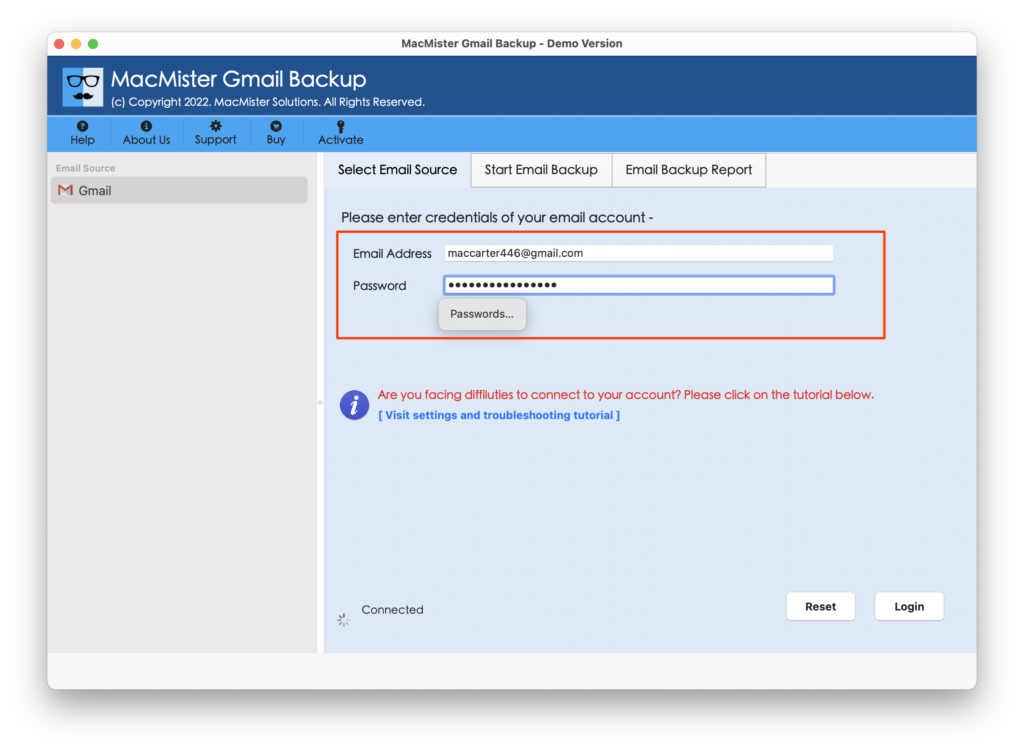
Step 3. The Gmail account will connect quickly with the tool and its mailboxes will start appearing on the software pane.
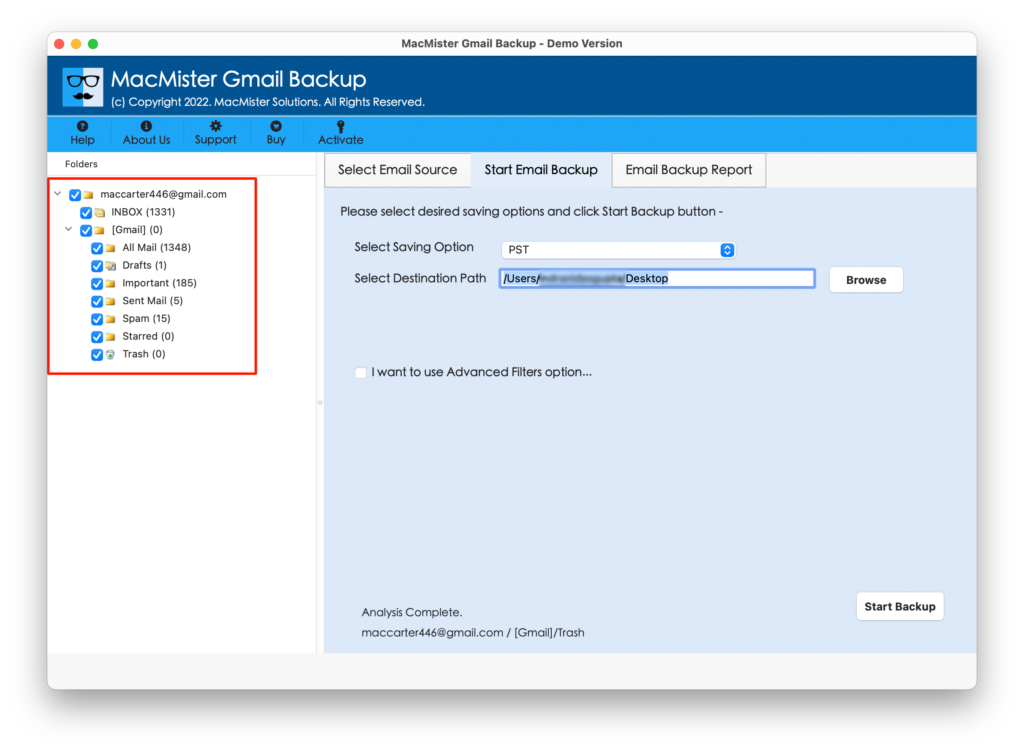
Step 4. On the right side of the application, click on Select Saving Options and choose CSV file format from the menu.
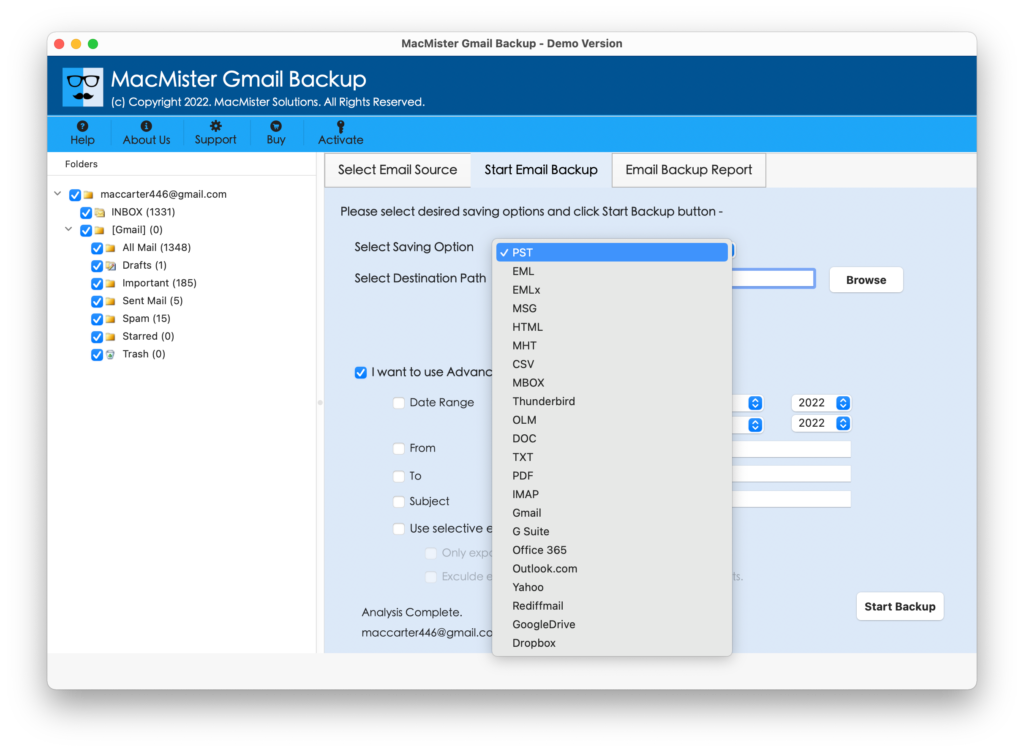
Step 5. Set CSV sub-options and Filters as per your requirements and start the conversion by tapping Export button.
Step 6. The procedure will start shortly and then Email Backup Report will appear that will show the ongoing export status of Gmail emails.
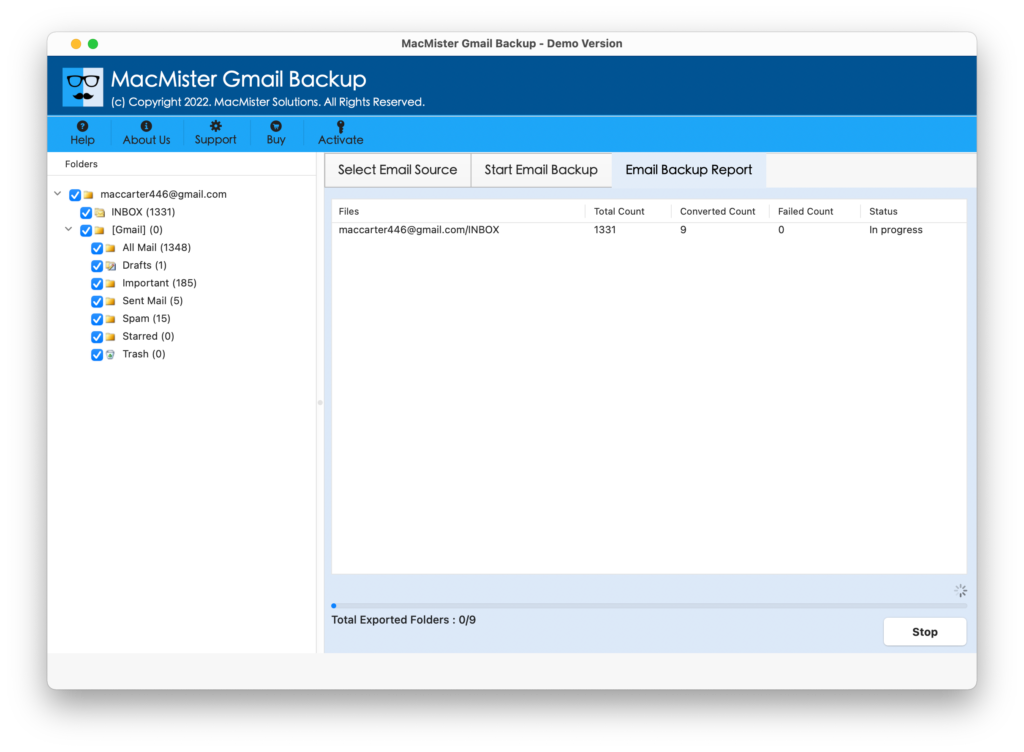
The entire process will take few seconds to complete and then “Process Completed” pop-up window will appear. Click on OK and go to location where resultant CSV files are saved. Right-click on it and select Open With Microsoft Excel option. And the resultant CSV file will straight away open in Spreadsheet.
Moreover, the original data remain accurate and you will find no modification in the file. Still, if you see any changes, then contact MacMister Support.
Quick Note. You can try MacMister Email Backup Software for Mac & Windows to take backup of emails from 90+ webmail sources. It supports AOL, Amazon Workmail, 1 and 1 Mail, BT Mail, Bluehost, Gmail, Office 365, Proton Mail, RediffMail, and many more. Download the free demo now and backup 25 email messages for free.