How to Export PST from Outlook Web App? – Ultimate Guide [2024]
If you are one of those users who find the process to export PST from Outlook Web App troublesome, then go through the tutorial that has highlighted a powerful solution to export PST from Outlook Web App with 100% accurate results.
So, let’s get started by exploring the default method first and understanding the reasons behind its negative perception.
How to Export PST from Outlook Web App (OWA) Manually?
To implement the process manually, follow the steps as discussed –
- Login to Outlook Web App portal.
- Go to the cog icon appearing at the top-right corner.
- Navigate to General tab.
- Go to Privacy and Data Section.
- Click Blue Color Export Mailbox icon.
- The Export Mailbox will be greyed and text “Status: Export in Progress” appear on the screen.
Problems with Manual Export
- At first, you see “Export in Progress” which does not provide any information regarding how much export has been done.
- The absence of status bar cause confusion for users. Because once the process is started then users won’t able to track the progress nor they have any information on how much data files are left for export.
- There are no updates on mail, one need to login to Outlook email client and follow the entire path till Export Mailbox to check the status.
- No appropriate guidelines are present regarding what will happen to the generated data while the current export is still ongoing.
- All the incoming and outgoing email conversations will be in limbo for 4 days approx. This is a timeline mentioned by Microsoft itself on the Export Mailbox page.
- Slow export process, it will take more than a day for a download link to appear.
- No Filtering is possible during export. There is no option present to choose folders, apply date filters, or prevent specific data from being a part of end result.
Make use of Client to Export PST from Outlook Web App
One cannot use any client for export, it is important to have a classic version to execute the process. Unfortunately, the new Windows machines are coming with only Outlook for Desktop email application. The version is basically the duplicate of OWA, so it has all the demerits that were discussed in previous export process. That is why it is better to have a classic edition that includes more robust PST extraction feature.
However, as the PC is not configured with the client, so it is important to download the copy of the client first and then follow the instructions mentioned here –
- Go to File and click Add Account.
- Enter the account name and select the box appearing besides Advanced Setup.
- Choose Outlook.com appearing on the next screen.
- Select the required email you need to import on the device.
- Tap Next button.
- Outlook email client is now connected to Outlook Web account. You may restart the app to see the changes.
In order to export the database from Outlook Web account, you need to follow the below steps –
- Navigate to File, click Open & Export, and choose Import/Export.
- Go to File and press Next button.
- Choose Outlook Data File (.pst) and press the Next button.
- Select the OWA folder whose files you need to import into PST. You may apply Advanced Filters as well.
- Once the selections are made, hit Next button.
- Search for the on-device location; select one of the options, Replace Duplicates, Allow Duplicates or Skip Duplicates.
- Last, press Finish button.
How to Export PST from Outlook Web App (OWA) Directly?
The easy and direct procedure to export PST from Outlook Web App (OWA) is by utilizing MacMister Office 365 Email Backup Software Mac & Windows. The app is safe, user-friendly, and reliable. Due to its simple and intuitive interface, all technical and non-technical users will be able to export PST from OWA with ease. Additionally, the three-operational steps will not take users lot of time and efforts. They will immediately export unlimited Outlook Web App mailboxes into PST with correct output.
Moreover, the application is programmed with numerous features with the help of users can perform the migration of OWA to PST as per specific requirements. However, a freeware version of the tool is also available with the help of users can experience the software working for free.
Working Steps to Export PST from Outlook Web App on Mac
Step 1. Download, install, and run Office 365 to PST Converter for Mac on Mac OS.
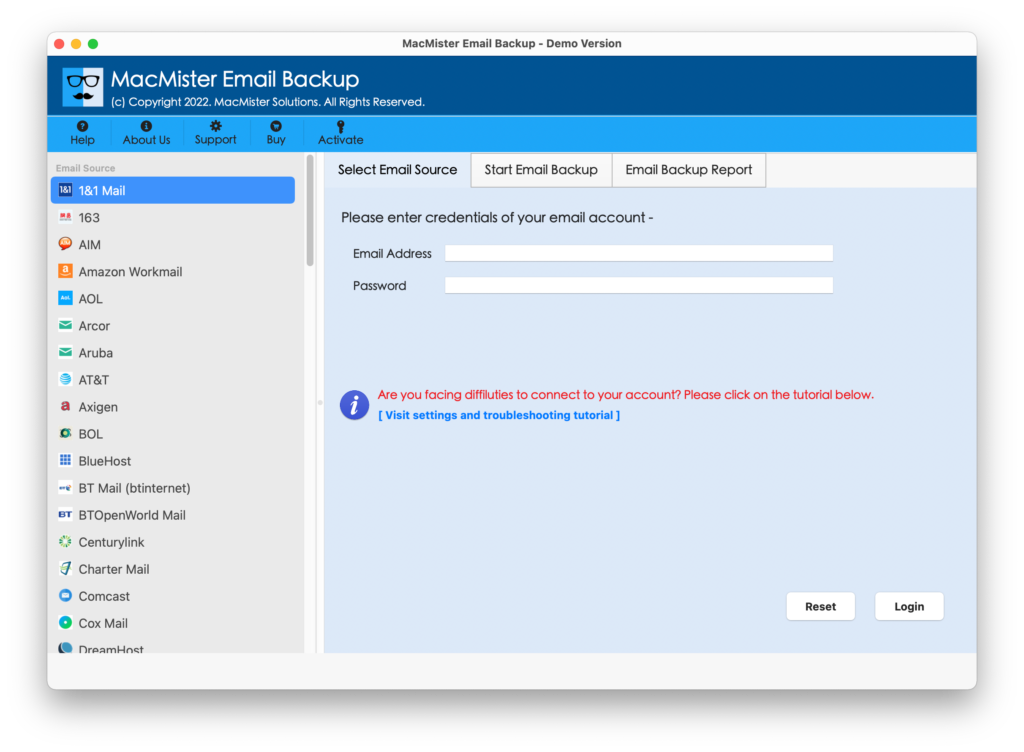
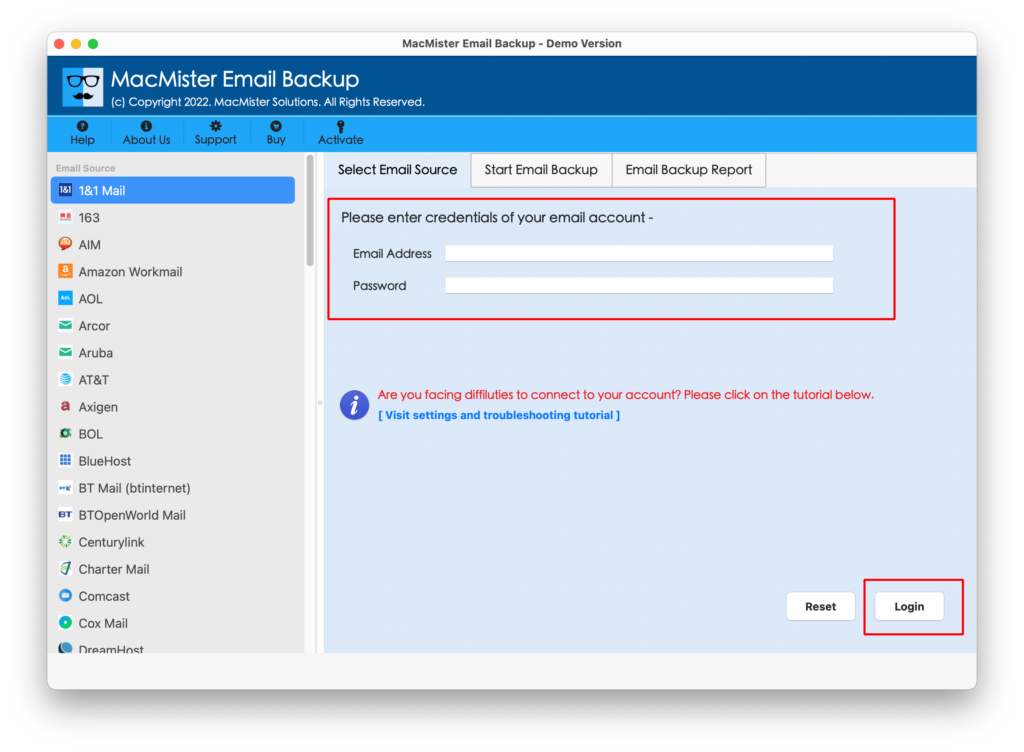
Step 2. Enter Office 365 credentials in the necessary fields and click the Login button.
Step 3. The tool will connect with Office 365 account and show Office 365 mailboxes on the screen.
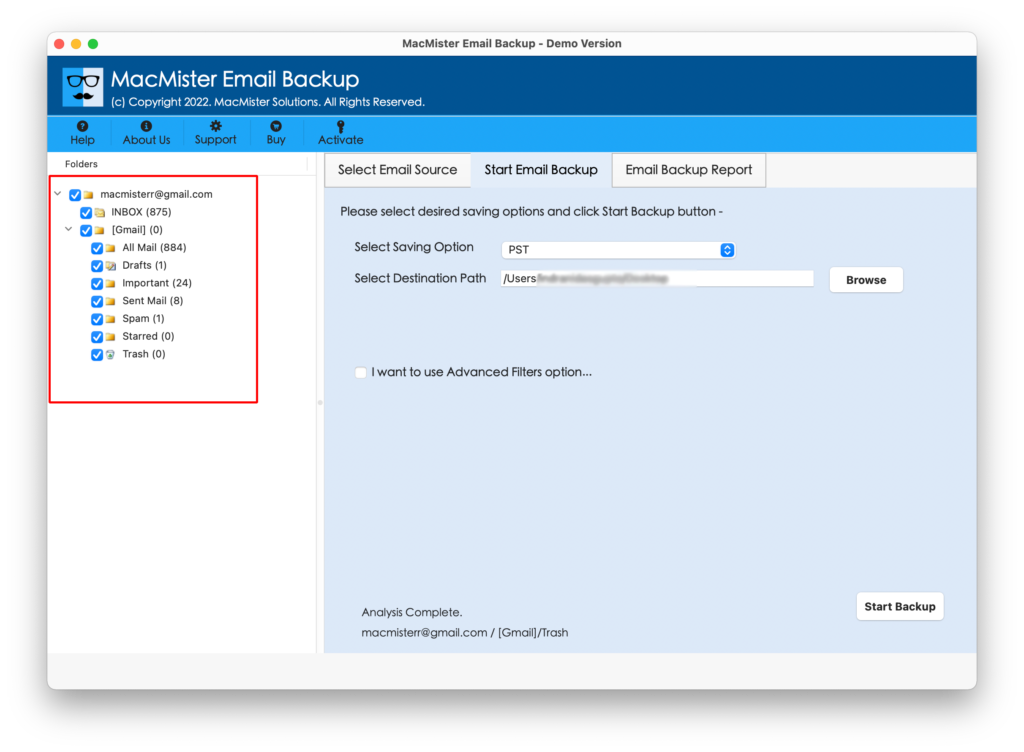
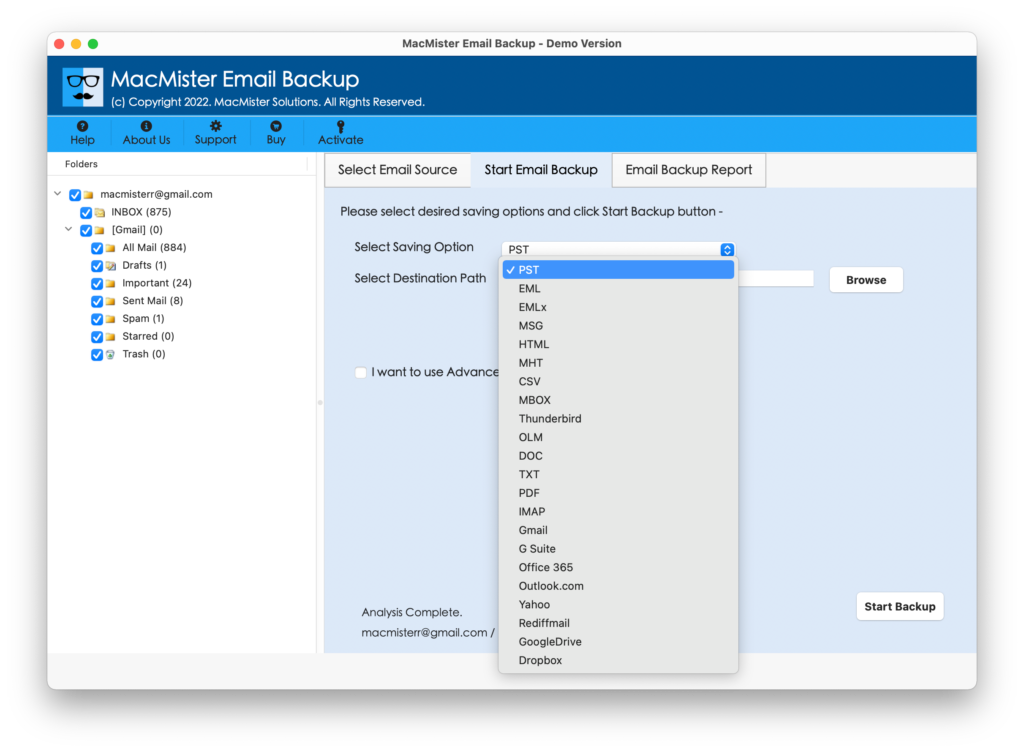
Step 4. Go towards right, click on the Select Saving Options and pick PST from the drop-down list.
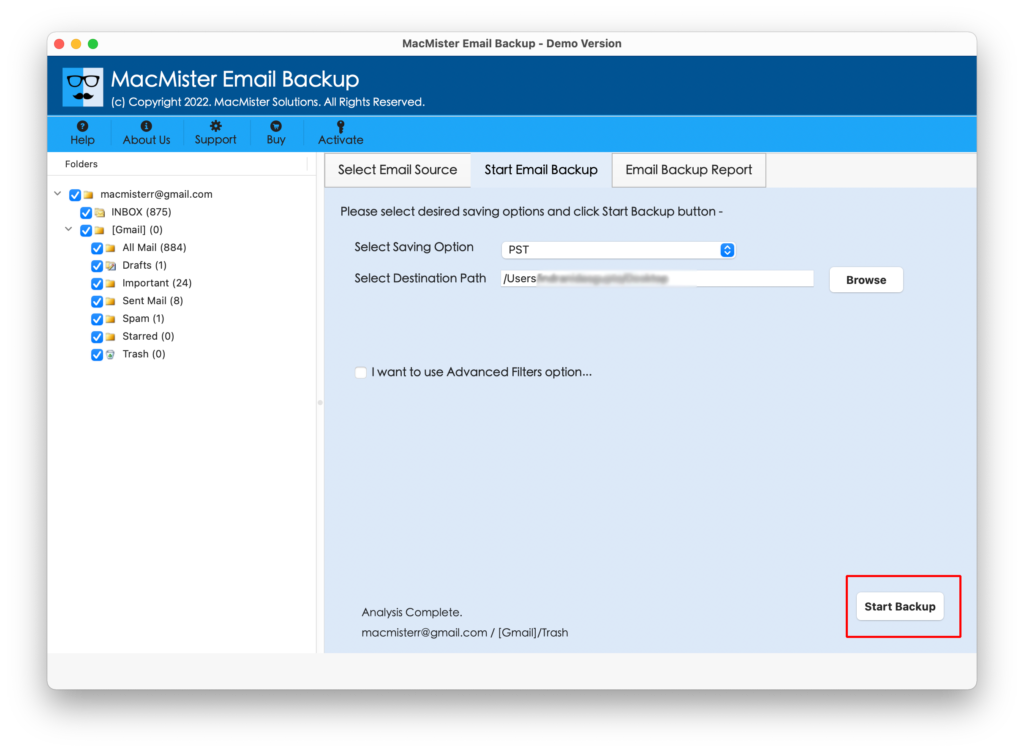
Step 5. Apply PST options and filter according to the requirements and press the Start Backup button to initiate the migration process.
Step 6. The Email Backup Report will appear on the screen displaying the live migration status of OWA to PST.
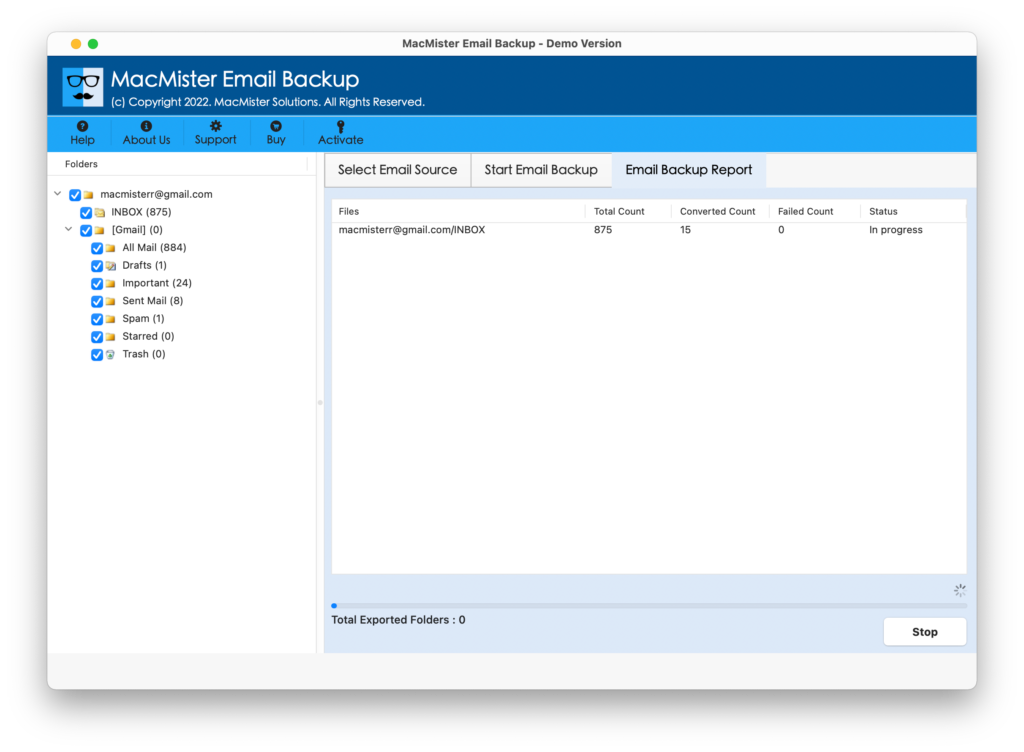
The entire task will finish in a few seconds with a message “Process Completed”. Click on the OK button and import PST in Outlook Windows/Mac as per your wish. Now, open the required email to check the results. You will see that the application has performed the migration without making any modifications in the original data. The emails will appear with precise content, structure, and metadata properties.
Overall, the professional solution is a perfect way to export PST from Outlook Web App. It not only supports migration from OWA but also provides 30+ other webmail sources from which users can export their essential emails.
Epilogue
In the article, we have made our readers aware of different methods to export PST from Outlook Web App. We have discussed the manual solution followed by direct approach. Also, it is advised to use a guaranteed method for the same because, manual method has some demerits that could frustrate lot of users. Moreover, only technical users can operate it. The steps are lengthy and complicated which can trouble non-technical users Therefore, one should go for a solution that is easy, safe, and gives the assurance of accurate outcome.