cPanel Not Receiving Emails – How to Fix? [2023 Solution]

Are you a cPanel user who is finding difficulty in accessing the emails stored in it? Frequently dealing with “cPanel not receiving emails”? Wondering how to resolve it ASAP? Looking for a trouble-free solution for executing the required task? No worries, keep reading the segment and you will come across different approaches with the help of you can receive emails in cPanel webmail.
cPanel Webmail is accessible from anywhere through any web browser or mobile device.
In order to login to webmail, use one of the following methods:
- Open any browser and go to https://example.com:2096. Replace example.com with the email address domain.
- Navigate to cPanel’s webmail email account interface (Go to cPanel > click Home > select Email > choose Email Accounts). Then, navigate to the email account in the table and click Email. The Webmail Interface will appear in a new browser tab.
cPanel is a kind of automation tool, designed with an easy manageable GUI to simplify web hosting. It has a three-tier structure, offering comfort for administrators and end-user website owners to manage different website aspects and server administrators through standard web browsers.
The beneficial aspect of cPanel is file management, email management with the use of a spam filter as well as an autoresponder, forwarding of email account and mailing lists, backups, FTP, domain and subdomain control, protecting web folders through password, MySQL database administration and more.
But sometimes due to bad network or server errors, users face “cPanel webmail not loading” and due to this, they are unable to receive new emails in the same. So, let’s discuss some methods by which users can opt to accomplish the necessary task.
Popular Ways to resolve “cPanel not receiving Emails” Error
There are many reasons behind cPanel not receiving email errors. However, we have listed some approaches that are simple and complex that will resolve the problem and help you receive the email again in cPanel.
Some Techniques to opt if “cPanel is not receiving Emails”
Verify Domain Status
The first and basic step to resolve the error is to verify if the Domain is active or not. You can check the status at WHOIS. In case the Domain is deactivated or expired, then you can renew it to receive new emails.
Email Quota
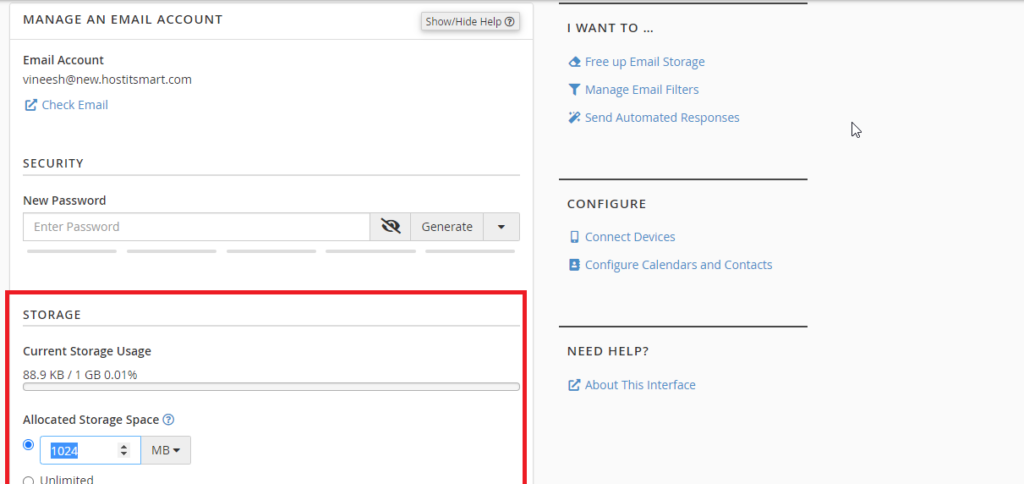
Every email address is assigned with a fixed data storage. So, you need to check if the data storage reached to its maximum limit. Because the error can arise if the size of disk space exceeds its limit.
But you can try two options for this, either you can change the quota limit of your email or clear the disk space to delete a few unnecessary emails. Either way, you will have free space access to your email account and maybe you start receiving new emails.
To view the disk space, tap the email icon in cPanel. To increase the size of the specified email quota, follow the steps discussed below –
Login to cPanel.

Navigate to the Email section.
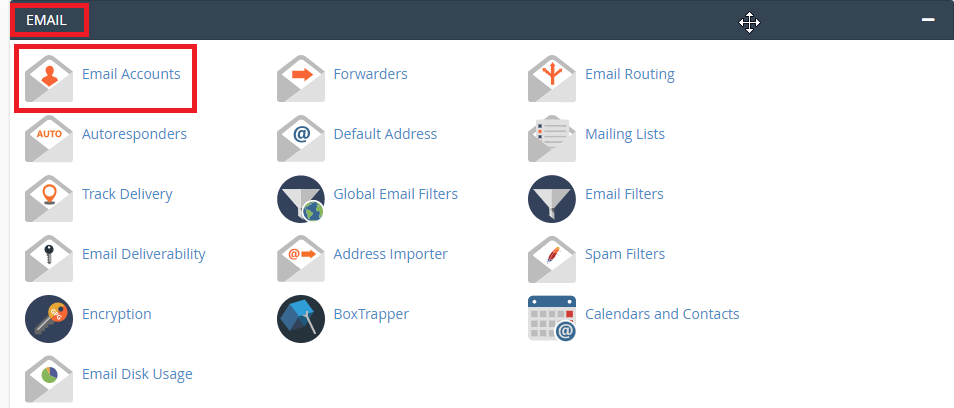
Click the Email Accounts icon.
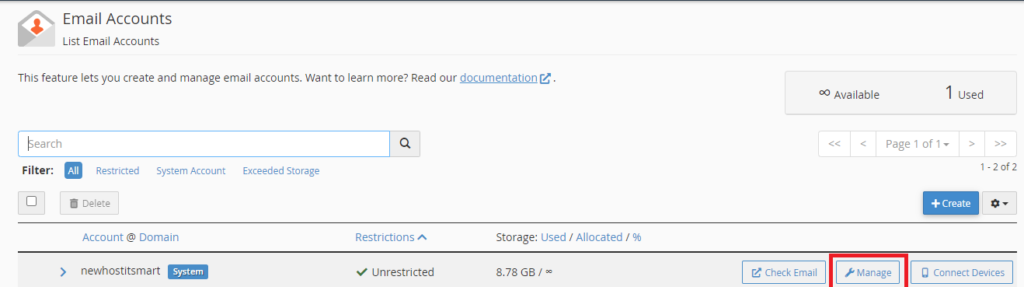
Besides the email address, you will see “Change Quota”. Click on the same. Specify the new limit or set it as unlimited and hit Change Quota.
cPanel Quota
Another common reason for experiencing cPanel not receiving email errors may be that the entire cPanel has exceeded its specified limit. However, you can fix the process by increasing the allotted disk space.
To check and change the cPanel quota, refer to the following steps:
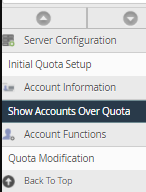
Go to the left-side menu, and navigate to the Account Information section.
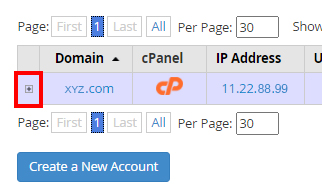
Proceed with “Show Accounts over Quota”.
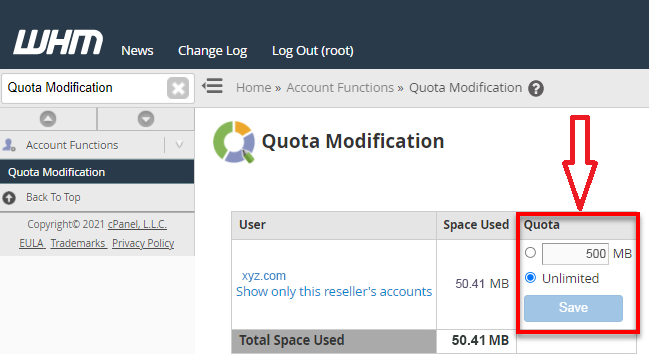
Here, you can adjust the account quota, also view the disk space used.

When all the changes are done, click on the Save button.
Email Bounceback
In case you are still having problems receiving emails, then there are chances that people who are sending you emails are receiving bounceback emails. These emails will give you clarity on why a particular email address is unable to receive emails.
So, try sending the emails to your email address from a different email account to check if you receive a bounceback email. It can help you in analyzing where the fault lies.
MX Records
MX Records are the bridge between the Domain and Email Accounts. With the domain being active, you need to check if the MX Records are connected to the preferred host.
Mail Settings
Check the email settings after ensuring you are not having trouble there. Also, if you are using the same email hosting provider and website, then the mail server is Local. And, if you are using a different hosting provider, set the mail server to Remote.
Automated App
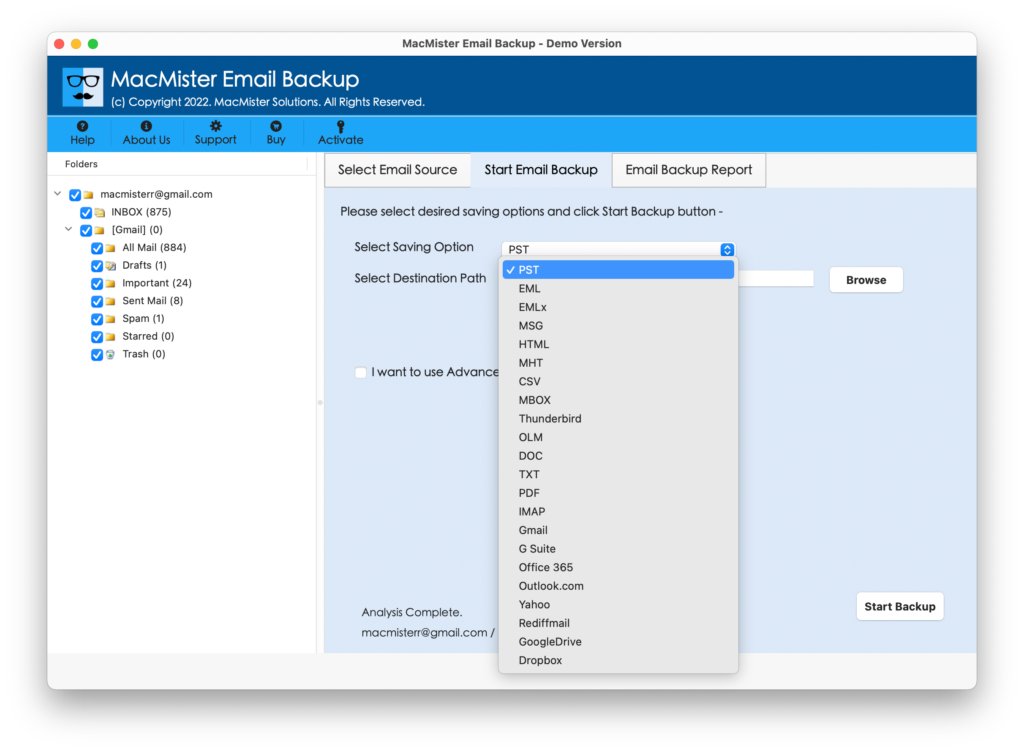
You can try the process with the help of MacMister Email Backup Software for Mac & Windows solution. A reliable utility which will help you to transfer all the emails from cPanel webmail account into more enhanced webmail server or email client. With the help of the tool, you can receive cPanel emails to 15+ saving options such as PST, PDF, MSG, EML, EMLx, MHT, HTML, DOC, IMAP, Thunderbird, Gmail, G Suite, and more.
It is a simple application that any technical and non-technical user can effortlessly manage to perform the required task. You can try its entire list of features by downloading the free demo. It will also help to save the first 25 cPanel emails into the required webmail server or desktop file format free of cost.
Working Steps to Receive cPanel Emails on Mac
Step 1. Download and run the software on your macOS device.
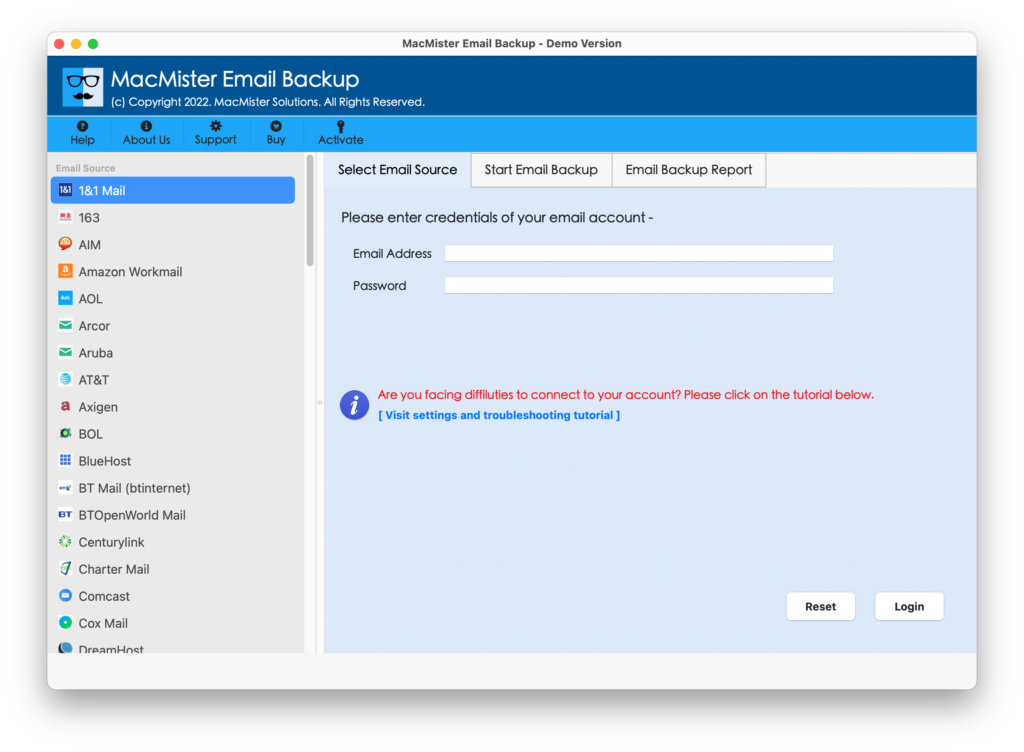
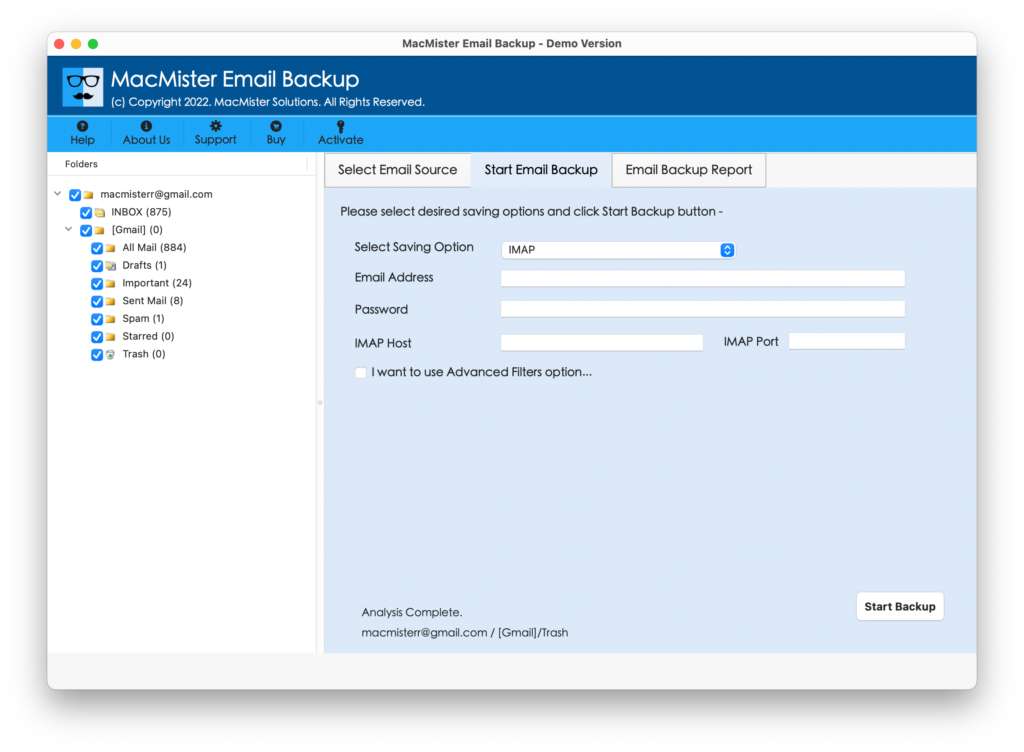
Step 2. Choose cPanel from the left. Enter cPanel webmail details and click Login.

Step 3. The cPanel email account now successfully connects with the tool, and its mailboxes will appear on the software pane.
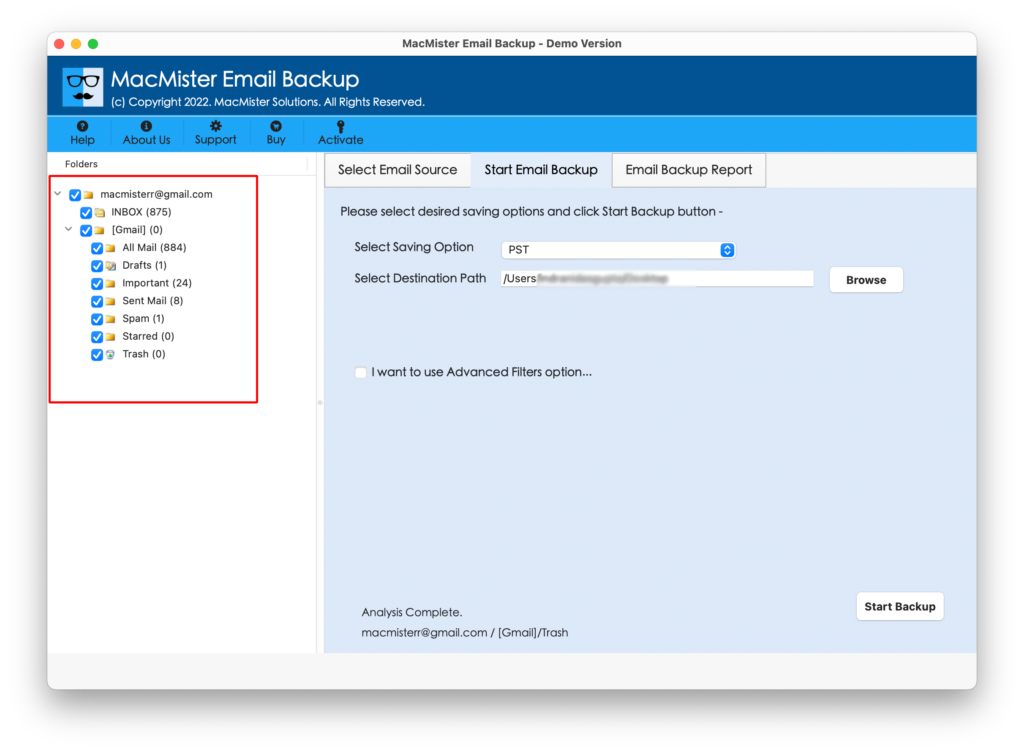
Step 4. On the right side of the application, click on Select Saving Options and select the required saving type in which you need to transfer cPanel emails.
Step 5. Set the options of selected file type according to the requirements. You can also use filters in case you want to transfer cPanel emails as per date, month, subject, etc.
Step 6. You can now see Email Backup Report window through which you can track the ongoing export progress of cPanel emails.

After this, you will get “Process Completed” pop-up. Click on OK and go to location where files are saved to verify them. However, the migration will be performed with 100% accuracy and the database will remain original throughout the process.
Epilogue
The write-up has discussed multiple approaches and hopefully one of them could help in resolving the problem. If nothing helps, then right away contact to cPanel support. However, you can contact MacMister Support for software assistance.