Why GMX Mail not Working? – [SOLVED]
Are you facing problems setting up GMX account? Frequently facing errors when trying to access GMX webmail in a third-party email client? If yes, then we are having troubleshooting suggestions that can help to setup GMX account in a required account.
If you have put efforts to configure the GMX account in the email program but still it is not working, then in such a situation an error message will appear. There are multiple reasons behind this issue and some are explained here:
Turned Off POP3/IMAP
By default, the POP3/IMAP remains disabled in a GMX webmail. And due to these options, one can retrieve email messages. If you wish to receive emails with a third-party email client, then activate POP3 & IMAP in email settings.
Error Message in a Mailbox
At times, error messages such as temporary blocks may not appear appropriately in a third-party email client. Login to GMX account straight away on a Mac and check if error message is displaying on the screen after logging in. This will then hold the further instructions to fix the error.
Incorrect Server Details
You have provided wrong server details.
Verify the Server Details
| Inbox (IMAP) | Inbox (POP3) | Outbox (SMTP) | |
| Server | Imap.gmx.com | pop.gmx.com | mail.gmx.com |
| Port | 993 | 995 | 587 |
| Encryption | SSL or encryption | SSL or encryption | STARTTLS, TLS or encryption |
If STARTTLS is not in the application, then use TLS protocol. If neither of the option exists, then activate the Encryption option. Alternatively, one can use Port 465 for outgoing mail server with SSL encryption.
Note. You can use TLS protocol if the email program make use of TLS versions 1.2 or 1.3. For security purpose, GMX does not support older TLS versions 1.0 or 1.1.
Incorrect Settings
When you manually setup an email profile, then the input settings such as the outgoing mail server needs authentication. If the email account is automatically configured, then there are a few settings that are set by default which can be incorrect.
Check the Settings
Go through the information given to set up the email account in GMX Help Center. Check if the settings are matching the instructions. If the account is automatically set, then delete it and configure it manually.
Incorrect GMX Login Details
You entered the wrong email address and password of the GMX account.
Cross-check Email Address & Password
Check the login details by logging into your email account via the gmx.com webpage. You can reset your password if you are not able to remember it. You can get more information on how to do it on the GMX password recovery help page.
Issues with Security Applications
At times, the installed security applications on the system such as a virus scanner or firewall prevent sending/receiving emails.
Check Security Software
Verify the settings of security software. And, if important then immediately contact the software vendor.
Email Program is Outdated
The Outdated email application will be unable to fulfill current security needs.
Change Email Application
Move to an enhanced email application such as Thunderbird.
Still, if you are facing the same issues, then it will be better to transfer your GMX email account to a more secure, updated, and reliable email client.
Expert’s Way to Migrate GMX Emails on Mac
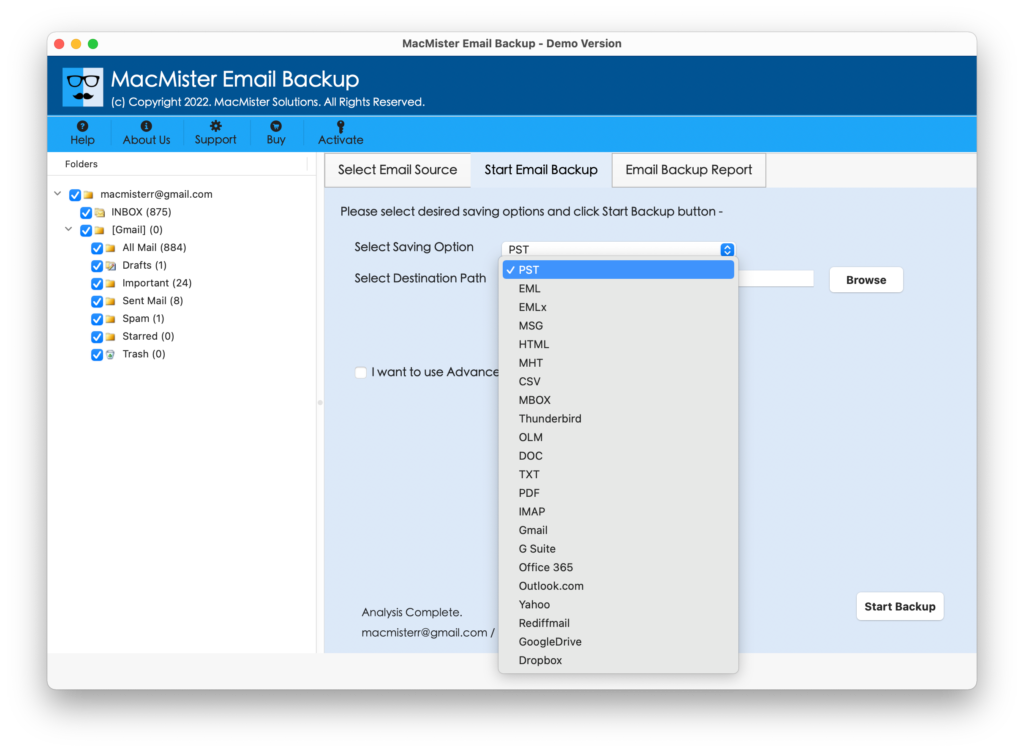
With the help of MacMister GMX Backup Tool. It will help you to migrate GMX emails & attachments into 15+ saving options such as PST, PDF, MSG, EML, EMLx, MHT, HTML, DOC, CSV, IMAP, Yahoo, Thunderbird, and more. The application is simple, cost-effective, and powerful. It has a direct migration facility that will save time and help to attain the desired results within seconds.

Moreover, the software includes many features that one can apply as per requirements and save the resultant files accordingly. However, the free trial edition is available which users can download to test the working steps of the application for free.
Steps to Migrate GMX Emails with Attachments on Mac
Step 1. Download, install, and open MacMister GMX Backup for Mac on macOS.
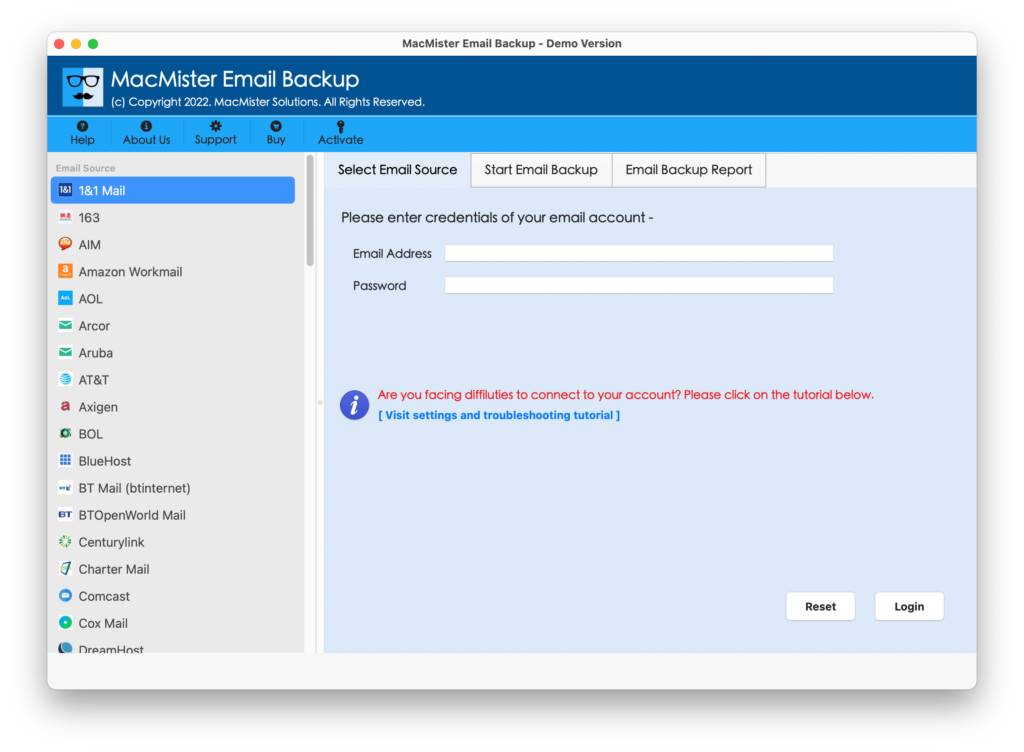
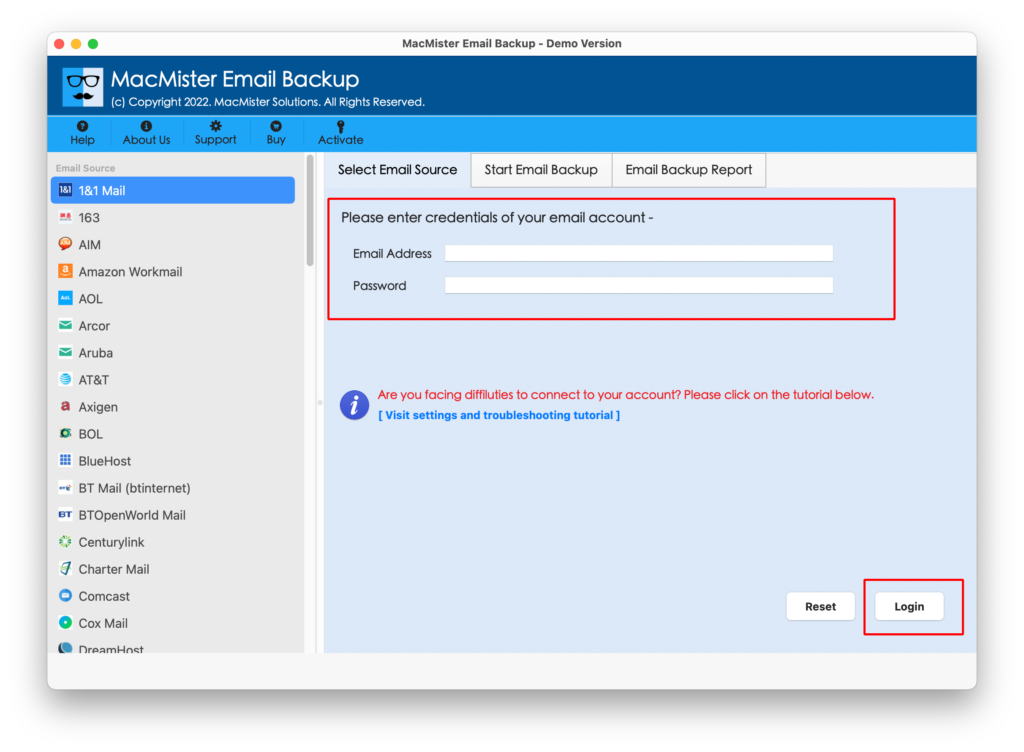
Step 2. Select the GMX option from the left and add GMX account credentials in the required fields. Click the Login button.
Step 3. The tool will create a connection with the provided GMX account and then its mailboxes will start to list on the software.
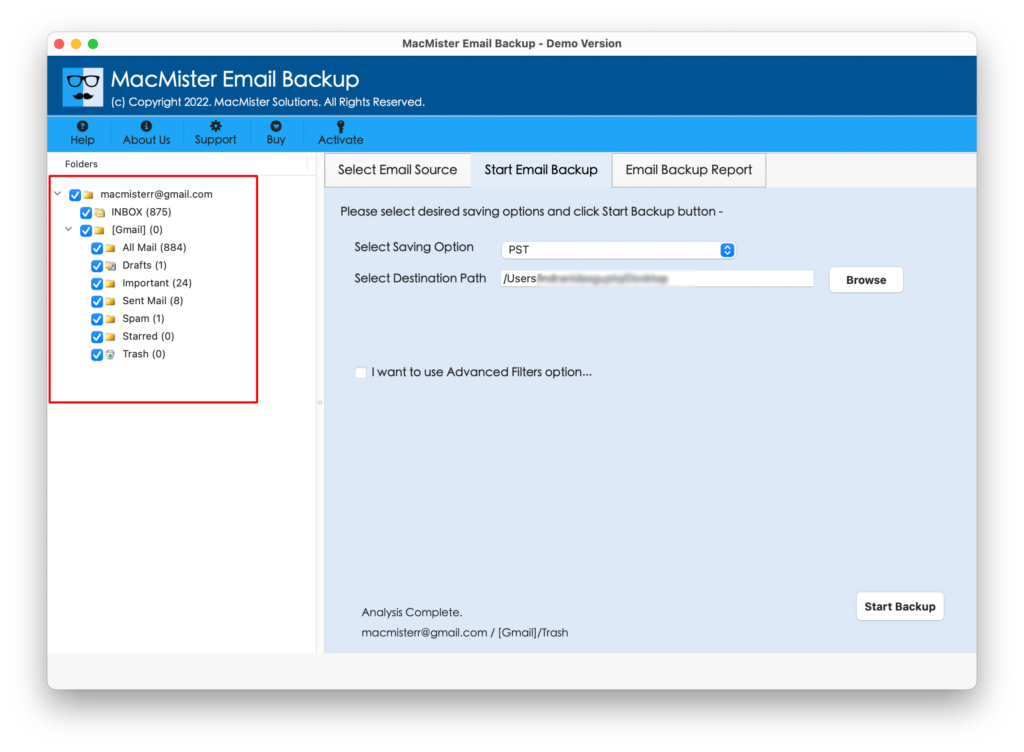
Step 4. Click Select Saving Options and select the required saving type from the list.
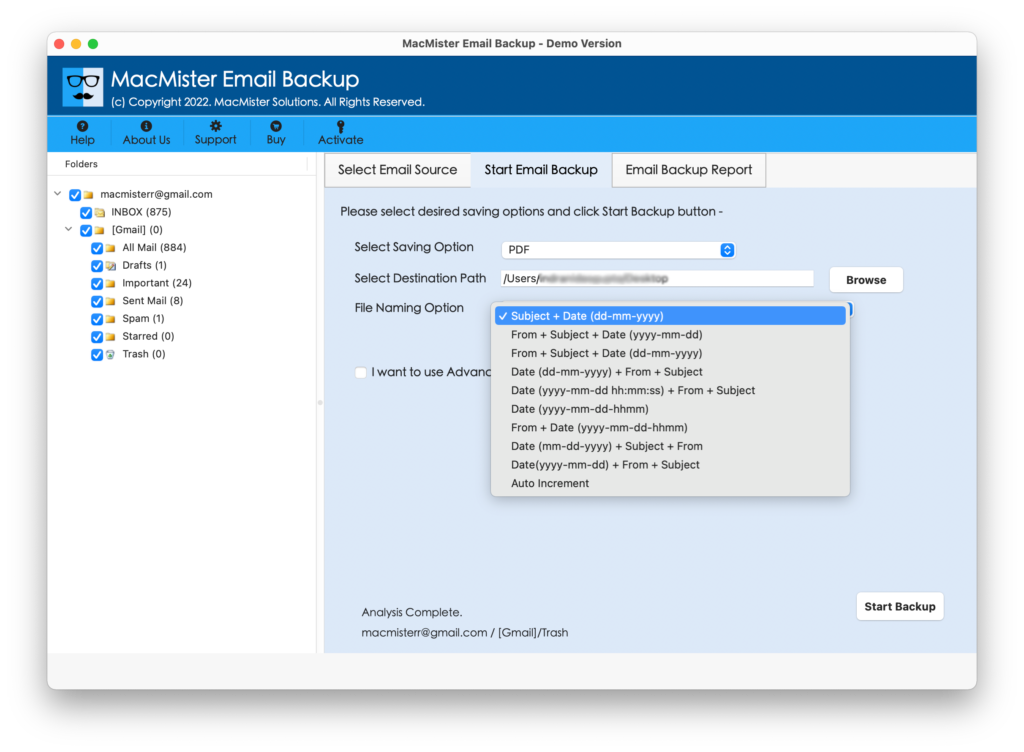
Step 5. Apply the sub-options of a selected file type as per requirements. Set Filters if required and then click the Start Backup button.
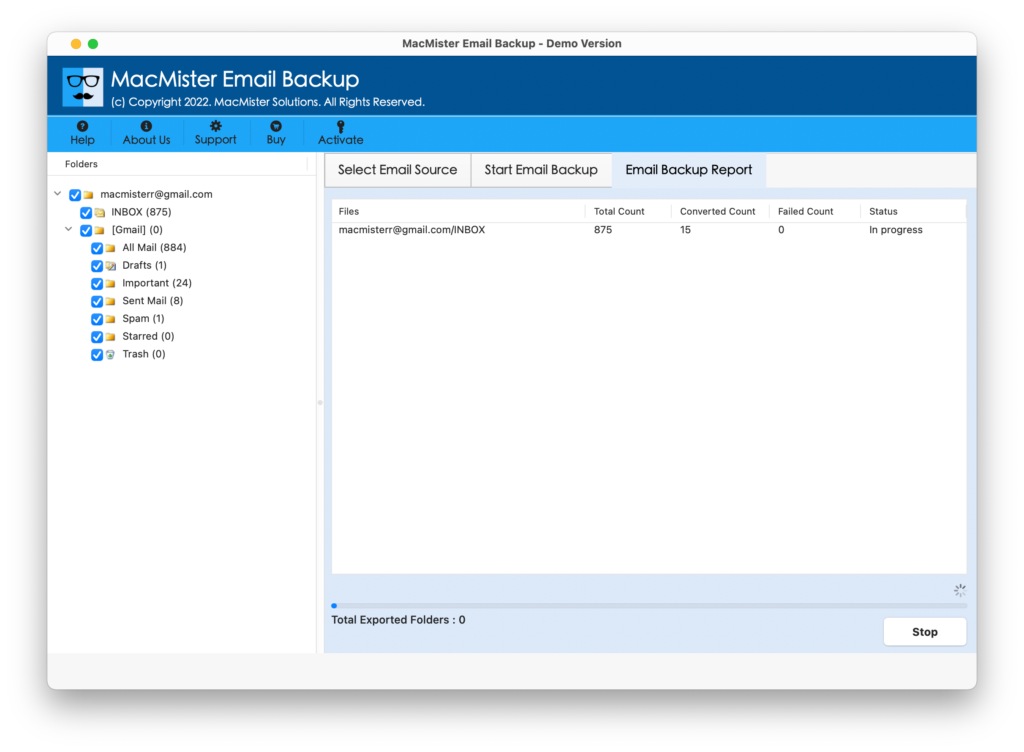
Step 6. The migration procedure will start and then users will see the Email Backup Report window that will display the current migration progress of GMX emails.
The complete finish within seconds and then one will receive Process Completed message on the screen. Tap the OK button and navigate to a resultant file location. Now, open the required email message and check its output. However, you will see that the content of all the emails is accurate and even the formatting properties will appear without any alteration.
Quick Note – Download FREE DEMO to Experience Software Working & Options in Detail
Epilogue
In the write-up, we discussed some fixes that are useful to resolve the problem when setting up an email profile. Still, if you find a problem accessing the GMX account on a desktop-supported email client, then use MacMister Email Backup Software for Mac & Windows. It allows users to directly transfer emails from 90+ webmail sources including GMX and into 15+ saving options. Download the trial version and know the software working for free. Also, save the first 25 emails from the GMX account free of cost.