How to Backup IMAP Email on Mac?
Are you thinking about taking backup of IMAP emails on Mac to prevent the data from malicious attacks? Wondering how to backup IMAP email on Mac in a safe way? Finding a secure approach to implement the task? No worries as article here elaborated direct approach with the help you can successfully backup IMAP email on Mac with attachments easily.
There are multiple approaches to backup IMAP email on Mac – One is manual method which requires the support of desktop email client such as Microsoft Outlook, Mozilla Thunderbird, or Apple Mail. The role of these email programs is to backup IMAP emails onto local computer. But the manual procedure will prove lengthy to you as it allow to save single email file at a time. The process is time-consuming, especially when the count of emails are large. The second is direct and recommended solution which is certified i.e. MacMister IMAP Backup Tool for Mac. The tool will directly backup IMAP emails locally and also provide the opportunity to backup IMAP emails in bulk into different web-based services.
Now, let’s get started by first explaining about IMAP in detail followed by the reasons for backup. And then, we conclude the post by mentioning the approaches useful to execute the process.
What is IMAP?
IMAP is Internet Message Access Protocol which is considered as a standard email retrieval incoming protocol. It stores emails on a mail server and allows to view and use them as though they were stored locally on the devices.
There are many desktop email application that offers to configure the email client using webmail servers and one of them is IMAP. By providing the details of required IMAP webmail such as email ID, password, IMAP host, and port number, one will be able to connect the desktop email client with the IMAP based server and directly access the IMAP emails in the same.
Why to Backup IMAP Email on Mac?
There are many reasons why taking backup of IMAP emails on Mac is beneficial. Some are highlighted below:
- Taking backup of IMAP Server mailboxes locally allows to view emails when you are not having internet connectivity. This is important during business travel or when experiencing any disruptions from the internet side.
- Saving IMAP email on Mac will save you from sudden data loss or outage. This will protect from losing critical emails.
- Storing IMAP emails on the system will help in migrating emails from the old account easily to new account when moving to a new email service provider.
- The webmail servers are susceptible to malicious attacks which can cause severe business loss to users as they can steal the critical data of the company.
- IMAP email backup is valuable in a field where there is a need to analyse former email database.
- Email Service Providers sometimes deals with unexpected technical faults and unanticipated situations. And creating a local backup of IMAP mailboxes can protect the essential files from such possibilities.
After knowing some common reasons, let us discuss the approaches to backup IMAP email on Mac.
How to Backup IMAP Email on Mac?
There are different methods to backup IMAP email on Mac –
- Manual Method
- Professional Method
Let’s get started with the manual method first and then will backup IMAP emails using professional methodology.
Method 1. Manually taking backup IMAP Email on Mac
In this process, we have taken Apple Mail as an email client and configuring it using Zoho Mail.
Quick Note. For best results, make sure to have good internet connection when configuring the account.
Step 1. First, go to Zoho Mail to make sure that IMAP is enabled. And if it is disabled, then use the steps below to enable IMAP in Zoho Mail.
- Login to Zoho Mail account.
- Navigate to Settings (Gear icon).
- Go to Mail Accounts and choose the primary email address.
- Now, in the IMAP section, select IMAP Access checkbox.
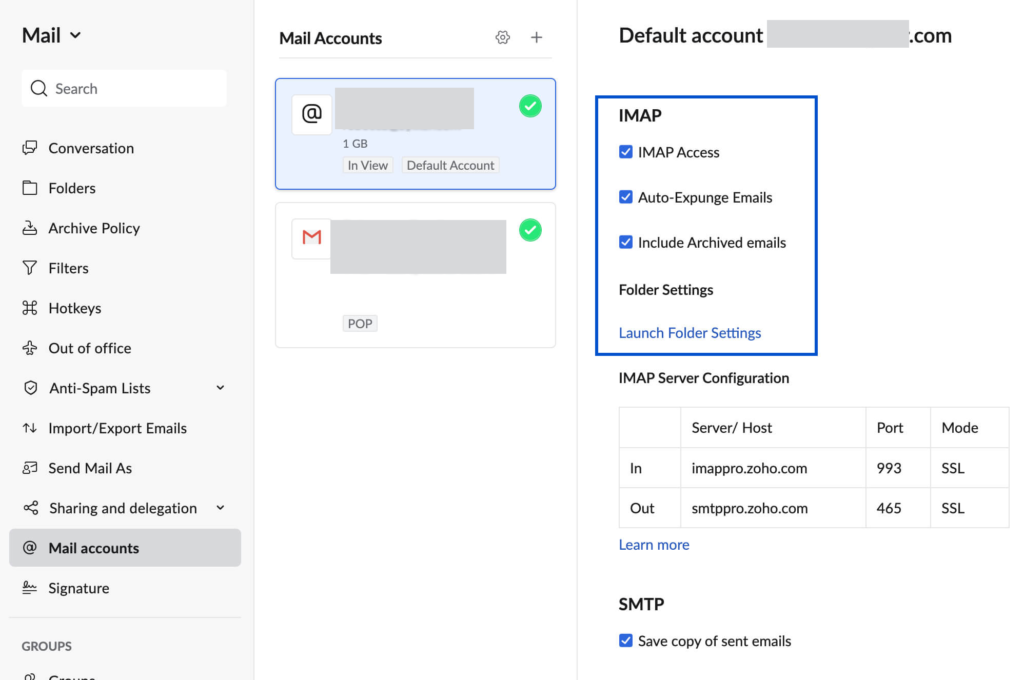
- Enable Auto-Expunge, Include Archived Emails, and configure Folder Settings.
- Scroll down until you see Save. Click on it.
Step 2. Open your Mac Mail email application.
Step 3. Go to Mail. Click Accounts. Tap + icon displaying in the bottom right, add new account.
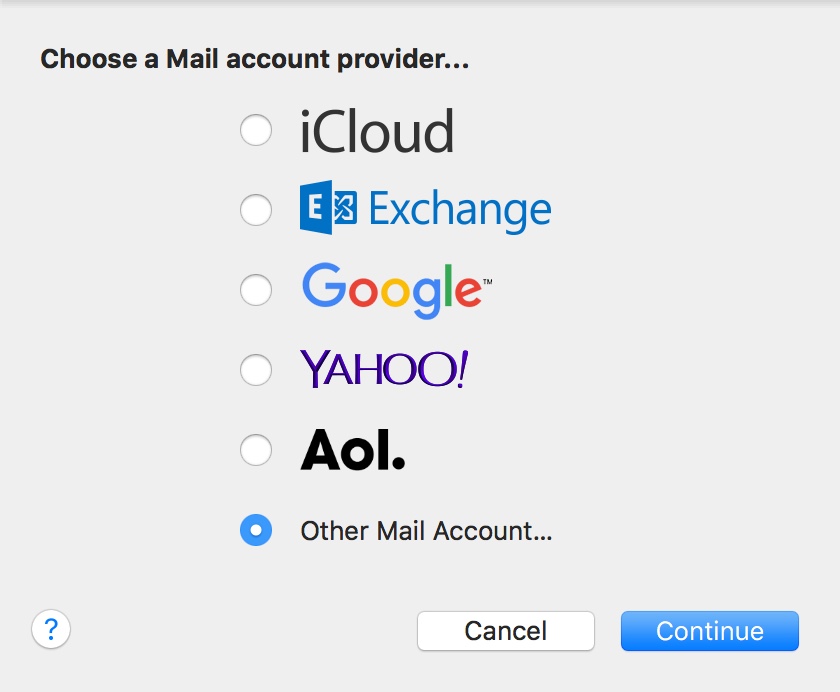
Step 4. Choose Other Mail Account.
Step 5. Provide preferred Display Name, Account Email Address of Zoho with Password.
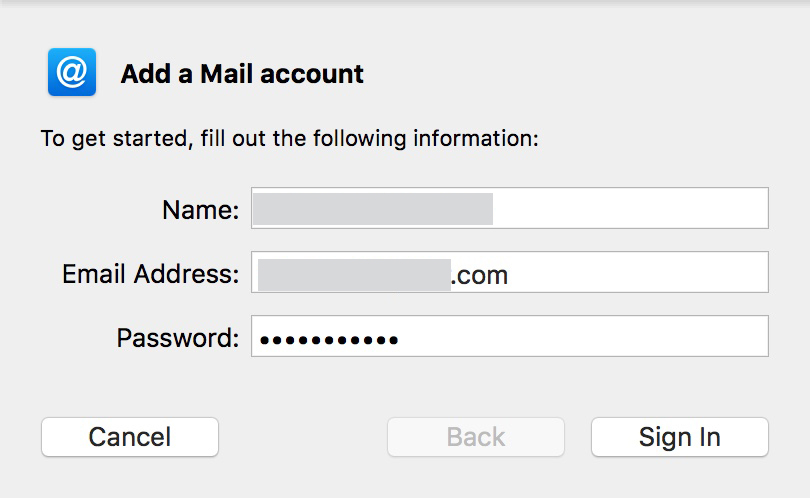
Step 6. Click Sign-in and specify the other configuration details manually.
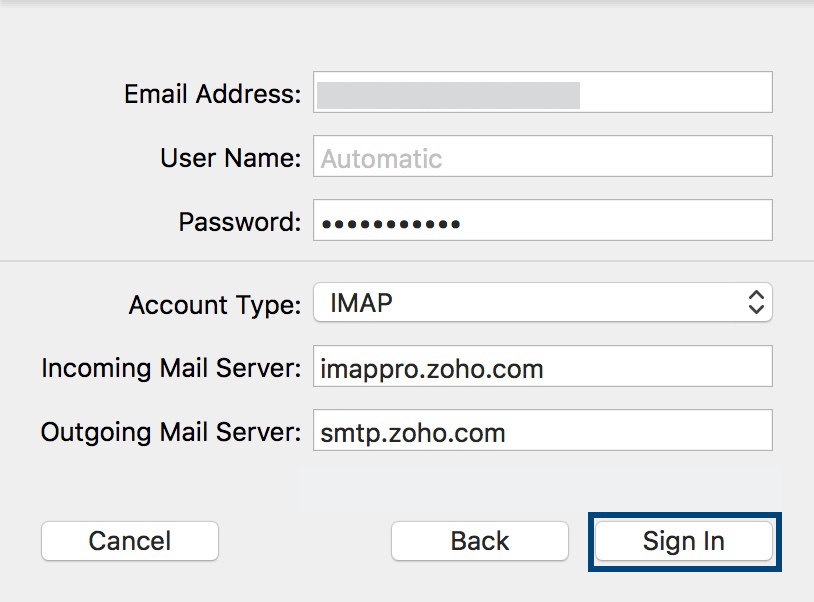
Step 7. Next screen appears, choose the Account Type, and provide the Incoming and Outgoing Mail Server info as per the requirements using the details given below.
Use the Zoho Mail Server details to Configure Apple Mail on Mac.
Incoming Server Settings (Personal email accounts – username@zoho.com)
- Incoming Server Name: imap.zoho.in
- Port: 993
- Require SSL: Yes
- Username: username@zoho.com
Incoming Server Settings (Organization domain based accounts – you@yourdomain.com)
- Incoming Server Name: imappro.zoho.in
- Port: 993
- Require SSL: Yes
- Username: you@yourdomain.com
Outgoing Server Settings (Personal Users Account – username@zoho.com)
- Outgoing Server Name: smtp.zoho.in
- Port: 465 with SSL or
- Port: 587 with TLS
- Require Authentication: Yes
Outgoing Server Settings (Organization domain-based account – you@yourdomain.com)
- Outgoing Server Name: smtppro.zoho.in
- Port: 465 with SSL or
- Port: 587 with TLS
- Require Authentication: Yes
Step 8. Click Sign-in.
Step 9. Apple Mail will verify the entire account details and maps the server details for the account.
Step 10. The account will be created based on the details provided. The folders and emails will not synchronize successfully with the Apple Mail.
Now, from the Apple Mail, export the mailboxes you want to backup locally on Mac.
Steps to Export Mailboxes from Apple Mail for Backup
- Open Apple Mail. Go to Mailbox and choose Export Mailbox option.
- Choose the necessary folder to export and click Choose.
- Apple Mail will successfully export all the mailboxes with .mbox extension.
Quick Note. In case you want to perform the further conversion of MBOX files, then you can try MacMister MBOX Converter for Mac. It has 15+ saving options which you can use to save MBOX files. You can even try out the process by downloading the free demo. It will convert 25 MBOX files free of cost.
Method 2. Directly taking backup IMAP Email on Mac
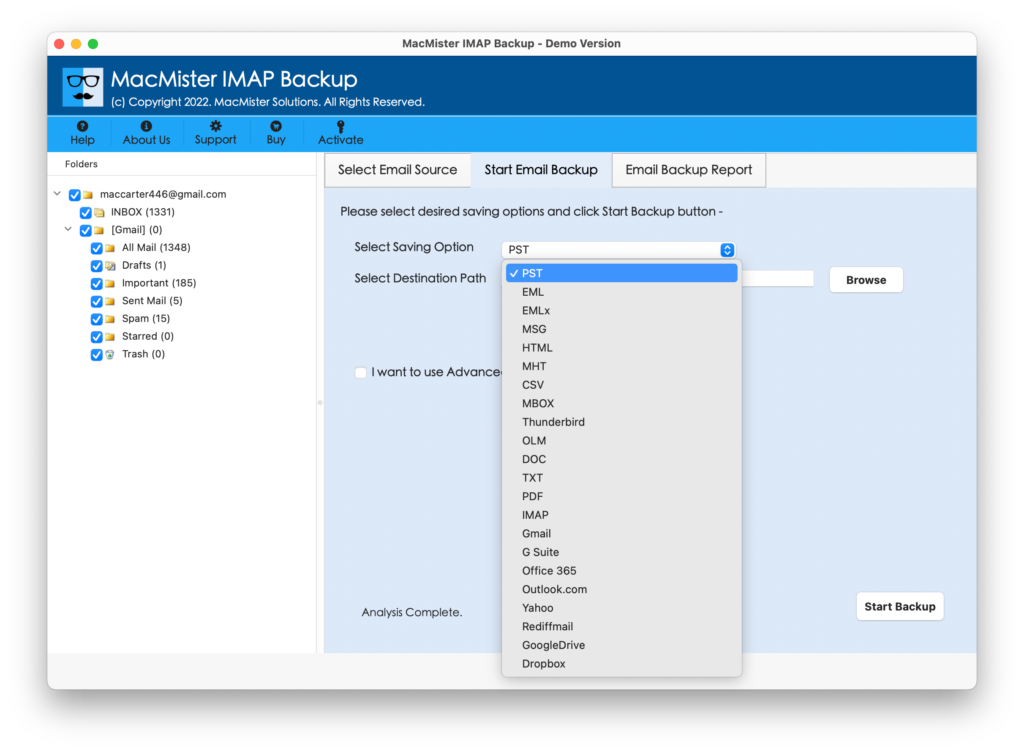
The direct way is certified and recommended by top-level experts. MacMister IMAP Migration Tool is a perfect utility for storing IMAP emails directly on Mac into 15+ saving options. The tool only requires the details of your IMAP account and then allows to select the desired saving option in which you want to save IMAP emails. The app includes PST, PDF, MSG, EML, EMLx, MBOX, MHT, HTML, DOC, TXT, CSV, Google Drive, Dropbox, Gmail, G Suite, and more. You can save IMAP emails in the necessary file type to backup IMAP email on Mac.

Moreover, the simplified GUI can be used by any user effortlessly. It also has several inbuilt features with the help of users can perform the process according to their requirements. Also, one will be able to download the free demo to check the complete process for free.
Working Steps to Backup IMAP Email on Mac
Step 1. Download and open the application on macOS.
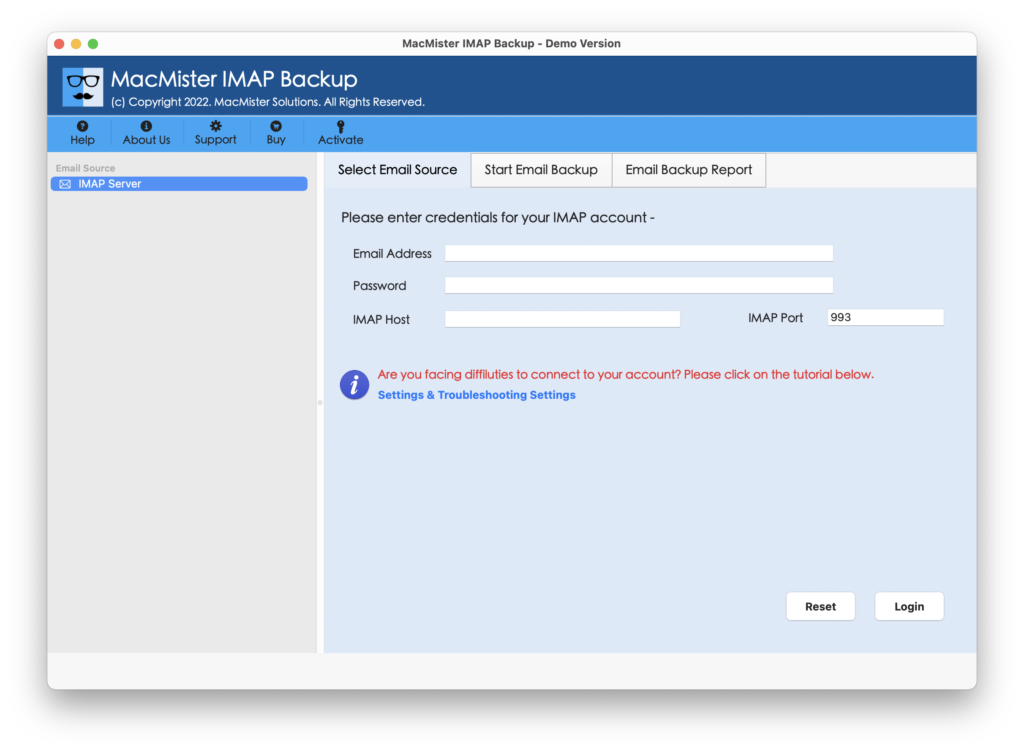
Step 2. Enter IMAP email address, password, IMAP host, and port number and then click Login button.
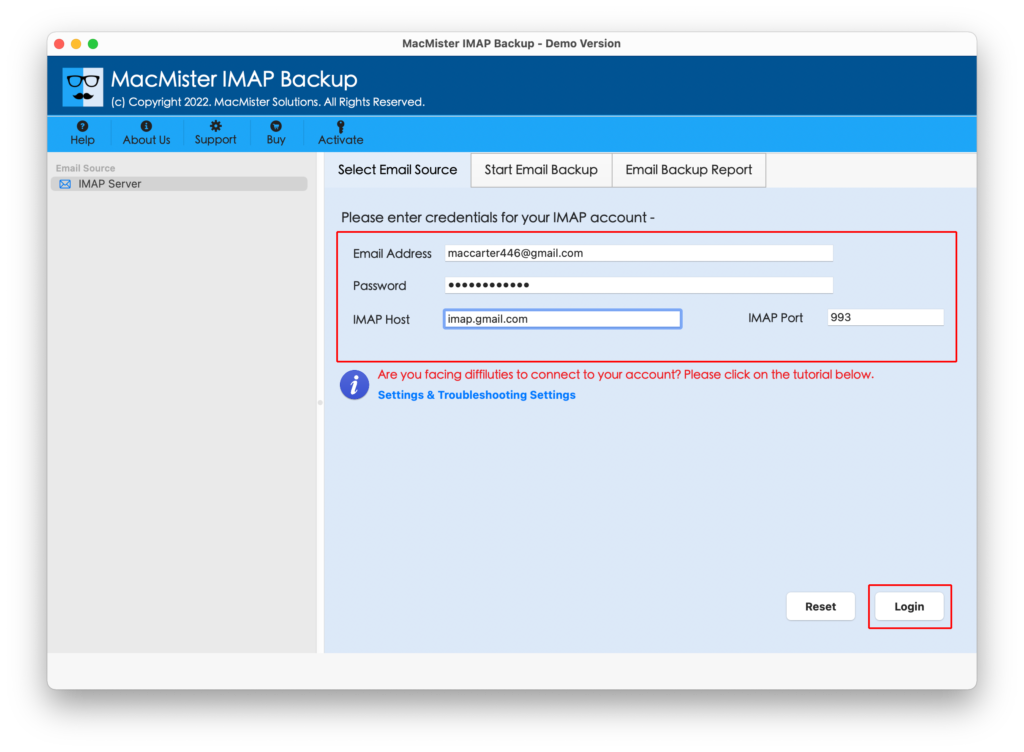
Step 3. The tool will connect to the specified IMAP account and start listing all the IMAP webmail items on the application panel.
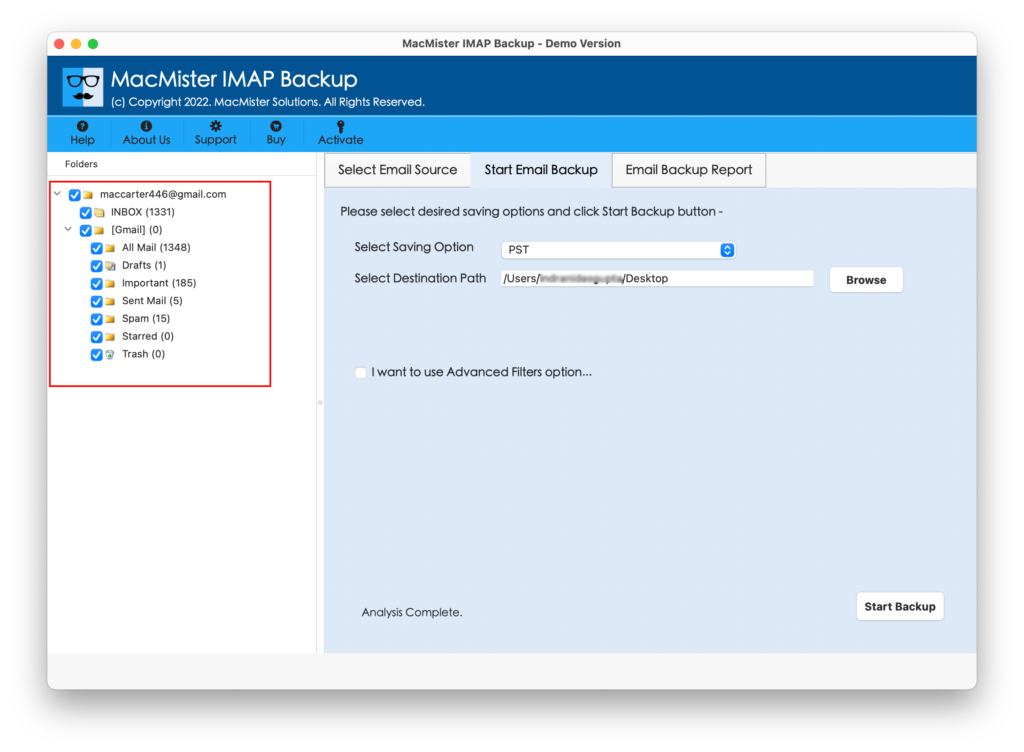
Step 4. On the right side of the app, click on Select Saving Options and select the required saving type from the list.
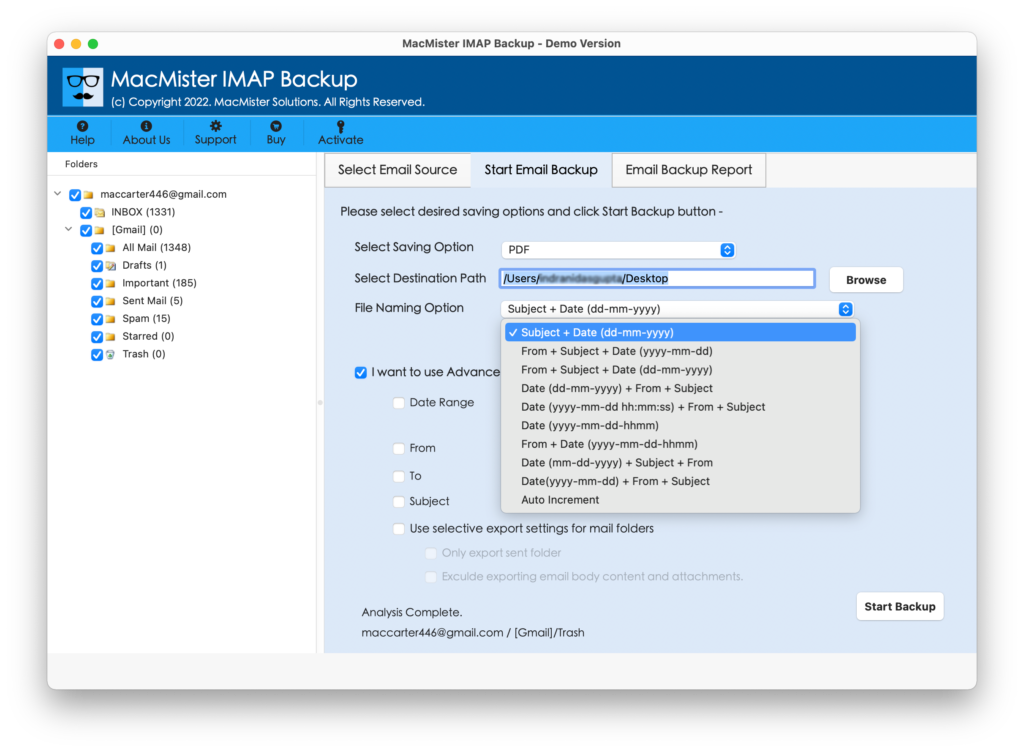
Step 5. Apply the options and filters of the selected saving type according to the requirements and click on Start Backup button.
Step 6. The process will take place and then Email Backup Report window will appear through which users can track the ongoing backup progress of IMAP emails.

The entire procedure will take few seconds and complete the whole task by displaying the confirmation message of process completion to users. Click OK and go to the destination path of resultant files. You can choose the necessary file to open and verify the database. However, you will see that the content is accurate and the folder structure is also precise.
Epilogue
The blog has discussed multiple solutions to resolve “how to backup IMAP email on Mac”. The first method need to be performed manually. And make sure to implement it under expert’s guidance. The second method is a direct solution i.e. MacMister Email Backup Software for Mac. It guarantees fast process with 100% accurate output. You can even use its free demo and save first 25 IMAP webmail emails into required saving option for free.