Office 365 Shared Mailbox not showing in Outlook Error – [Solved]
Office 365 has certainly introduced a new source for organizations to collaborate and communicate. One of its main features is the ability to generate shared mailboxes. But, configuration issues, synchronization challenges, or permission settings can at times hinder its visibility in Outlook. Thus, users often express dissatisfaction about the issue i.e. “shared mailbox not showing in outlook error”. That is why we have provided an article here that addresses the issue of Microsoft 365 shared mailbox.
Overview of Office 365 Shared Mailboxes
Organizations and enterprises usually collaborate and communicate through Office 365 shared mailbox. It acts as a collaborative inbox for groups or teams. As a result, it enables many users to access & manage emails directed towards shared email address. Furthermore, users no need individual license to make use of it. Generally, shared mailboxes are engaged in situations such as project management, customer support, and communication within the organization.
However, with the expansion of mailbox data, Outlook data file size also increases. If its size exceeds from 50 GB, then the Outlook may face difficulties to handle shared mailbox. Thus, result in Office 365 shared mailbox not showing in Outlook error.
Why Microsoft Office 365 Shared Mailbox is not showing in Outlook?
Individuals holding necessary permissions in Office 365 will able to access as well as respond to emails within shared mailbox. However, occurrence of unexpected circumstances may cause disruptions in the process. Below are few typical reasons discussing why Office 365 shared mailbox not showing in Outlook: –
- Users trying to access shared mailbox may not possess necessary permissions, preventing shared mailbox to appear in Outlook.
- Outlook isn’t synchronized properly with Office 365. Thus, it will result in a shared mailbox not showing in Outlook error.
- Another important reason could be the Outlook version not compatible with Microsoft 365.
- Disabled auto-mapping features keep shared mailboxes hidden. Auto-mapping feature add shared mailboxes automatically to Outlook profile.
- Damaged or corrupted Outlook profile can interrupt the appropriate appearance of shared mailboxes.
How to Fix – Office 365 Shared Mailbox not showing in Outlook?
The segment highlights some of the most accessible solutions to resolve Office 365 shared mailbox not showing in Outlook issue. Further, you will explore professional technique that will fix the error without altering data originality. Let’s start with the manual procedure first that is free of cost.
Check for Auto-Mapping and Enable using PowerShell
The Office 365 shared mailbox not showing in Outlook error can be fixed with the procedure caused by disabled auto-mapping. Either enable the auto-mapping feature through PowerShell or add shared mailbox in Outlook manually. Here’s how to do it –
Step 1. First, locate and run PowerShell as Administrator on Windows.
Step 2. Run the following command – $Credential = Get – Credential. A dialogue box appears asking to enter O365 credentials.
Step 3. Now, use the following command to create a connection with Exchange online.

Step 4. Run the command to import Exchange Session –

Step 5. Enter the below command to cancel access permissions of a shared mailbox –

Step 6. To delete the shared mailbox – go to Outlook and click Account Settings. Now, locate and choose the shared mailbox and tap Remove.
Step 7. Now, use the below command to reassign access permissions without using auto-mapping –

Note. In place of complaint@domainname, use shared mailbox email and instead of tony@domainname, enter user email.
Step 8. Lastly, add shared mailbox in Outlook manually, following the regular process. Go to Outlook, click File, choose Account Settings, and tap New.
The method will help in disabling Auto-mapping feature and then add shared mailbox manually in Outlook. In case you are still encountering the same error, then use the further discussed solution.
Generating & Reviewing Logs
The process of generating & reviewing logs help in addressing the issue associated with Outlook shared mailbox or folders.
- Run Outlook email client on PC.
- Go to File appearing in top menu, navigate to Options and click Advanced.
- Search for Enable Troubleshooting logging setting and select it.
- Apply changes by tapping OK and then close Outlook application.
- Restart Outlook email client.
- The created log files will get stored in a particular directory on a computer.
- Usually, log files are present in the following locations –
- %localappdata%/Temp folder
- C:/Users/YourUserName/AppData/Temp folder (Note: Replace YourUserName with your actual username)
- Now, open log file to search the details of possible causes of Shared Mailbox Emails not showing in Outlook error.
- Carefully review log files to address any issues that still exist.
Several IT professionals as well as users have fixed the cause with the help of the above discussed procedure and taken correct measures to resolve it. However, the process will seem difficult for novice users. Therefore, we have other potential solutions for the issue.
How to Add Office 365 Shared Mailbox in Outlook Manually?
Another important way of accessing shared mailboxes in Outlook is by adding them manually. To perform the same, follow the below steps –
- Run Microsoft Outlook on a desktop.
- Go to File and click Account Settings.
- Select Account Settings again.
- Navigate to Email menu. Double-click on your email account to go to Settings.
- Click More Settings.
- Select Advanced options.
- Enable the option “Download Shared Folders”.
- Tap Add and type name of the Shared Mailbox.
- Click OK, then Apply and again hit OK to save your settings.
If the above discussed methods won’t fulfill your requirements, then contact your administrator.
Why Manual Approach is less effective?
The above discussed procedures have some limitations that prevent users from fixing the issue –
- Updating permissions or managing Auto-mapping includes lengthy steps which might consume lot of time.
- PowerShell commands will be difficult for users who are not aware of command-line interfaces.
- The approach won’t work in case of server-side errors, damaged Outlook profiles, or account syncing failures.
- There is also a possibility of potential loss of data and duplication while adding shared mailboxes manually.
Automated Solution to Resolve Shared Mailbox Not Showing in Outlook
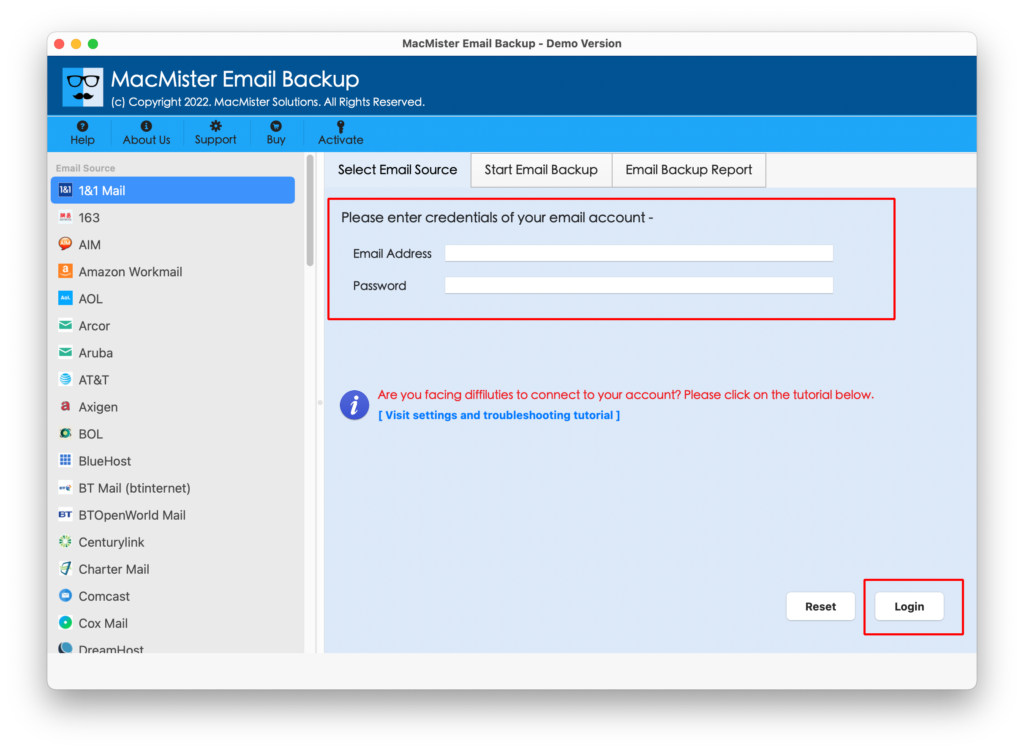
With the help of MacMister Office 365 Email Backup Software Mac & Windows, users can help in overcoming the limitations of a manual method. With the help of the tool, one can export shared mailboxes directly into PST and then import the same into Outlook. The GUI of the app is user-friendly which eases the migration of technical and non-technical users. Even, it possesses three simple steps that help in performing the entire task within seconds. Besides, the tool has wonderful features with the help of users can implement the process as per the requirements.
Working Steps of the Application
Step 1. Download, launch, and run the app on Mac.
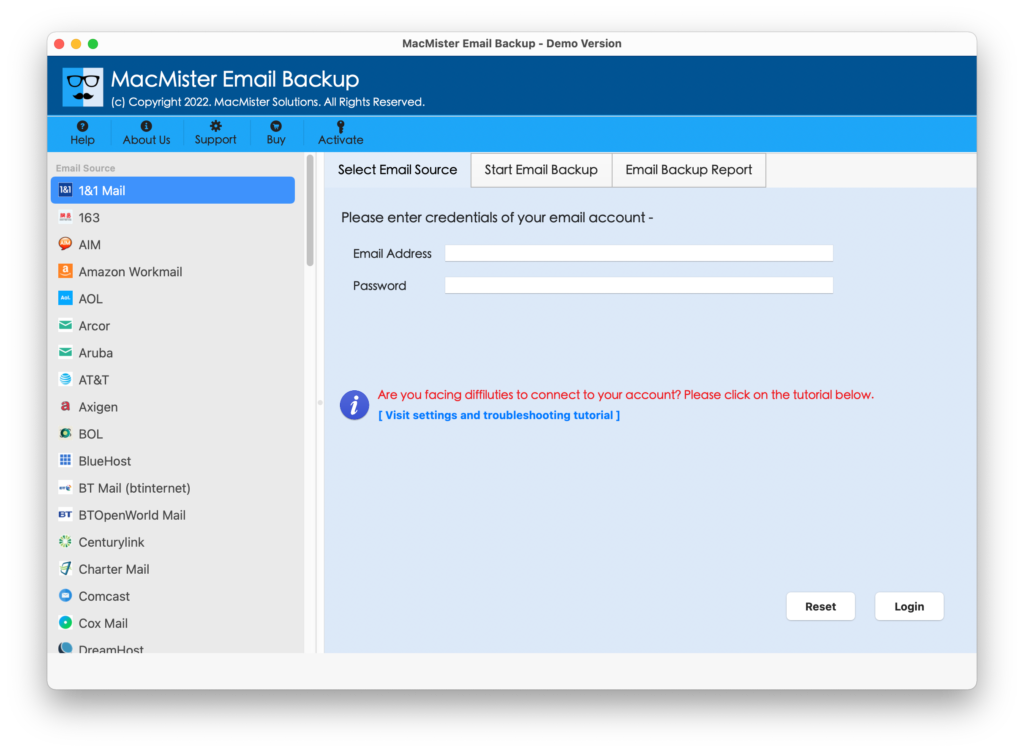
Step 2. Select Office 365 from the left. Add the credentials. Click Login.
Step 3. Check the list of mailbox folders appearing on the left. Select them. Hit Next.
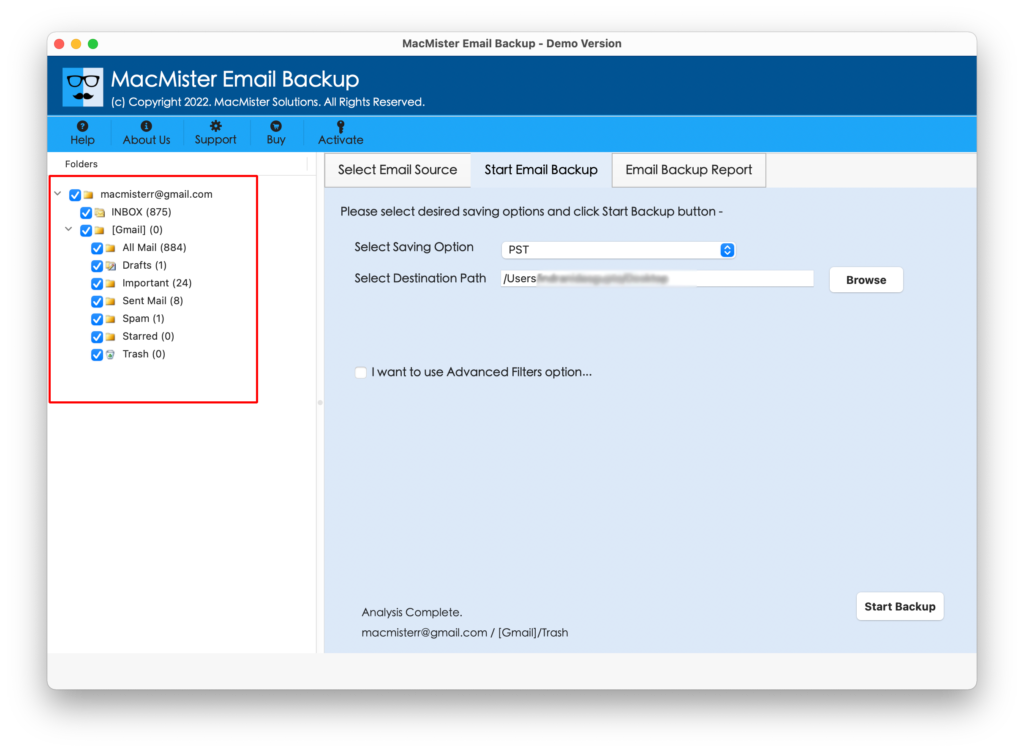
Step 4. Pick PST saving type and apply optional filters.
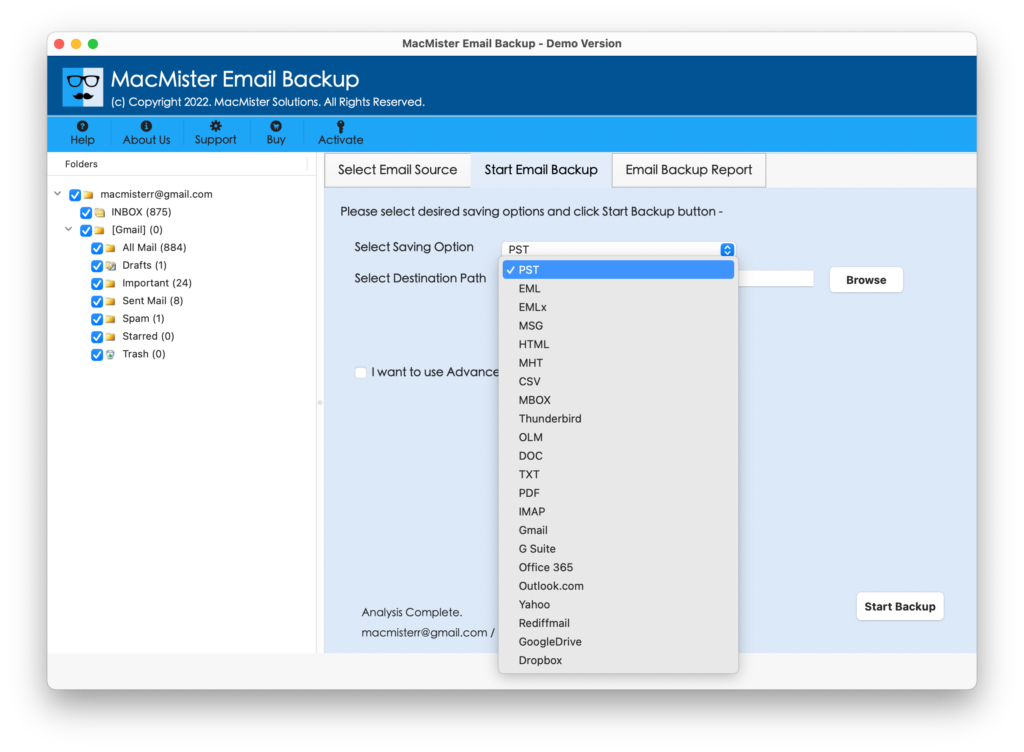
Step 5. Last, mention saving path and tap Start Backup.

For detailed information, run free demo of the app and perform the migration of 25 Office 365 mailboxes into PST.
Epilogue
Office 365 shared mailboxes not showing in Outlook can disrupt the efficiency of organization workflow. However, the problem can be fixed by understanding the actual cause behind receiving the error and applying right solutions. So, the blog here discussed multiple ways that will help in resolving the issue quickly.