How do I Free up Space on my Mac?
If you are constantly encountering error messages related to full disk, having trouble downloading and installing new applications, or thinking about how do I free up space on my Mac, then you are not alone. We are not professionals but we will provide few things that could help you in cleaning up your Mac.
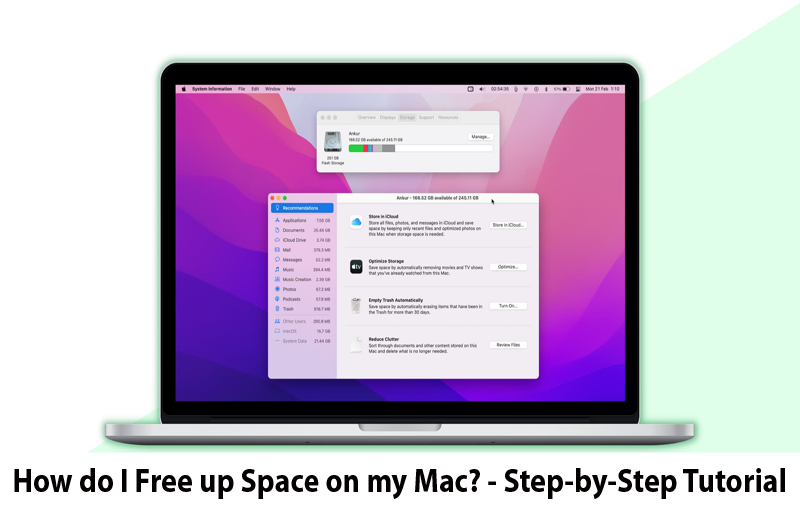
How much available space you have in Mac?
The storage drive hold large amount of space. Although there are many advantages of upgrading the storage space to an SSD, but the space is a big one. Some of that storage is occupied by internal processes, some by operating system and the other leftover space is reserved for files, music, photos, programs and anything else that you have saved.
To check the space available on a storage drive, follow these instructions –
Step 1. Go to Apple menu.
Step 2. Click About this Mac and then go to Storage.
The total storage size of the disk will be displayed on the screen with the free space left of the disk. However, it is recommended to leave 20% of a free space to give the system plenty of room to exchange files with a memory module.
How do I Free up Space on my Mac?
There are two different ways to free up space on Mac –
- Manual Method
- Automated Solution
Method 1. Manually Free up Space on Mac System
Step 1. Clean your Desktop
Go through the entire desktop and erase the shortcut created of any apps and files that are no longer needed. Navigate to Software Update to remove the app from storage drive permanently.
To use Software Update, tap Apple icon and then click App Store where one can update or uninstall programs.
Step 2. Verify your folders
Go to the Downloads folder for unnecessary files. Make sure the things you need are saved to a proper place on a storage drive, and then delete the copy in Downloads folder.
Navigate to storage disk to delete files, games, programs, music, etc. that are no longer required. One can also shift the necessary items to keep but not often use to the cloud or to an external storage drive.
Erase any downloaded movies or TV shows that you have watched already. In case you are thinking about to watch them again, then you can do the same through iTunes.
Step 3. Clear Duplicate Files
Follow the instructions below to clear duplicate items such as music, photos, documents, etc.
Go to File present in the main menu.
Tap New Smart Folder, click + icon appearing on the right-hand side, then select the search parameter such as File Extension displaying under Other. You can however delete them all but the most recent version.
If you are using OS X Sierra on macOS, then you may automatically move few items to iCloud. Select Apple menu, go to About this Mac, click Manage, then Storage Tools and last, go to Store in iCloud. The steps will move the items from storage drive to Apple Mail account in cloud.
Step 4. Use Automated Tools
There are other options present in the area that allows to automatically erase the space on storage disk.
Optimize Storage – The option helps erasing movies or TV shows that was purchased on iTunes and downloaded. If you need to see the item again, then you can re-download it.
Empty Trash Automatically – The option will permanently delete items from the trash after 30 days.
Reduce Clutter – This option helps in navigating those files that need to be transferred to alternative storage solutions including external hard drive or cloud storage.
If you have implemented these steps but still struggling with the same problem, then try to upgrade the storage disk to a larger solid state drive.
Step 5. Final Cleanup
Make sure to clear browser cache’s files. If you are using Safari:
- Open Safari and go to Preferences.
- Click Advanced and then go to Show Develop Menu.
- Select Check Develop Menu and then Empty Caches.
Items placed in a trash folder also occupy space, so one need to clear them from the same as well. And to do the same, right-click the trash icon and select the option to Empty Trash. Furthermore, applications such as iPhoto, Mail, and iMovie contain their own trash cans; make sure to empty them as well by navigating to each program and selecting Empty Trash.
Method 2. Professional Way to Free up Space on Mac System
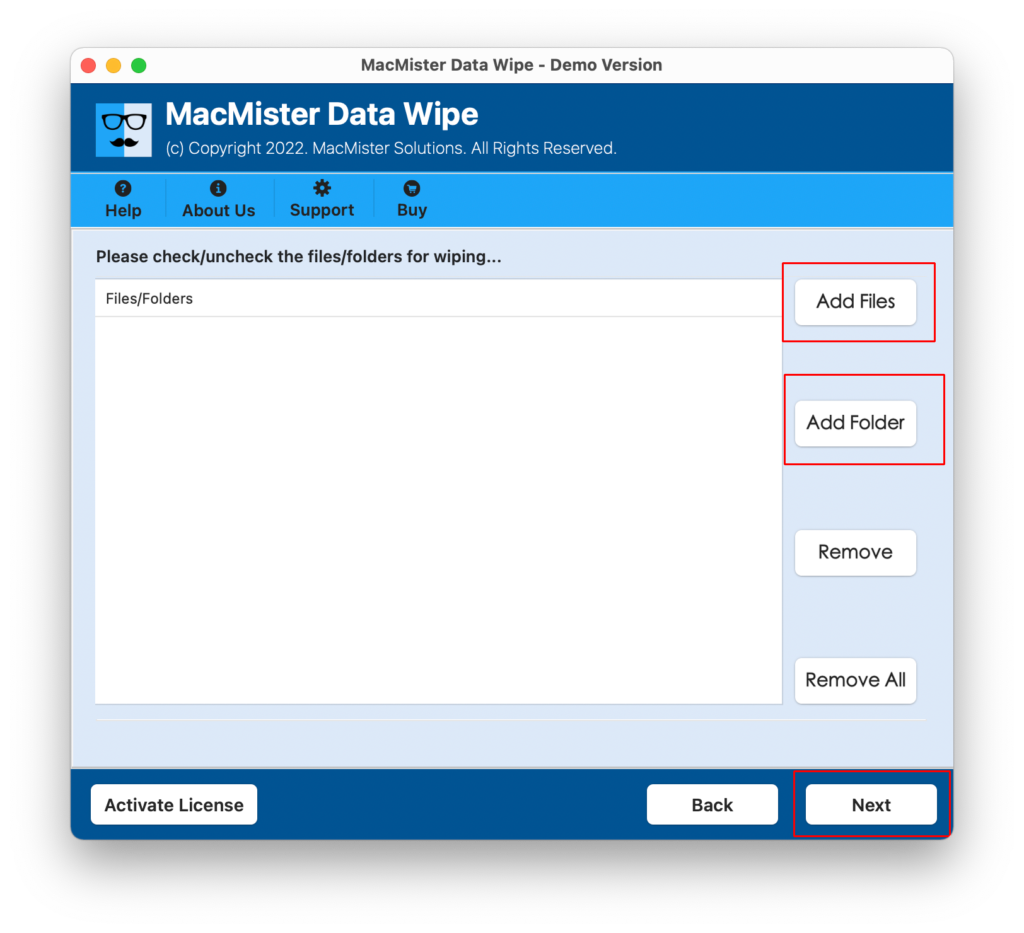
The direct way to free up to space on Mac system is MacMister Data Wipe for Mac Tool. Users can use the software dual options such as Add File(s)/Add Folder options to add necessary files/folder on the tool that no longer required. It has three operational steps and intuitive interface that eases the process for all types of users.

Moreover, the features enable users to free up space on Mac system according to the requirements. And the best part is, it has a free demo available that users can download on any macOS to evaluate the software process for free.
Working Steps of the Tool to Free up Space on Mac System
Step 1. Download and launch the app on your macOS.
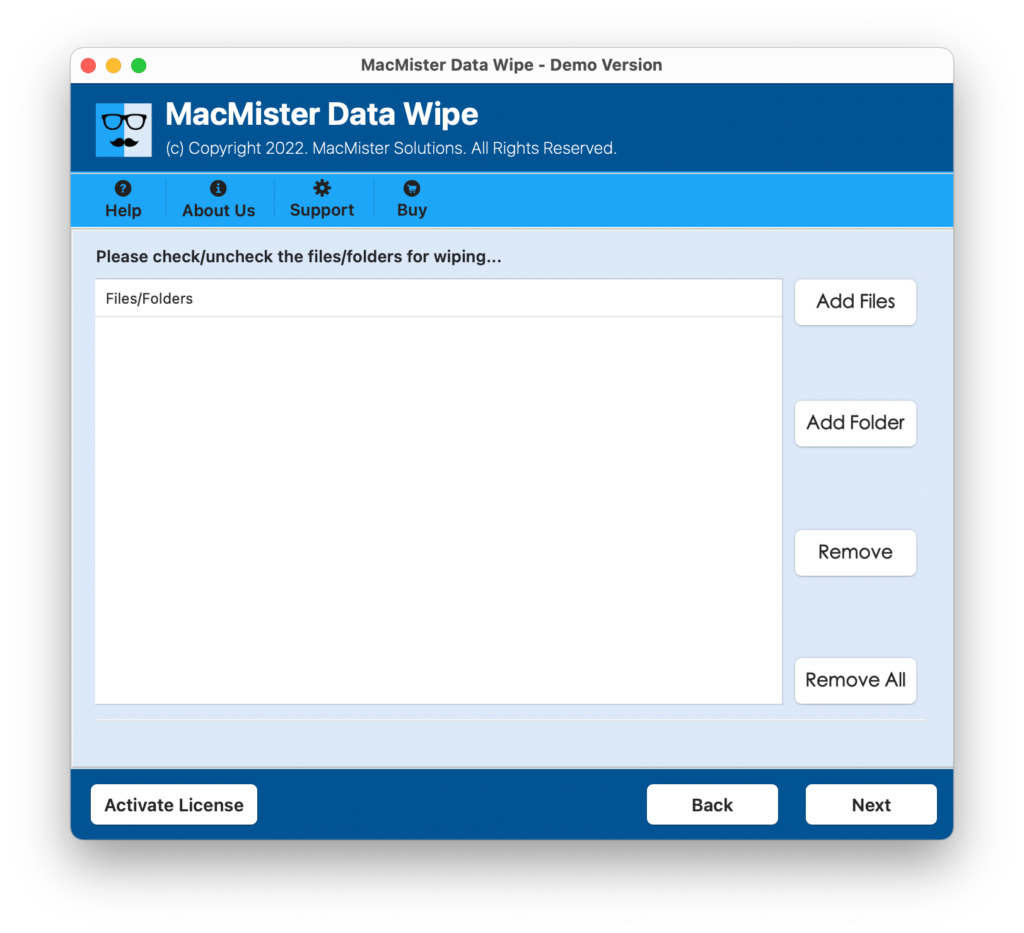
Step 2. Use Add File(s)/Add Folder options to load the important files or folder on the tool for data erasure.
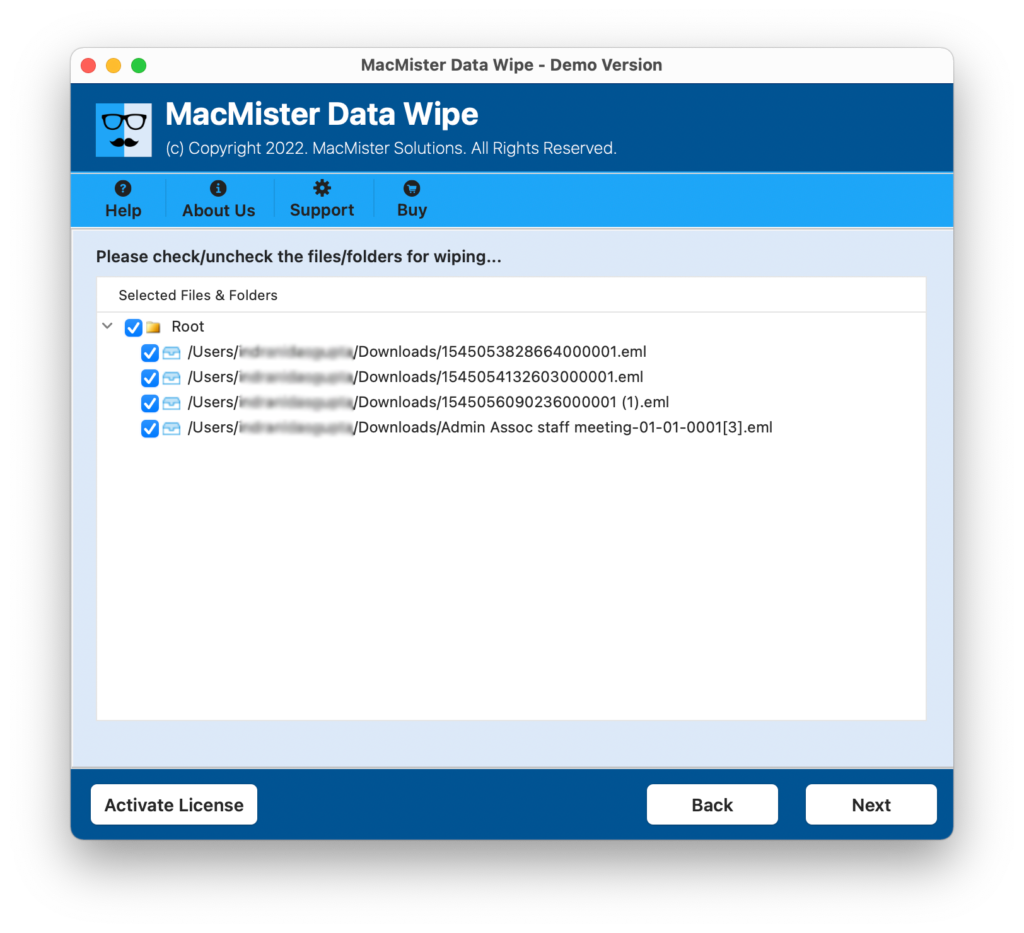
Step 3. Now cross-check the files listed and click Next.
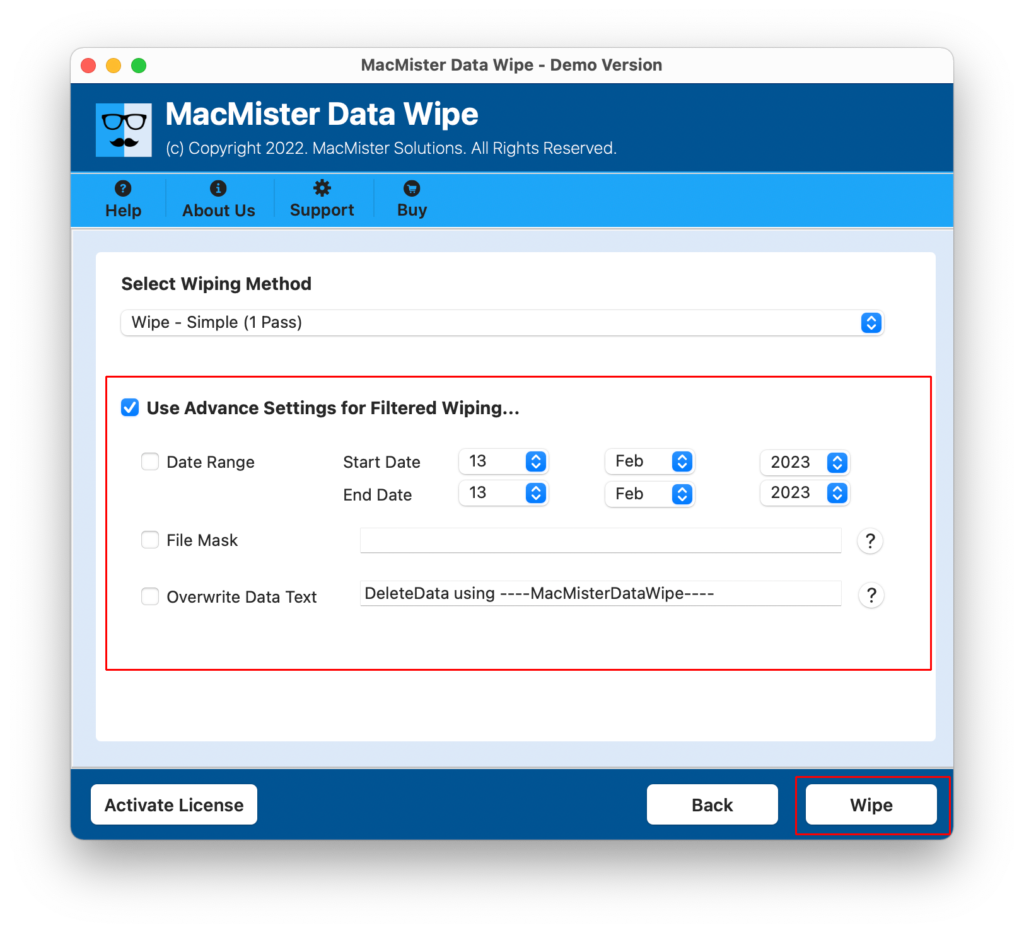
Step 4. Choose the required wiping option from Wiping Methods.

Step 5. Apply the advanced filtering according to the requirements and tap Wipe button.
Step 6. The Live Wiping Process screen will appear which shows the live wiping status of unnecessary files.

In few seconds, the tool will complete the process and then show a log report to users displaying the summary of the process.
Epilogue
The write-up here discussed multiple approaches to fix how do I free up space on my Mac. The first method is manual and free to use. But the steps are lengthy and time-consuming. Even, technical support or assistance is required to operate the same, whereas, the direct solution is paid but user-friendly, reliable, and advanced. It also has numerous features with the help of users can free up the space as per their needs. Get its free demo and explore the entire software functionality for free.