How to Fully Erase a Mac Hard Drive?
If you are planning to sell your Mac machine then make sure to erase it properly before giving it away. So, in the tutorial we will cover how to fully erase a Mac hard drive in Mac OS Sequoia and earlier versions including Apple Silicon & Intel-based devices.
Note. Erasing Mac hard drive will destroy all your important files stored on the system. It is advised to backup all the necessary files before executing the steps discussed below.
Here, we have mentioned different ways to erase Mac hard drive data permanently. Let’s explore them in detail.
Fully Erase a Mac Hard Drive Data Manually
The manual method includes multiple approaches to erase data from Mac hard drive. The appropriate method will depend on the type of processor you are utilizing –
- In case you are using Mac with Apple Silicon or an Intel-based Mac having Apple T2 Security Chip, then opt for Method 1.
- For Intel-based Mac, use Method 2.
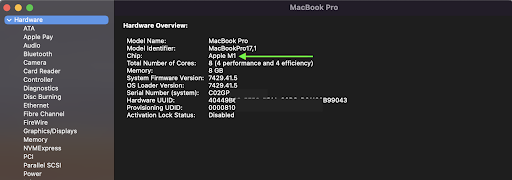
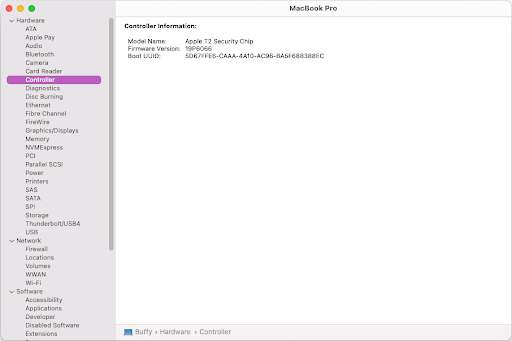
You may check the type of chip that Mac is using; hold the option key while navigating to Apple Mail menu and then select About this Mac. Click Hardware appearing in the sidebar. Go to the right window and you will encounter the type of chip the Mac is using. If the device is configured with Intel processor, then go to the sidebar and click Controller in order to verify if it is installed with T2 security chip. If it is installed then it will appear on the right side of the screen.
Method 1. Erasing Hard Drive from Mac OS Monterey Installed with Apple Silicon or Apple T2 Security Chip
Mac OS Monterey offers Erase All Content and Settings feature that helps in erasing all the settings, data, and apps in a secure and instant way.
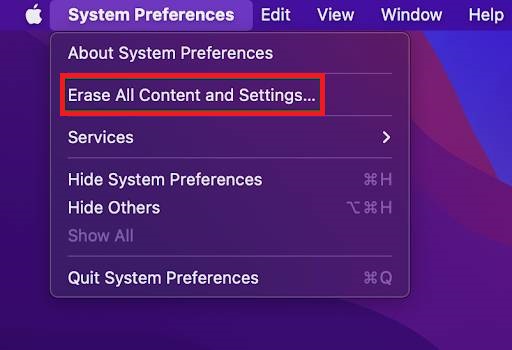
Step 1. To use the feature, navigate to Apple menu >> click System Preferences. Navigate to menu bar, click Erase all Content and Settings. Note. In case the feature isn’t visible to you, then use Method 2 to erase your Mac.
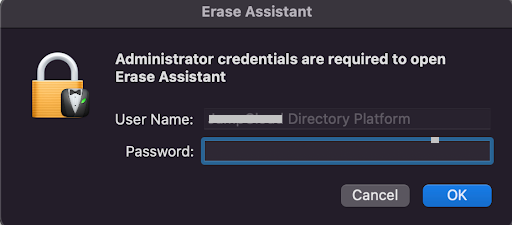
Step 2. When Erase Assistant opens: mention admin username and password to approve. Enter the required details and click OK.
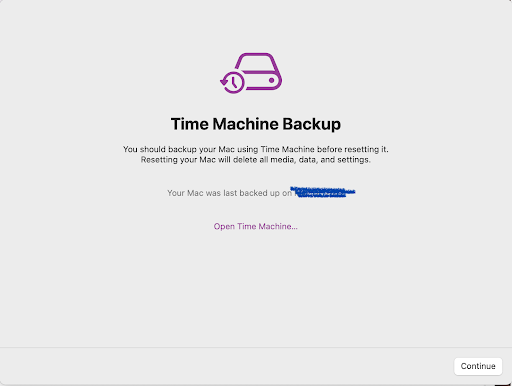
Step 3. Now, the reminder will display to backup your Mac. In this case, the Time Machine Backup page will appear. In order to preserve your data, click Open Time Machine to backup data to an external storage device.
If you do not want to have any backup, then click Continue. As discussed earlier that it is difficult to backup essential files you would like to keep before initiating the data erasure process.
Step 4. The next page will display all the additional items that will be discarded from settings, media, and data. If there are multiple users on a Mac, this screen will show their list. Now, click Continue to confirm the permanent deletion of the data from Mac.
Step 5. If it asks to sign out from Apple ID, then enter your Apple ID and password and tap Continue.
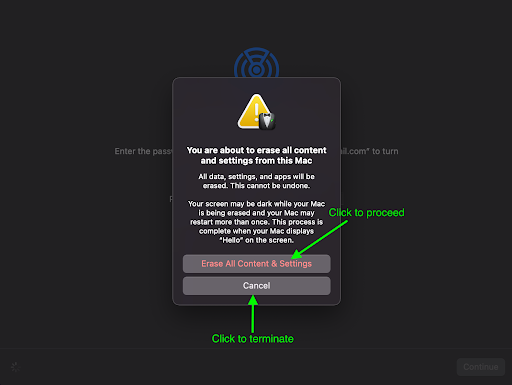
Step 6. A warning message will display on the screen “You are about to erase all the content and settings from this Mac”. If you are not completely ready to erase all your content, then this would be the last opportunity to cancel the process by clicking Cancel. However, if are totally ready, then click “Erase all Content & Settings” to continue.
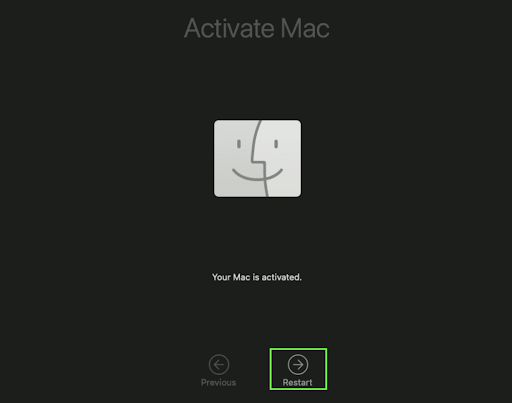
Step 7. The Mac will start again and show a black screen or a progress bar. Note. The process could ask you to connect a network cable or choose Wi-Fi network. To select Wi-Fi network, navigate to the upper-right corner of the window and use Wi-Fi menu. Once the network is connected, the Mac will activate. Lastly, click Restart.
Step 8. After the erasing process completes, a setup assistant will help you setting up your Mac again.
Method 2. Erase Hard Drive from Mac OS Monterey configured with Intel-based
If you are using Mac OS Monterey with an Intel-based processor, then Method 1 will not be suitable to you. However, you need Disk Utility to remove data from your Mac. The steps are discussed below –
- Before starting the erasure process, backup important files to external drive.
- Start up from macOS recovery: Turn on or restart your Mac and hold down the Command and the R keys until Apple logo becomes visible on the screen.
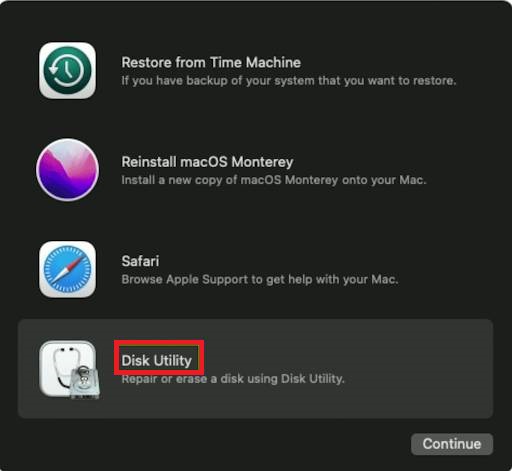
- A Recovery Window will appear, click Disk Utility and tap Continue.
- From the sidebar, click Macintosh HD.
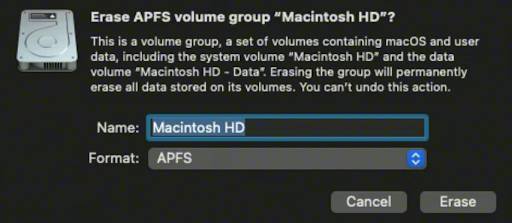
- Tap Erase button appearing in the toolbar. Provide all the necessary details. Enter Macintosh HD in the name field or use the name you would like to give to hard drive. Select APFS for formatting and hit Erase.
- After the process finishes, close Disk Utility window and navigate to Utilities screen. Now, shut down the system with empty drive. Or, you may reinstall macOS by choosing Reinstall macOS in the Utilities. Click Continue and implement the instructions as discussed.
Fully Erase a Mac Hard Drive Data Directly
If none of the above method works, then make use of MacMister Data Wipe for Mac utility. A direct, cost-effective, and powerful solution with the help of users can fully erase Mac hard drive data permanently. It has a simplified environment, so any professional/non-professional user can perform the operation effortlessly. Additionally, the tool has many advanced filters that users may apply to execute the data erasure process according to their needs. Follow the steps and fully erase data from Mac hard drive without trouble.

Step 1. Download, launch, and open the software on any macOS machine.
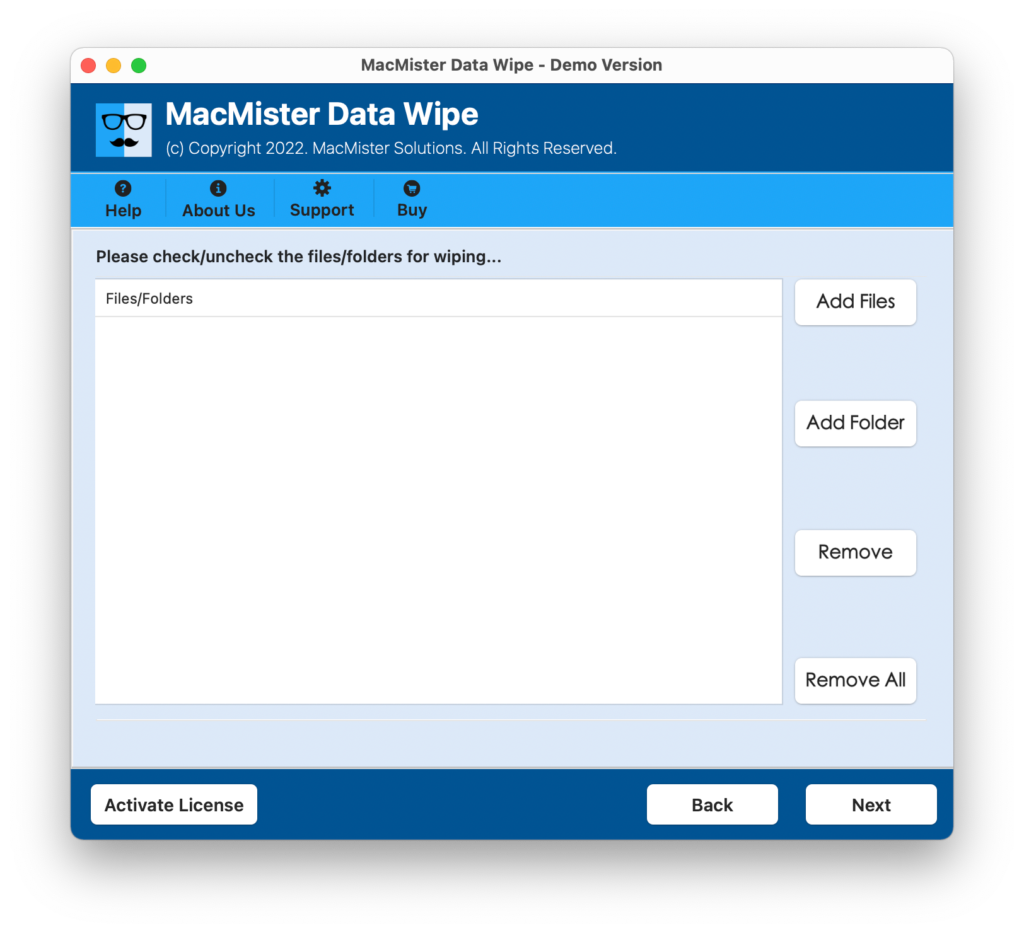
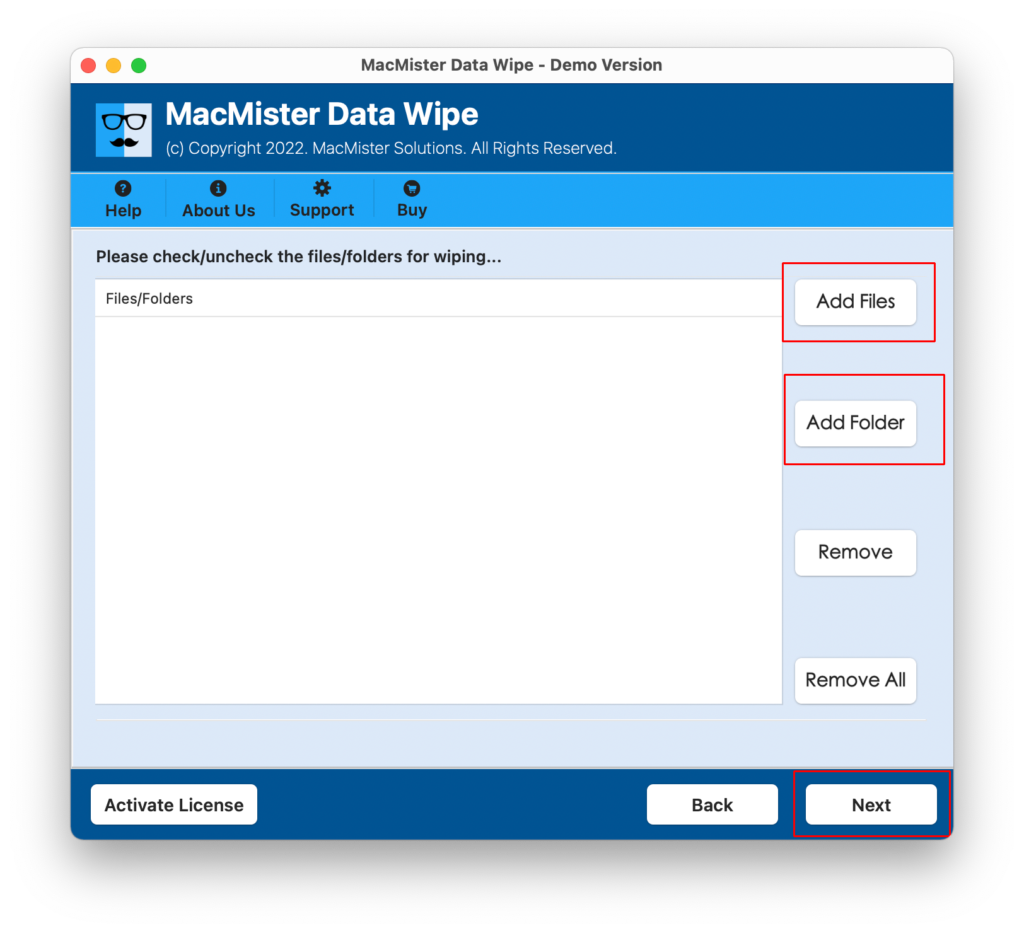
Step 2. Use the Add File(s)/Add Folder options to add necessary files on the tool and click Next.
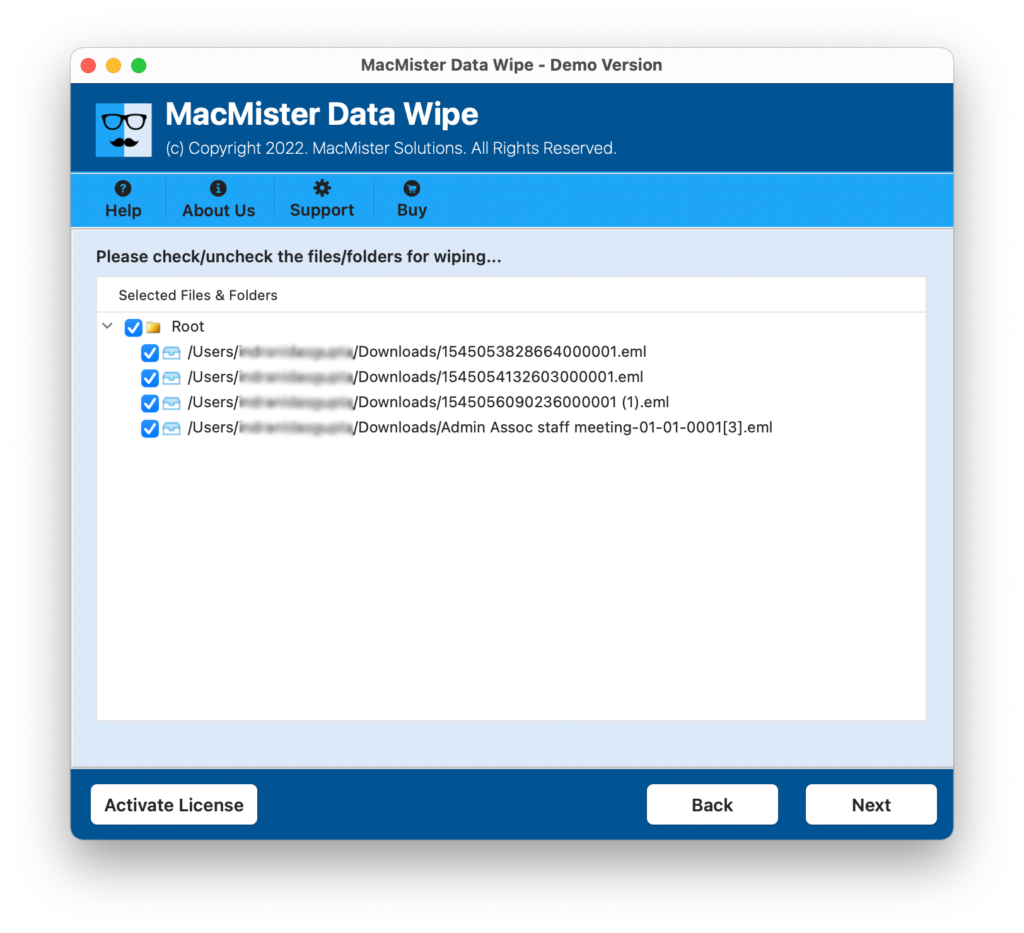
Step 3. Now, all the files are successfully added, verify them and click Next. Alternatively, you may use checkboxes to erase the selected files (if needed) otherwise, select all the checkboxes and click Continue.
Step 4. Apply wiping methods and filters according to your requirements and click Wipe button.

Step 5. Track the live wiping progress using the window appearing.

In few seconds, all the files will be permanently deleted from Mac hard drive. Overall, it is one of the best utilities to fully erase Mac hard drive data.
Epilogue
In the article, we have explored multiple approaches to resolve “how to fully erase Mac hard drive data”. If your Mac is Apple Silicon based, then pick Method 1. Or, if the system is Intel-based, then use Method 2. Both the methods are free to use but not suitable for novice users. For them, there is another direct solution available which will not only save users crucial time but their money as well. Download it for free and check the entire process without any trouble.