How to Save IMAP Emails Locally Mac?

If you one of those users who are seeking a solution to save IMAP emails locally Mac, then you are at the right place. In this blog, we have presented best ways to download IMAP emails locally on Mac & Windows operating systems. We have explained detailed manual and professional approaches with step-by-step instructions.
To save IMAP emails locally Mac by using manual methods, one can take support of email applications such as Microsoft Outlook, Apple Mail, or Thunderbird. These email programs allows configuring IMAP accounts and helps in backing up IMAP server emails into local computer. But the manual backup methods often need to individually select or save each email or folder that can be time-consuming, especially in case of large number of emails. Simultaneously, we have discussed automated solution that helps saving IMAP emails directly and effortlessly.
What is IMAP?
IMAP stands for Internet Message Access Protocol. There are multiple ways available to assesses emails on email server with IMAP, POP (Post Office Protocol) and SMTP (Sending/Receiving) emails. By using IMAP, one can manage their emails through any device. And there is no need to download emails from the server. Just connect your email application to the server and use it.
Why to Save IMAP Emails Locally Mac?
Saving IMAP emails locally Mac can be performed for many reasons –
- Downloading IMAP emails on a local system help users to view essential emails when without internet connection.
- If the email service encountered any data loss or outage, then preserving local backup ensures the safety of important emails.
- Saving IMAP emails locally helps migrating old emails to a new email account when moving from an IMAP email server to a different email service provider.
- Limit storage or retention regulations could be imposed by email providers. Local backup enables to save emails forever.
- Backing up IMAP emails locally are important for journalist, researchers, and anybody else who need to analyze and refer old email data.
- Email Service providers face data loss due to technical errors or other unforeseen situations. Thus local backup can prevent from such eventualities.
How to Save IMAP Emails locally using Verified Solutions?
In the following segment, we have discussed manual and professional solutions to save IMAP emails locally.
However, manual steps for Windows and Mac are different and are explained below. Let’s go through the manual procedure first followed by professional method.
Method 1. Save IMAP Emails locally using Microsoft Outlook
To download IMAP emails locally using Microsoft Outlook, follow the steps mentioned –
Step 1. Run Microsoft Outlook
Install Outlook on your Windows, if it is not installed.
Step 2. Set up IMAP Account
Add IMAP email account details in Microsoft Outlook for configuration. To do the same, got to File, select Add Account. Add the email account in Outlook.
Step 3. Generate new PST File
Create a new PST file for backup.
Step 4. Import IMAP Email Folder to PST
After PST file is generated, import IMAP folders in the same –
- Right-click on a new created PST file in the left navigation pane of Outlook.
- Click “New Folder” to generate folder structure similar to IMAP account.
- Right-click new folder and select the option “Import and Export”.
- From Import and Export Wizard, choose Import from another program or file and tap Next.
- Select Personal Folder File (.pst) and tap Next again.
- Browse IMAP folder location that usually appears under email account’s name and choose the required folders to backup.
- Select new created folder in PST file as a destination.
- Choose the option to create duplicates (if needed) and tap Next.
- Set required options to manage imported items and click Finish.
Step 5. Initiate the Migration Process
Outlook start transferring selected data items into new PST file.
Method 2. Save IMAP Emails Locally Mac using Apple Mail
Follow the steps to download IMAP emails locally Mac by utilizing Apple Mail email client –
Step 1. Open Mac Mail
Run Apple Mail email client on your Mac system.
Step 2. Set up IMAP email account in Apple Mail
If Apple Mail is not configured, then set up the same by using IMAP email account. Navigate to Mail, then Add Account and follow the steps accordingly.
Step 3. Create IMAP Mailbox Backup
Backup IMAP emails by generating local mailbox in which you’ll migrate or duplicate emails. Here are the steps discussed –
- Go to Mailboxes and right-click on it.
- Click New Mailbox option.
- Choose the desired location for mailbox such as “On My Mac” and specify a name for the mailbox.
- Tap OK button.
Step 4. Copy IMAP Emails to Local Folder
After mailbox backup completes, start copying or transferring emails from IMAP folders to local mailbox –
- Go to IMAP account’s folders present in a Mailboxes sidebar.
- Choose the required email files to backup.
- Right-click on the items selected.
- Either choose “Copy to” or “Move to” to select the created backup mailbox.
Step 5. Repeat the complete steps for every mailbox backup.
Step 6. Apple Mail will copy or move chosen emails from IMAP server to local mailbox
Disadvantages of using Manual Approach
- Manual method has lengthy steps that consume users’ lot of time and energy.
- High Data Loss Risk is involved.
- Only single file at a time can be moved.
- Not suitable for large mailbox items.
- Non-professional users could face many challenges while implementing it.
Method 3. Save IMAP Emails Locally by using Automated Approach
With the help of MacMister IMAP Backup Tool Mac & Windows, one can directly save IMAP emails into 15+ saving options such as PST, EML, HTML, DOC, IMAP, Yahoo, and more. The tool is simple, advanced, and secure. All users can utilize the app with ease and perform the process in few seconds.
Furthermore, the tool is equipped with many features with the help of users can save IMAP emails locally Mac according to the requirements. However, a freeware version is also available with the help of users can check the software process for free.
Working Steps to Save IMAP Emails Locally Mac
Step 1. Download, launch and run the app on any macOS.
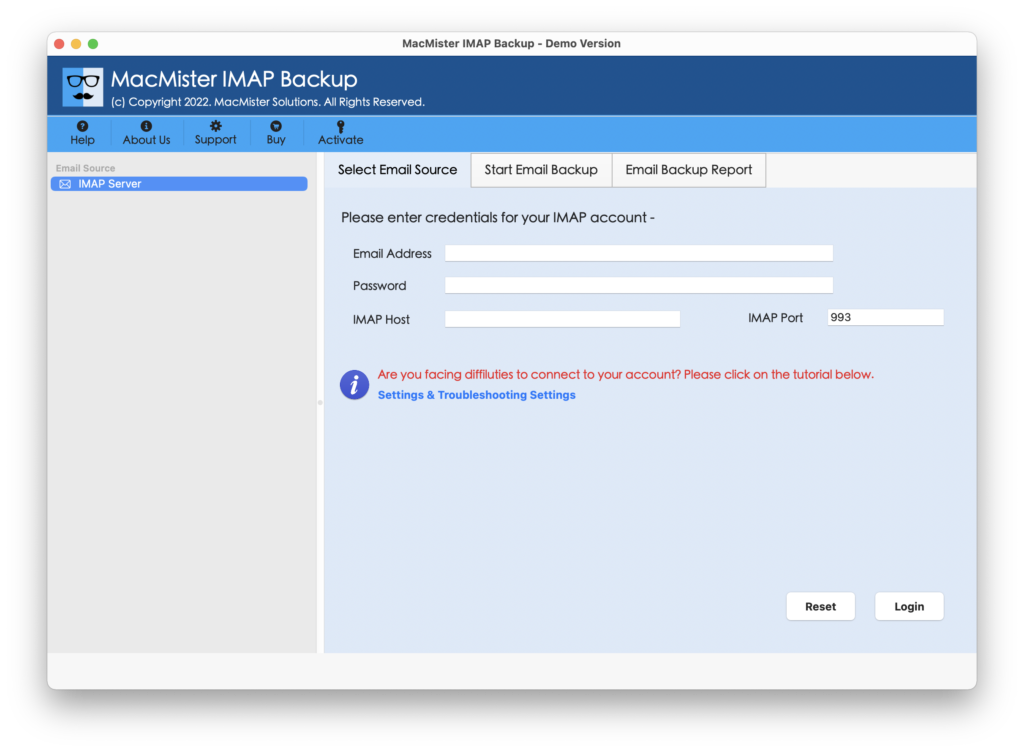
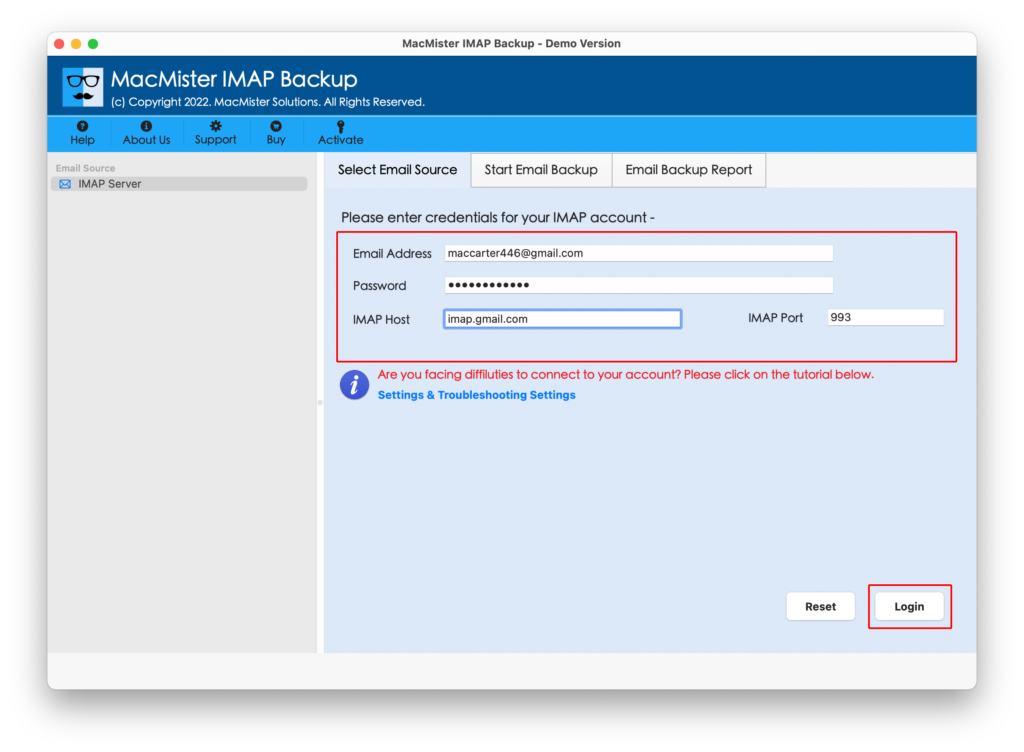
Step 2. Add IMAP email account details with IMAP host and port number. Then, click Login.
Step 3. Once the account is connected, its mailboxes will start to list on the left application pane.
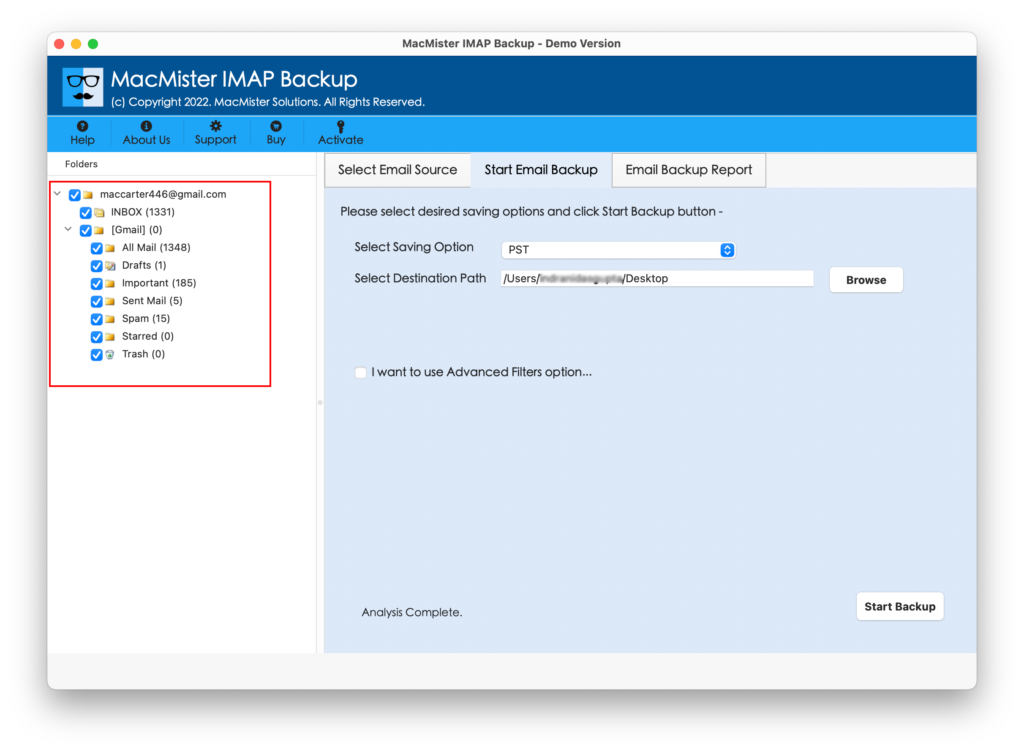
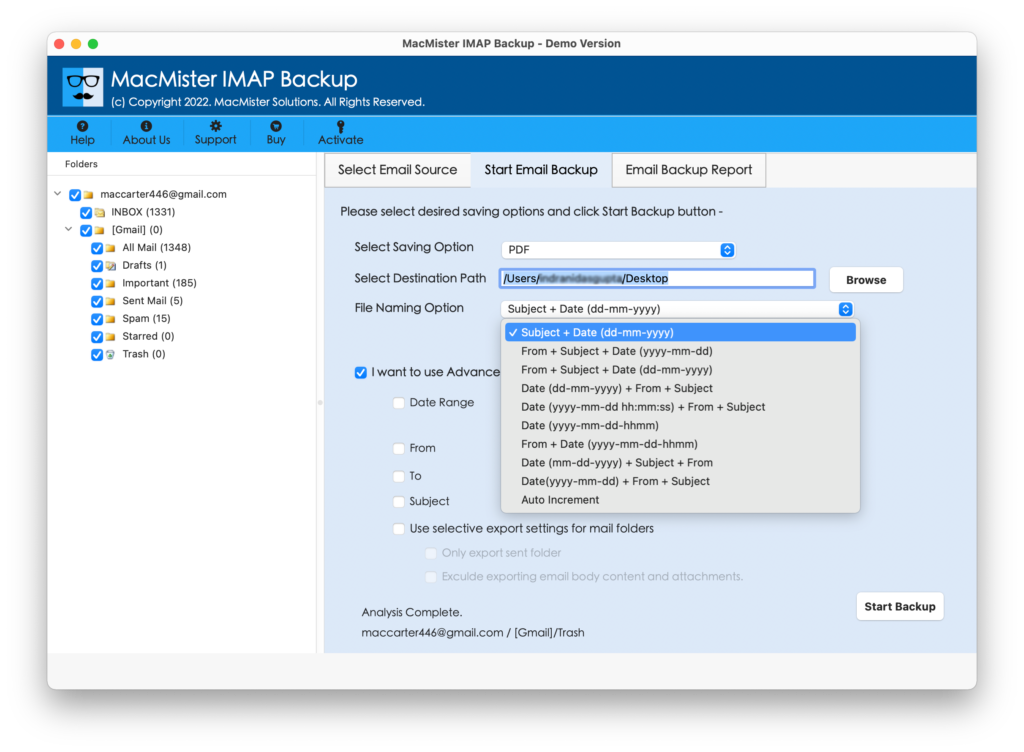
Step 4. Now, go to the right pane of the tool, click Select Saving Options and choose the required saving type from the list.

Step 5. Set the sub-options according to the requirements and click Start Backup button.
Step 6. The Email Backup Report window will appear. Users can use it to track the live migration status of IMAP emails.
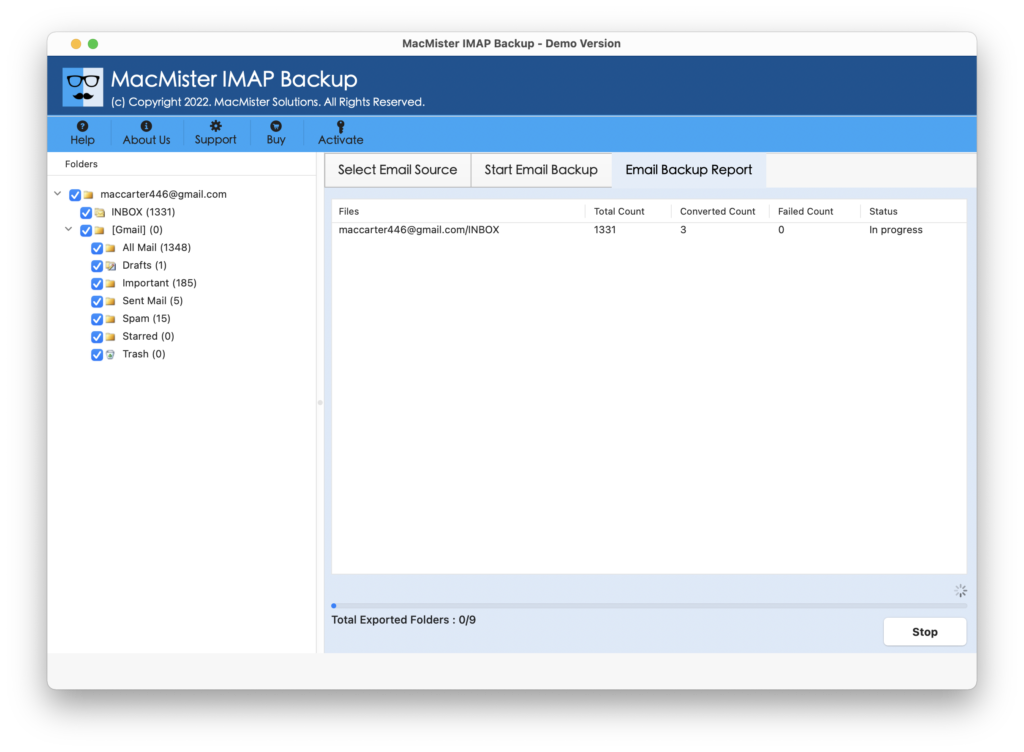
The process will complete with a message “Process Completed”. Click OK button and then go to the desired destination path to verify resultant files. However, you will see that the tool has accurately carried out the process. The emails, formatting properties, and email layout will appear without alterations.
Epilogue
The write-up here provided multiple approaches to fix how to save IMAP Emails Locally Mac. The first two methods possess manual steps. They are free to use but lengthy and time-consuming. The third method is direct, secure, and reliable. Any users can utilize it and implement the steps effortlessly. It has a lot of features as well with the help of users can obtain desired outcome. Moreover, a free demo is present that allow users to save first 25 IMAP emails for free. MacMister also provides Email Backup Software Mac & Windows Tool that includes 30+ email sources and over 15+ saving Options. One can also use it and save emails of required email server without trouble.