How to Set up Auto Archive in Outlook for Mac?

If you’re using Outlook for Mac and want to set up auto archive, no worries! This article provides step-by-step instructions on how to easily and efficiently set up auto archive in Outlook for Mac. Follow the instructions given in the article and you’ll have auto archive set up in no time.
The Auto Archive feature in Outlook for Mac allows users to automatically transfer messages from a specific folder to an archive folder. This helps to clear old emails from the inbox while still keeping them as a record. Users also have the option to delete these emails after a certain period of time. By automatically archiving items, Outlook for Mac reduces the item count that needs to be processed when opening a folder and saves storage space. This feature eliminates the need for manual archiving and saves time for users.
How to Setup Auto Archive in Outlook for Mac?
Setting Auto Archive in Outlook 2016 for Mac
Step 1. Open Outlook on a macOS.
Step 2. Navigate to Tools and select Rules…
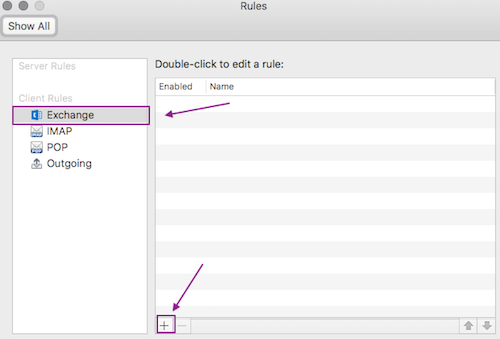
Step 3. Click on Exchange appearing in the left column of the window. Click the + sign displayed at the bottom of the window to add a rule.
Step 4. In the new window, you will see a field labeled “Rule Name.” In this field, you can type a description for the rule you are creating. This description will be displayed in the Outlook Rules window (shown in Step 2) if you ever need to review, modify, or delete the rule in the future.
Step 5. Apply additional criteria for the rule. For e.g. in order to move the messages older than 180 days moved from the account to the server to the INBOX on the computer, choose the following: In the section of When a new message arrives, change the drop-down to Data Received. Click Is Greater Than and enter 180 in the days-old field.
Step 6. If multiple accounts are configured in Outlook on the system, click the + button appearing to the right of days old to add the next rule condition and set it for your Liberty University email account.
Step 7. In the section Do the Following, click Select Message and then choose INBOX (On My Computer).
Note. If you want to use a different folder on the computer, it is totally fine. Just ensure that the folder is labeled (On My Computer). However, folders not labeled as such are stored on the mail server and will still count toward your quota.
Step 8. If there is an extra row for rule criteria not being used, select the – button to its right and remove it.

Step 9. Ensure that the Enable box is selected and then press OK button.
Step 10. Click the red button appearing in the upper right corner of the Rules window to close it and return to your Outlook mail.
Step 10. Click the server INBOX to select the same.
Step 11. Click the Message. Go to Rules. Select Apply and select the necessary rule to run. In the mentioned example, 180 Automatic Archive depends on the count of old messages that one is carrying and so the total time of archive depends on it.

Archived messages will appear on the left in the On My Computer folder.
Setting Auto Archive in Outlook 2011 for Mac
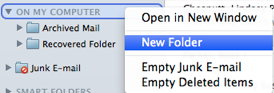
Step 1. Create a new folder to store the archived emails. Right-click On My Computer and click New Folder.
Step 2. Go to Tools and select Rules.
Step 3. Select Exchange appearing under On My Computer in the rules window on the left. Click + sign to add a new rule.
Note. The list of rules is processed in a top-to-bottom order. To adjust the rule order, use the arrows provided.
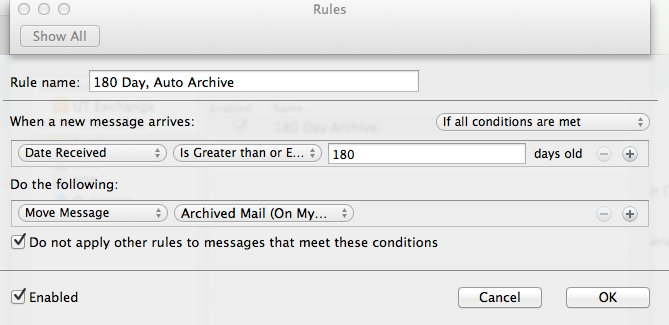
Step 4. Name Auto Archive rule.
Step 5. When a new message arrives, define the criterion as “Data Received” + “is greater than or equal to” + choose the number of days.
Step 6. Specify the action as “Move Message” + “Archived Mail (On My Computer).
Note. If you unable to see a folder you want to archive, then you need to click the drop-down arrow appearing beside “Move Message” and then click Choose Folder… and then look for the folder to archive. Under the folder name, the location “On My Computer” should appear.
Step 7. Press OK and make sure that the Enabled button is checked.
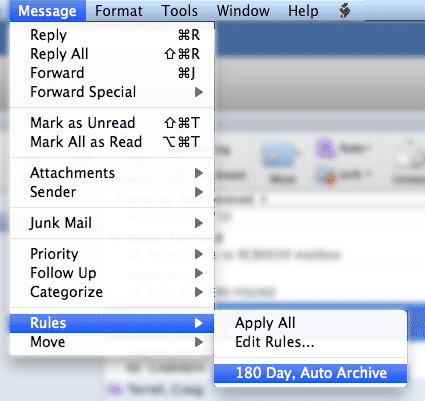
Step 8. In case you want to apply the rule to the current mailbox, go to Message menu and click Rules. Now, choose the rule you want to process.
Archiving Outlook for Mac Emails into Other Formats
With the help of MacMister OLM Converter for Mac, you can archive Outlook for Mac mailboxes into 15+ saving options. With the help of the app, you will be able to convert OLM to MBOX, PDF, PST, MSG, EML, EMLx, MHT, HTML, DOC, TXT, IMAP, Yahoo, Thunderbird, Office 365, and more. The application has a friendly platform and so all types of users can effortlessly operate it and perform the process in a minimum time.

Moreover, there are numerous advanced features present in the software that allow users to archive Outlook for Mac mailboxes according to their requirements. However, the freeware version of the tool is available that will help you explore the entire processing of the software for free.
Working Steps to Archive Outlook for Mac Emails into Other File Types
Step 1. Download and run Mac OLM Converter on the macOS platform.
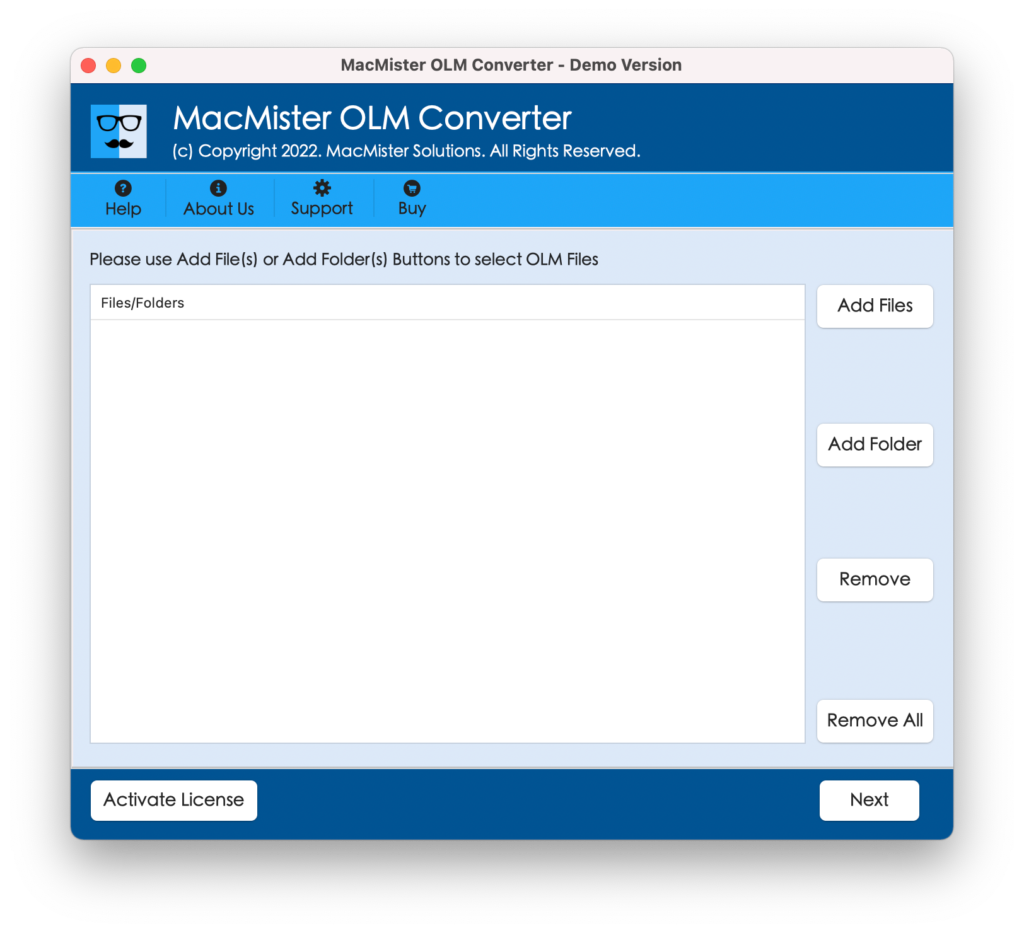
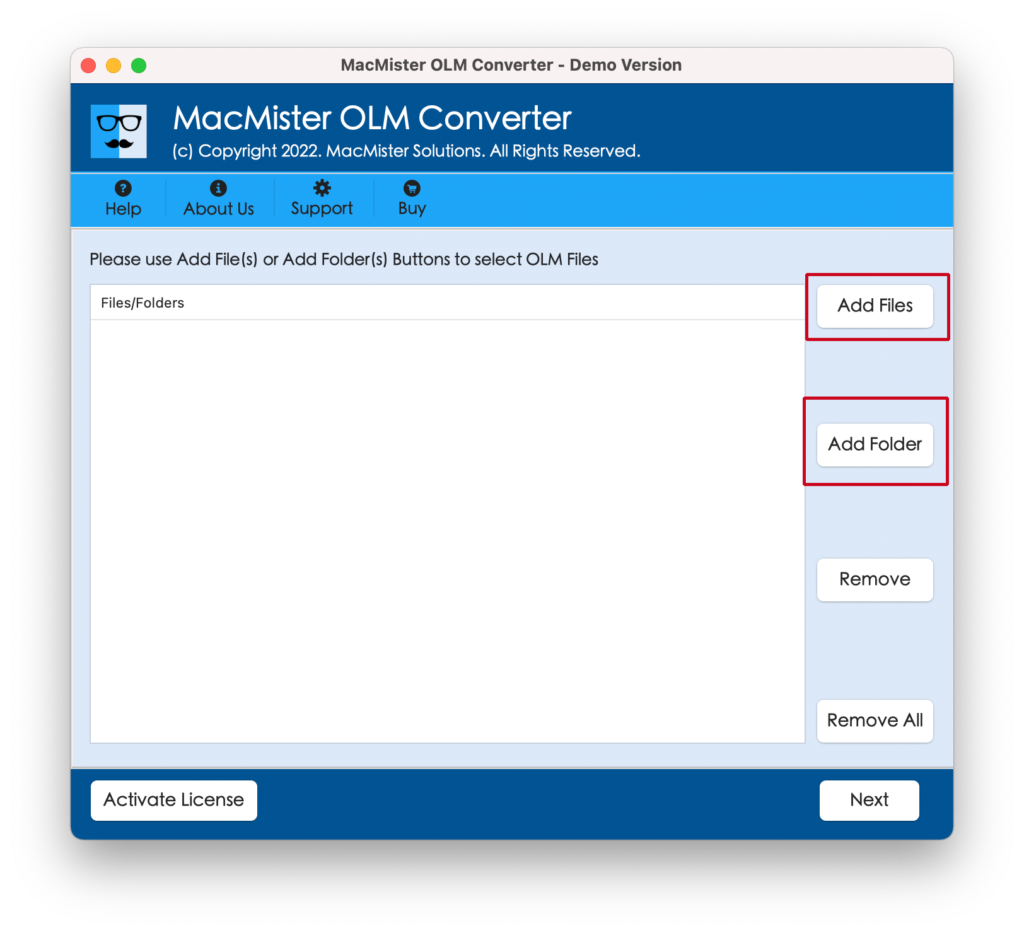
Step 2. Load the required OLM files on the tool by making use of the dual options i.e. Add File (s)/Add Folder buttons. Click Next.
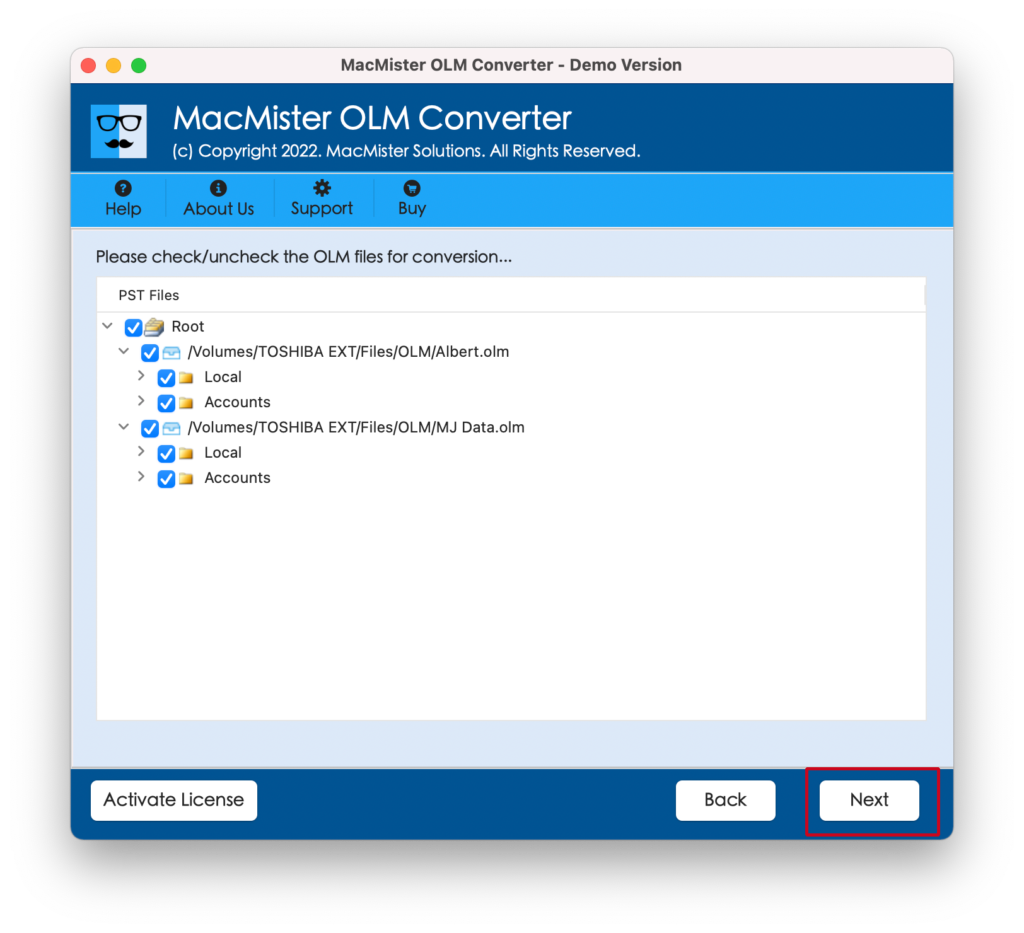
Step 3. The OLM files will list one-by-one on the application and each file has a checkbox. However, the checkboxes will help necessary users can archive specific OLM files into the required saving option. Click Next.
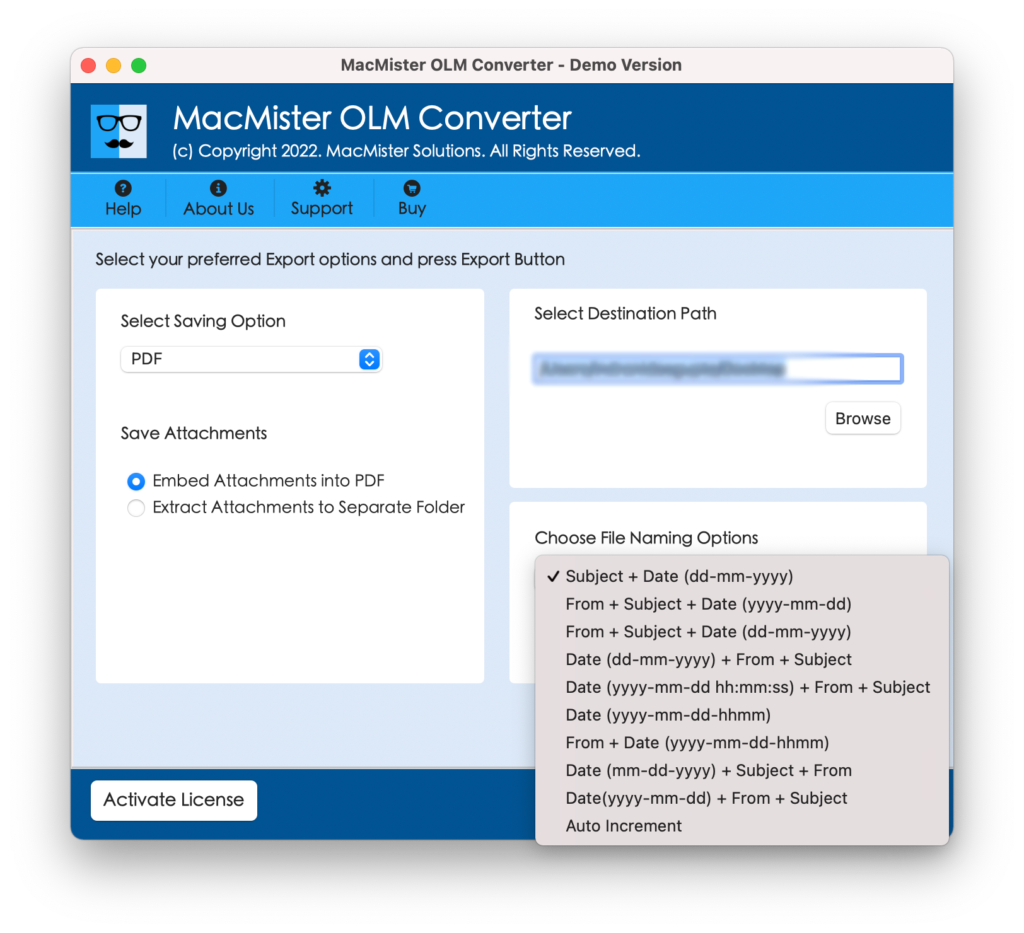
Step 4. Tap Select Saving Options and select the required saving type from the list.

Step 5. Every saving option has sub-options. Apply them as per need and perform the process according to your requirements. Last, click the Export button.
Step 6. The archive process will be live and a Live Conversion Window will appear on the screen with the help of users can track the ongoing archive progress of OLM files.
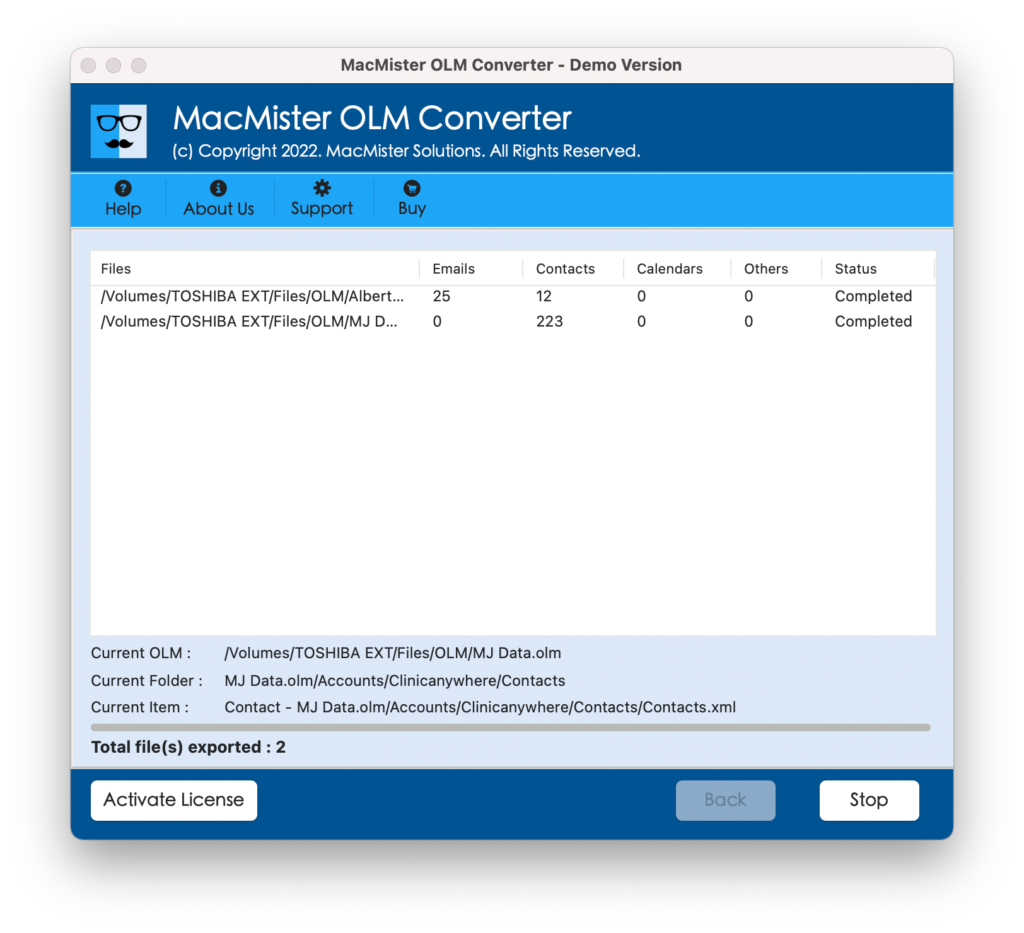
In a few seconds, the procedure will end successfully and accurately. You can use the trial edition of the app to test the working of the archive process.
Epilogue
The write-up has discussed the procedure to set up Auto Archive in Outlook for Mac. Follow the instructions carefully and implement the required task. However, we have mentioned a professional solution as well that will ease your process and save the archive files of Outlook for Mac into the required saving option. Moreover, you can check the entire app task by utilizing the tool’s freeware version. It will help you to archive the first 25 files free of cost.
Quick Note. You can contact MacMister Support anytime for any software assistance.