OLM to PST – Best Solution to Convert OLM to PST on Mac

Do you want to convert OLM to PST on Mac and searching for an appropriate & reliable method for the same? If yes, then simply stick with MacMister blog because here we will be providing a strategy that will instantly convert unlimited OLM to PST on Mac with emails, contacts, calendar, notes and tasks in few seconds.
Numerous Mac users put their belief on Microsoft Outlook and use the app on their Mac platform for communication. The task of MS Outlook is to give authority to users to manage the process of sending/receiving of mails or files from one location to another. And, in-between that, if a user want to extract essential data from Microsoft Outlook on macOS, then it can be done using the Import/Export option available in the application. By utilizing the option, one will be able to save the account emails, contacts, calendar and other items in OLM format.
However, the same app is available for Windows users as well. The responsibilities of Outlook on both the platforms are same. The only difference will be seen is in their file formats. OLM gets created in Mac and PST in Windows. They both stores the important data of users account in Outlook.
Why to Convert OLM to PST on Mac?
There are many whys and wherefores are present for converting OLM to PST on Mac but the three main of them are listed below:
- Change of an organization that is using Microsoft Outlook on Windows operating system.
- Users with Outlook on Mac need to send some crucial files to their colleague or a friend who is using Outlook on Windows.
- Moved from a Mac OS X to Windows and need to access OLM data on the same.
How to Import OLM to PST without Outlook on Mac?
There are basically two techniques for importing OLM to PST:
- Direct Procedure
- Manual Procedure
First, we will discuss the direct procedure that will directly perform the conversion into PST with 100% accurate database. And, then the second i.e. Manual procedure where total 5 steps needs to be operated to get OLM data into PST.
Method 1. Directly Convert OLM to PST using MacMister OLM to PST Converter
Mac OLM Converter Tool is a perfect application for exporting unlimited OLM mailboxes to PST on Mac at once. The software has been prepared with a simple friendly structure and equipped with the environment that is easily accessible by professional and non-professional users. The steps of the app are intuitive and easy to adapt. By executing just three clicks, users will be able to access entire OLM data into PST format.

Even, the solution is introduced with features which are advance and delivers impressive result within seconds. There will be no harm to the original data during the process. However, one can check the same by downloading the free demo edition.
Step-by-Step Process to Export OLM to PST on Mac
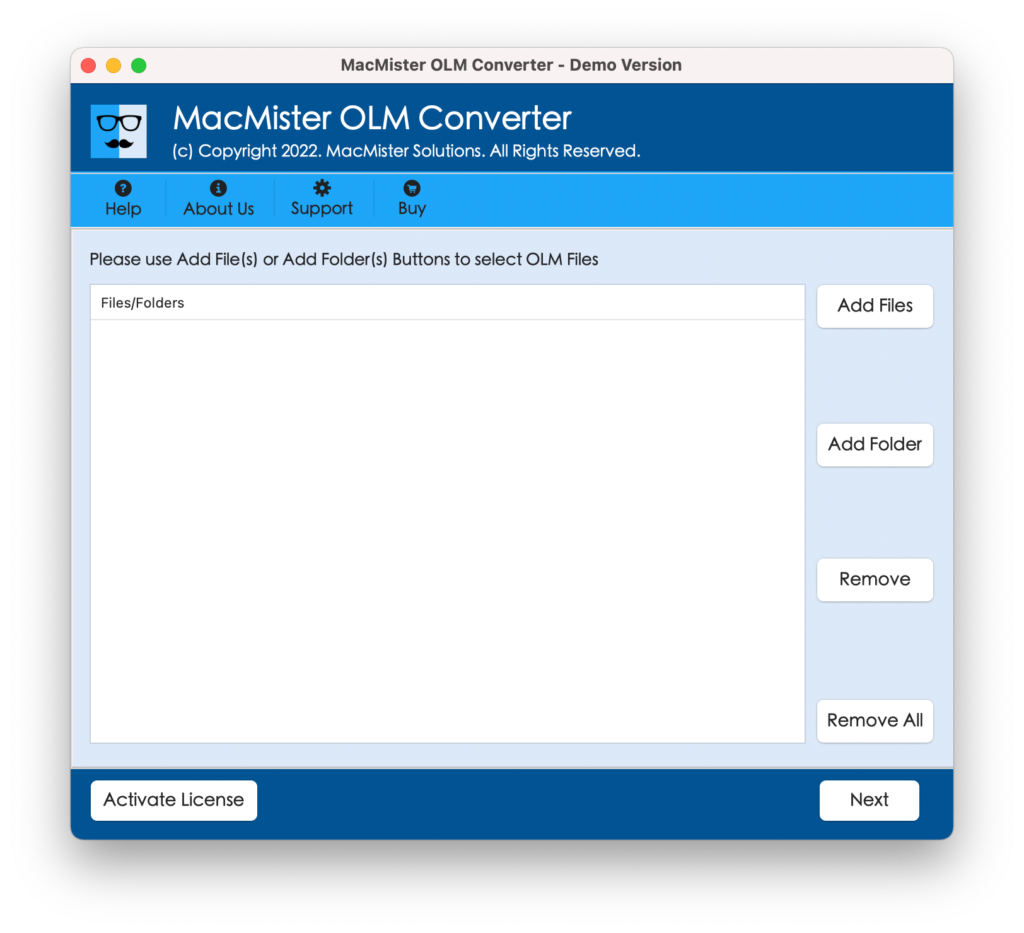
Step 1. Run Mac OLM to PST Converter for Mac Tool on Mac.
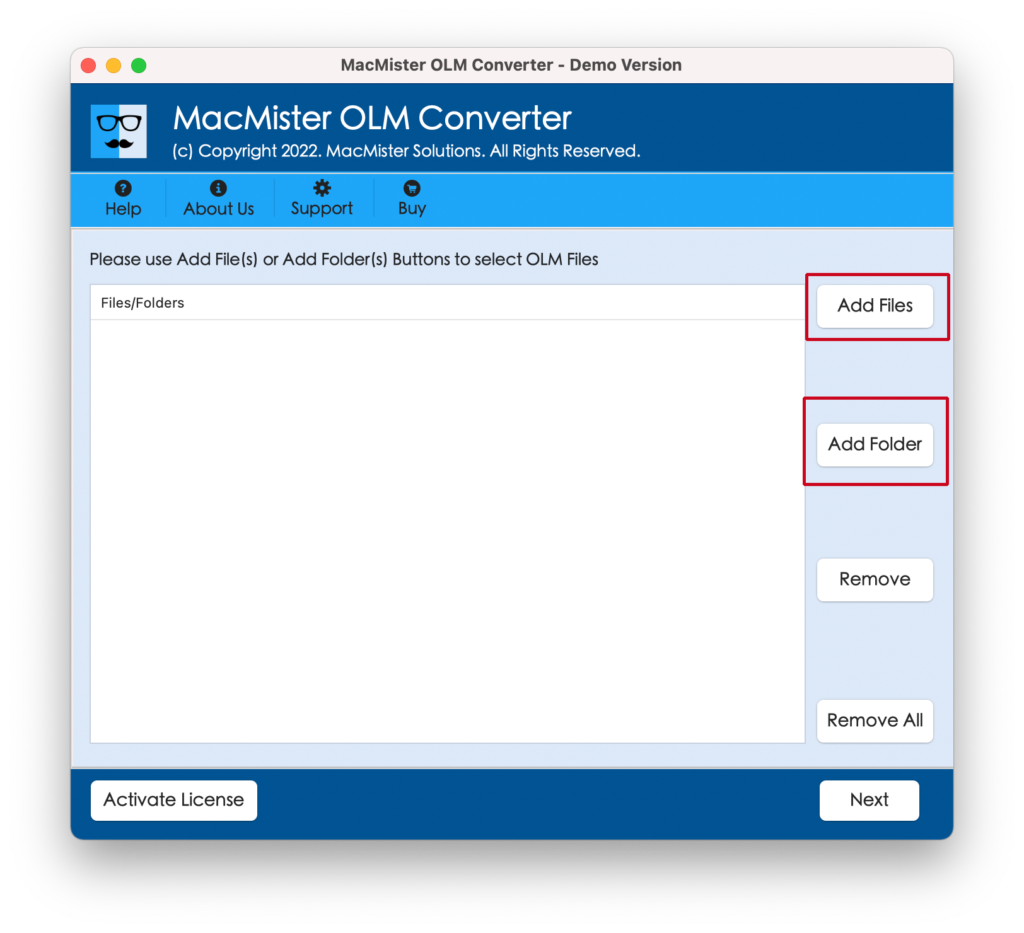
Step 2. By utilizing the Add File(s) option, add the required OLM files on the software. And, by making use of Add Folder button, load the necessary OLM folder on the software. Click Next after uploading the OLM files which needs to converted into PST format.
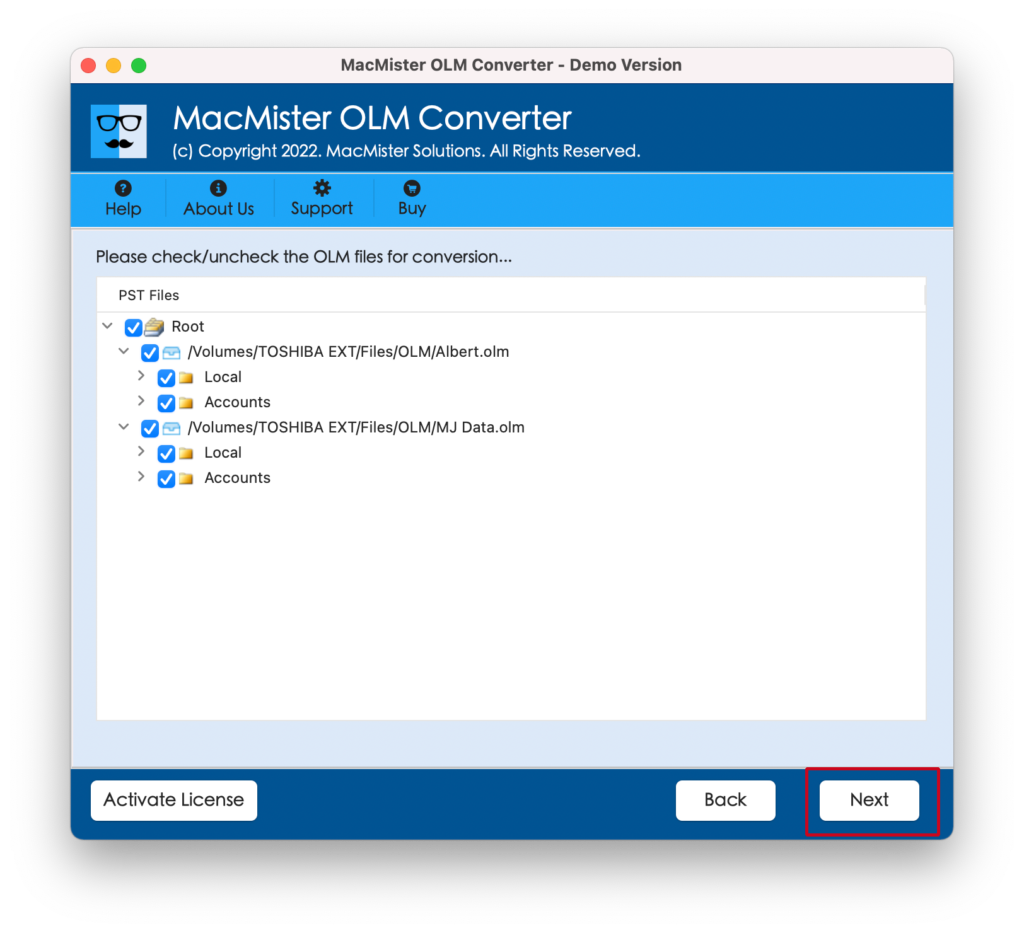
Step 3. OLM folder items will list on the app and shows in hierarchical structure. They will appear with a checkbox. By selecting them as per requirements, one will be able to import selective OLM files into PST. Click Next.
Step 4. Click Select Saving Option and choose PST as a saving format.
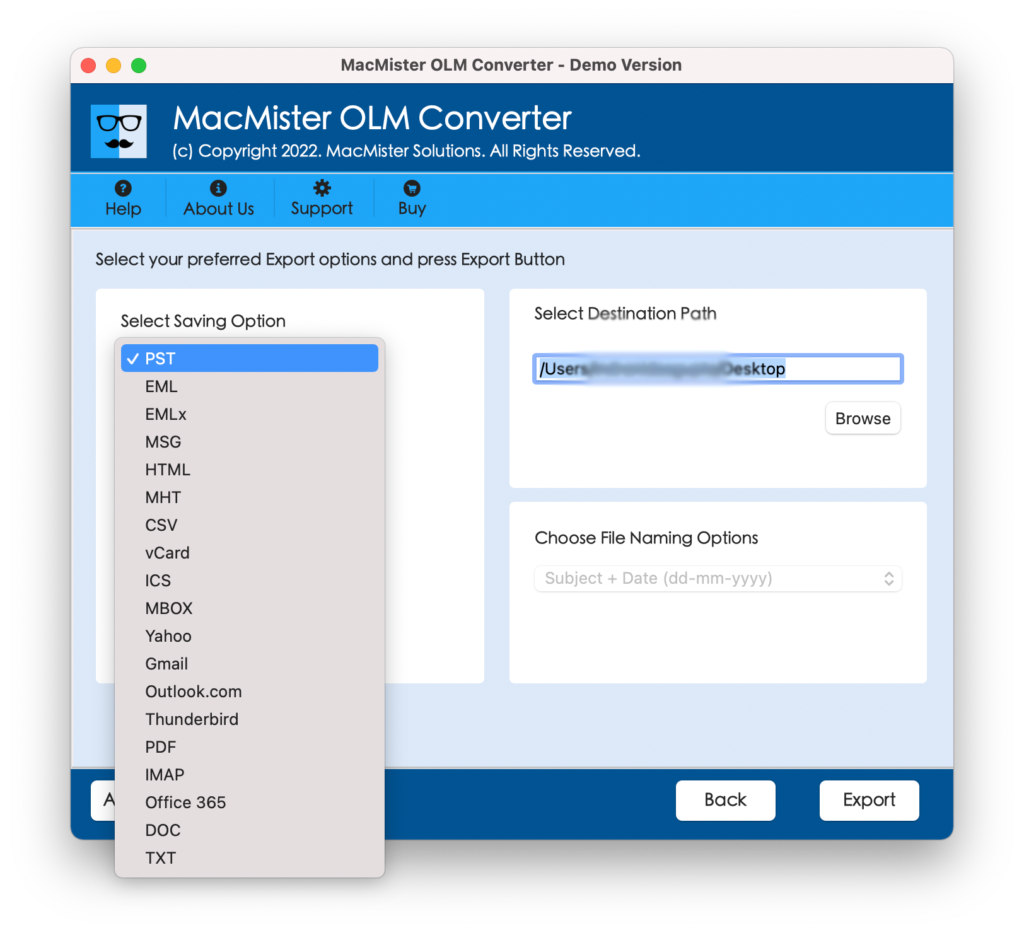
Step 5. Set the sub-options appearing under PST file and click on Export to start the conversion process.
Step 6. The conversion of Mac OLM to PST is now Live. Users can track the status of converted files as well by using the Live Conversion Screen as shown-
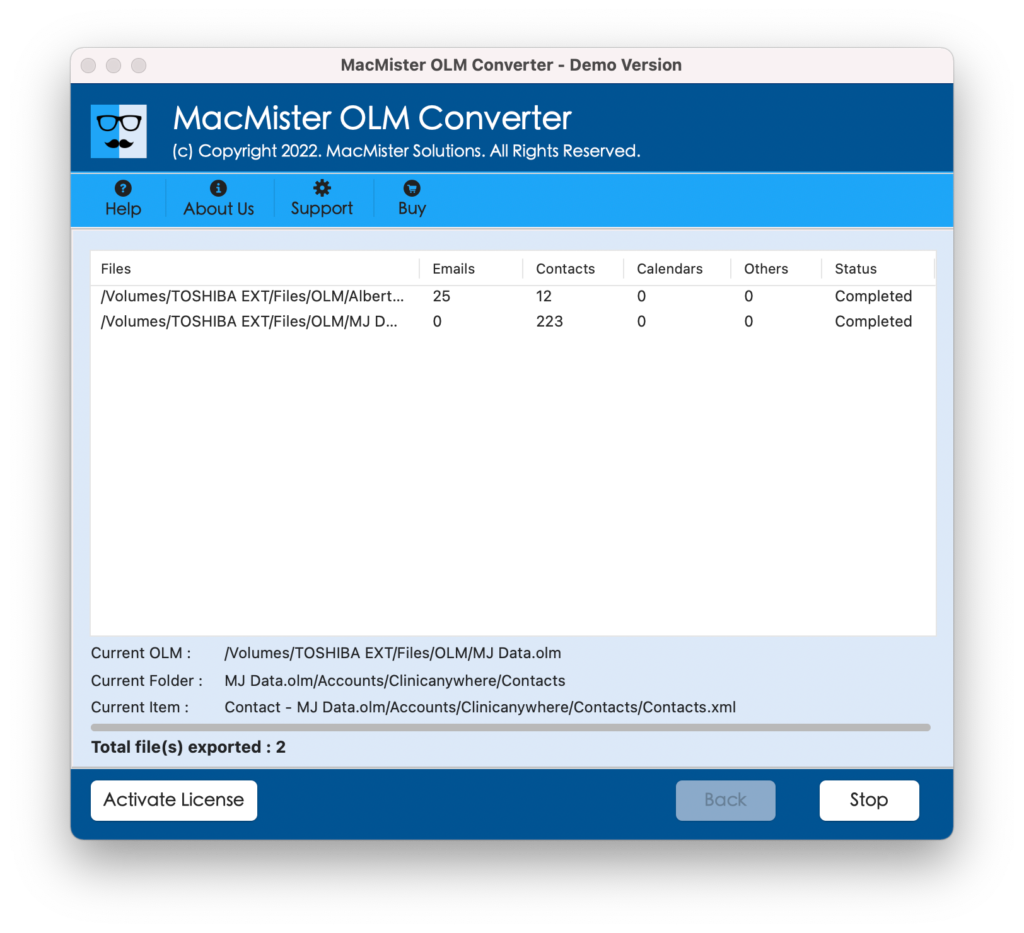
The procedure will execute smoothly by the application. Now, go to the location that is specified earlier and implement the import process of PST file on Mac Outlook or you can save the same on a cloud drive and download it on a Windows OS. Moreover, one can transfer the converted PST file on Mac to Windows by using external storage drive.
Note. Check the process for:
Method 2. Converting OLM to PST Manually on Mac OS
Implement the 5 steps appropriately and convert OLM to PST manually:
Step 1. Create IMAP Account with Google Mail
- Use the old account for performing this process.
- Also, make sure that IMAP Settings are activated and if not, then it will be a problem. So activate it before starting the process.
Step 2. IMAP Account Configuration in Outlook for Mac
- Open Outlook Mac, go to Tools and choose the Accounts tab.
- Select “+” and add a new account in Accounts tab.
- Select email option and provide the required details i.e. Email ID & Password.
- For incoming server, enter imap.gmail.com.
- For Outgoing server, select “Use SSL Connect” and enter smtp.gmail.com.
- In Outgoing Port, enter 465 and select Add Account.
- Yellow button will prompt on the left pane and will ask to provide the password. The button will become green when the password get verified. It will confirm that connection is complete.
Step 3. Importing OLM to Windows Outlook
- Select the required folder to transfer from OLM and then choose Copy option.
- Choose the desired folder in Gmail where one need to transfer necessary data.
- When files are uploaded, reload the Google Mail account.
Step 4. Configure the Same Google Mail Account to Outlook on Windows
- Open Windows Microsoft Outlook and click File option.
- Choose Account Settings option appearing in the right pane.
- Click New from the screen that is currently displaying.
- Select Manually Setup or Additional Server Types option.
- Check for Internet email and enter login credentials.
- Choose Account Type as IMAP.
- Provide Incoming Server as imap.gmail.com
- Apply Outgoing Server as smtp.gmail.com
- Click More Settings.
- Choose My Outgoing Server Requires Authentication displaying under Outgoing Server.
- Under Advance tab, provide incoming service port as 993.
- Choose SSL as encryption type.
- Provide port number as 465 showing in Outgoing Server port tab.
- Press OK.
- Choose test account settings.
- Press Finish.
Step 5. Transfer Complete Data into Windows Outlook Mailbox from Email Account
As email account is already configured in Windows Outlook, now one can directly move OLM data to Windows Outlook App.
Conclusion
The blog here mentioned different approaches for converting OLM to PST on Mac. The direct i.e. Mac OLM to PST Tool is a direct, verified and secure approach which has the ability to import OLM files to PST in a batch with 100% accuracy. The second method i.e. the manual approach is also implementable. I will not say that do not try it but make sure that you have lot of spare time for this. And, also it is important to execute the steps under expert’s guidance. In case you have any query, then contact MacMister Support straight away.