How to Save all Emails from Outlook before Deleting Account?
Deleting an email account is surely a big deal. Whether you are quitting your job, moving to a competitor’s services, migrating to a new custom domain, or simply tidying up your digital life, deleting an Outlook account permanently will erase the data forever. Once you click that “delete” button, you may lose all calendar events, important contacts, and years of conversation history.
Before moving forward with canceling your subscription or closing your account, it’s needed that you back up your data – which is why this guide has been put together, to walk you through the most effective ways of extracting all of your emails from Outlook. By doing so, you ensure that all of your information will remain in a safe place, accessible and easily searchable even once your account has been closed.
Method 1: Exporting Data to an Outlook PST File
For those using the classic desktop version of Microsoft Outlook, whether through a full Microsoft 365 suite or as a standalone Office application, the most straightforward step is to export your complete mailbox into a single Personal Storage Table (.pst) file that stores a local archive copy of all of your emails, folders, attachments, calendar events and contacts.
Step-by-Step Instructions:
- Run Microsoft Outlook desktop email application on the system (ensure that your account synchronization is working properly).
- Navigate towards File tab displaying on the top left corner of the ribbon.
- Go to the left-side menu, click Open & Export and choose Import/Export option.
- From Import & Export Wizard screen, choose Export to a file and tap Next button.
- Choose Outlook Data File (.pst) and press Next button.
- Choose the account for backup from the file you have chosen. Select the top folder and make sure that an Include subfolder is checked. Click Next.
- Now, using a new window, tap Browse button and select necessary location to save the PST file. However, you may also an choose an external hard drive or a safe cloud backup folder.
- Specify explanatory name to PST file such as Outlook_Backup_2026.pst. Finally, tap Finish to end the task.
Quick Tip: You’re being asked to assign a PST file a password because you’re entering your Outlook account information. If you want to protect your personal info and messages, you should set a password but be sure to save it somewhere safe so you don’t lose access.
Method 2: Backing Up via Outlook on the Web (OWA)
If you normally use Outlook in a web browser at Outlook.com or Microsoft 365 Web instead of the Outlook desktop app, Microsoft has a built-in tool to export a copy of your mailbox. Ask Outlook to export a copy of your mailbox using their tool.
Step-by-Step Instructions:
- Sign-in to Outlook.com by specifying necessary credentials.
- Navigate towards Settings (gear icon) appearing in the top right corner.
- Go to General in the left sidebar, and then click Privacy and data.
- From the “Export mailbox” section, tap Export mailbox button.
- Microsoft will initiate preparing the backup. This process will be done in the cloud and the time it could take will be from a few hours to a few days, depending on the size of inbox folder.
- Check back from time to time. After the export is complete, you will receive an email with a download link to save your mailbox as a PST file directly to your computer.
Method 3: The “Drag-and-Drop” Method for Selective Archiving
If you’ve only want to save a handful of key conversations and not terabytes of promotional emails and newsletters, the manual “drag and drop” technique is super easy. It saves emails as single .msg or .eml files.
Step-by-Step Instructions:
- Create a new folder on your desktop or external drive (e.g., “Saved Client Emails”) on your computer.
- Open the Outlook desktop application and resize the window so you can be looking at both Outlook and your new desktop folder at the same time.
- Select the emails you wish to save. You can click and drag your mouse to form a block. Or clicking Ctrl (Windows) or Cmd (Mac) lets you click on separate emails as you wish.
- CTRLCMD click and drag the emails into the desktop folder.
- The emails will be directly saved as separate files that can be opened later by almost any mail client.
Method 4: Forwarding and Mirroring to a Free IMAP Account
If you are in the process of deleting your Outlook account, but you want to still have your old emails on your phone or in a new web browser, sync or forward them to a no-cost alternative such as Gmail.
Using an External Email Client:
One clean method is using a free desktop client such as Mozilla Thunderbird.
- Download Thunderbird and add your old Outlook account and your new email account via IMAP.
- Let Thunderbird download all folders from both accounts.
- After downloading, make a new archive folder in your new account.
- Select all your old Outlook inbox messages, right-click, and choose Copy to, then your new account’s folder.
- The client uploads your old email onto your new providers cloud servers.
Method 5. Using Professional and Powerful Approach
Another quick and powerful way to save all emails from Outlook is MacMister PST Converter for Mac & Windows. The application has the ability to save PST files into 15+ saving options. Its interface is friendly and manageable. Anyone can operate the software without any trouble and save PST files with ease. Meanwhile, the tool will take care of users PST database during the process. Follow the steps below to save all emails from Outlook before deleting account using a professional and effective approach –
Quick Tip – For Mac, make use of MacMister OLM Converter for Mac & Windows. It helps in saving all emails from Outlook for Mac into 15+ saving options such as EML, PDF, MSG, HTML, PST, DOC, CSV, Yahoo Mail, IMAP, Gmail, and more. without any data loss.
Step 1. Run the application on a Mac machine.
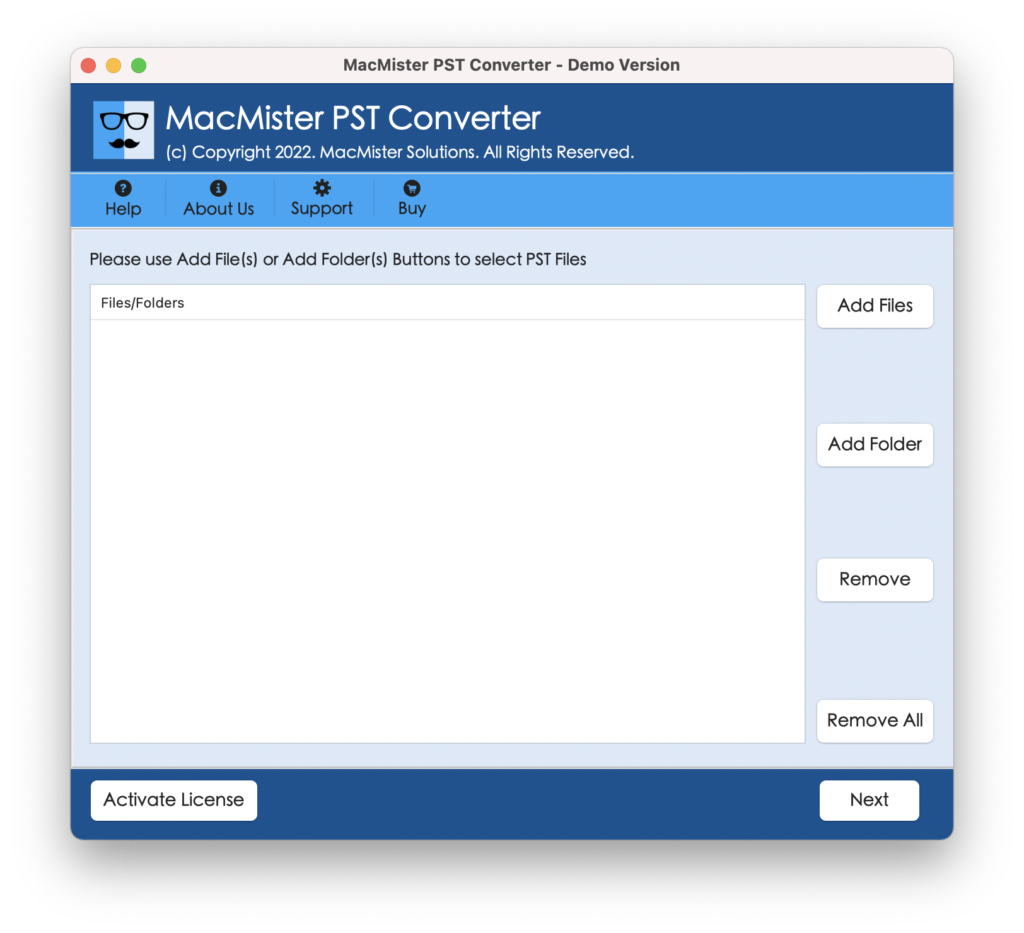
Step 2. Utilize Add File(s)/Ad Folder buttons to load PST files/folders on the application.
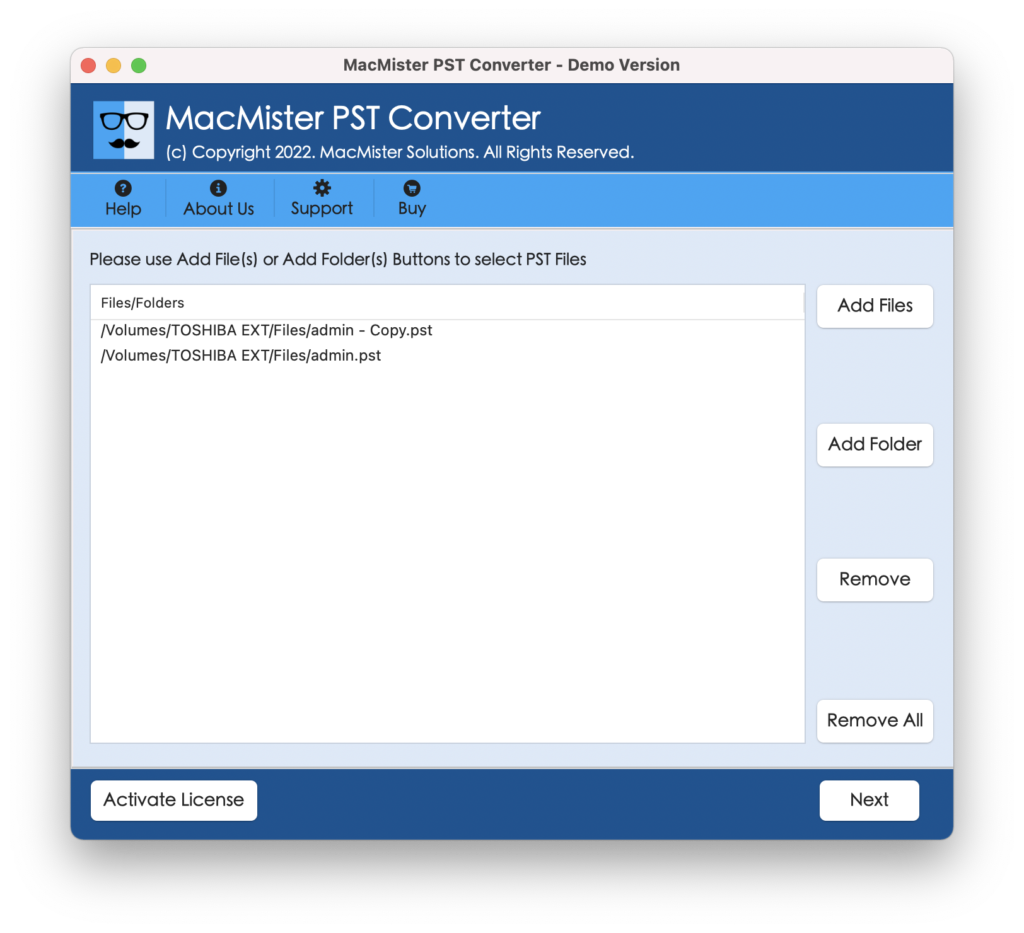
Step 3. Verify the files listed; select the checkboxes for selective conversion, if required.
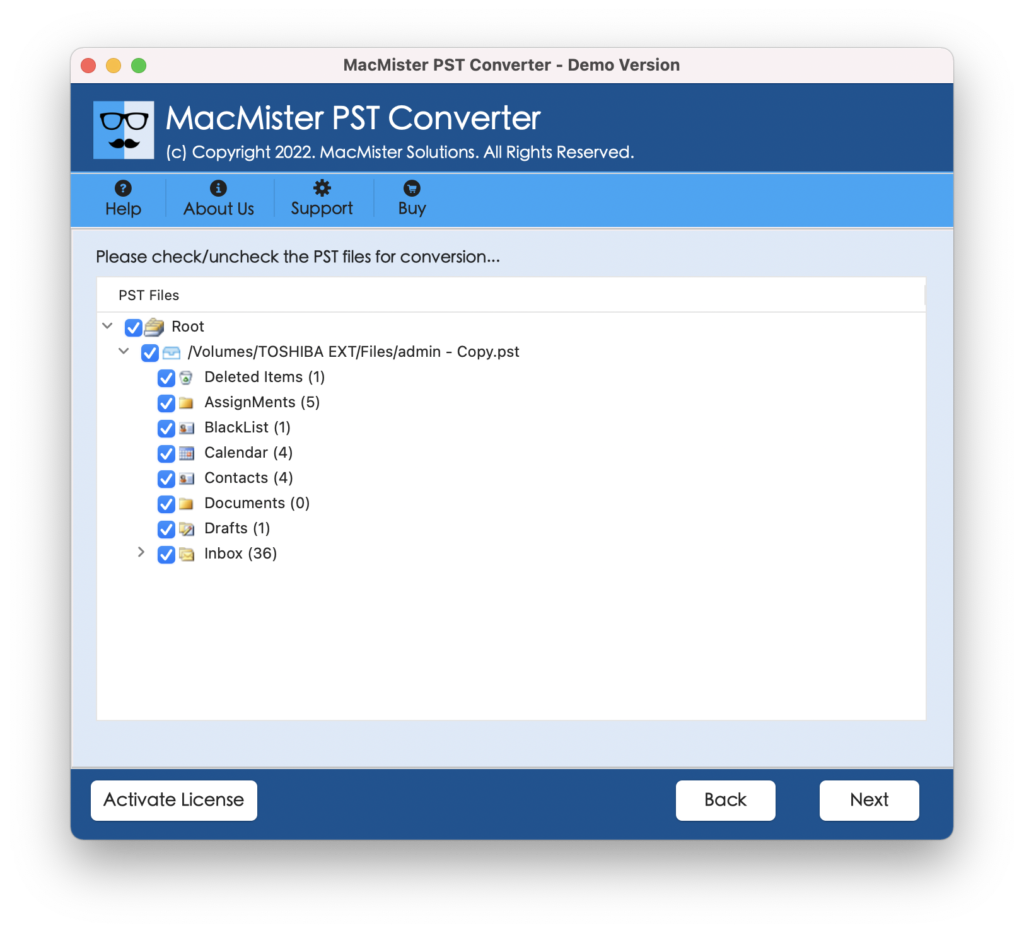
Step 4. Pick necessary saving type from Select Saving Options.
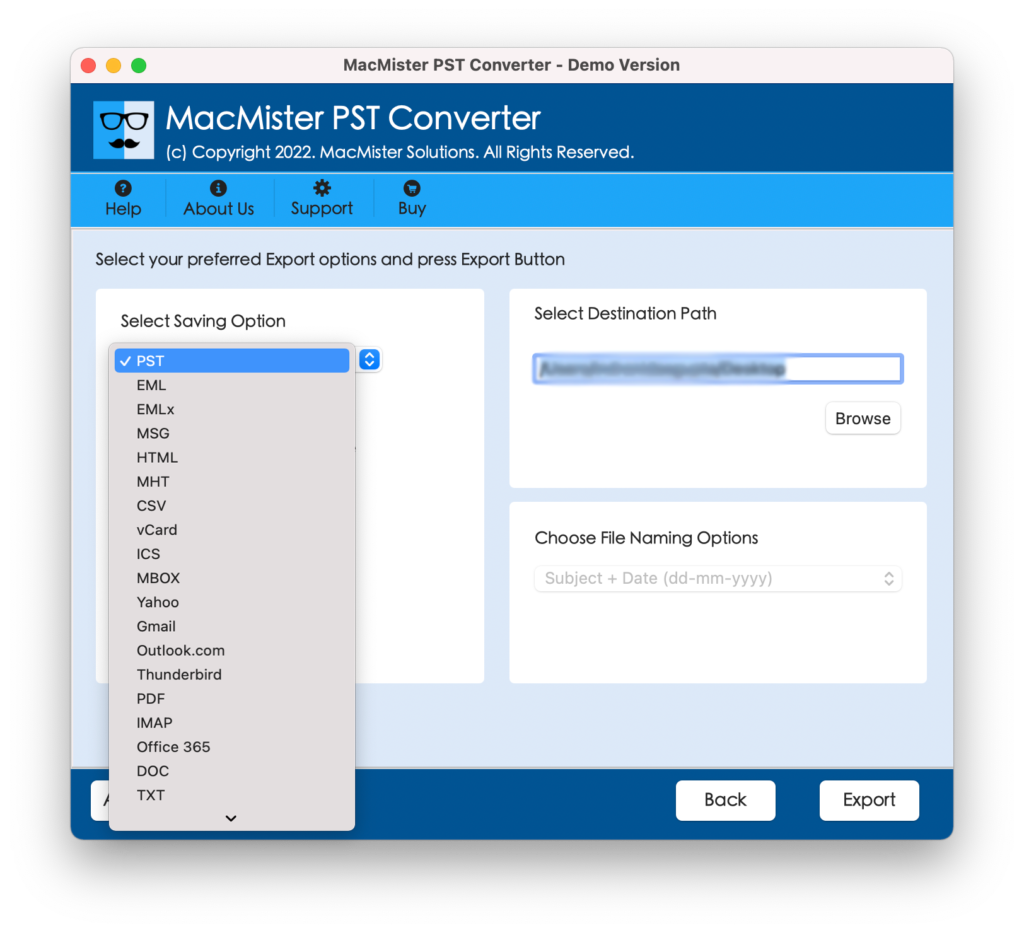
Step 5. Set sub-options according to the requirements and tap Export.
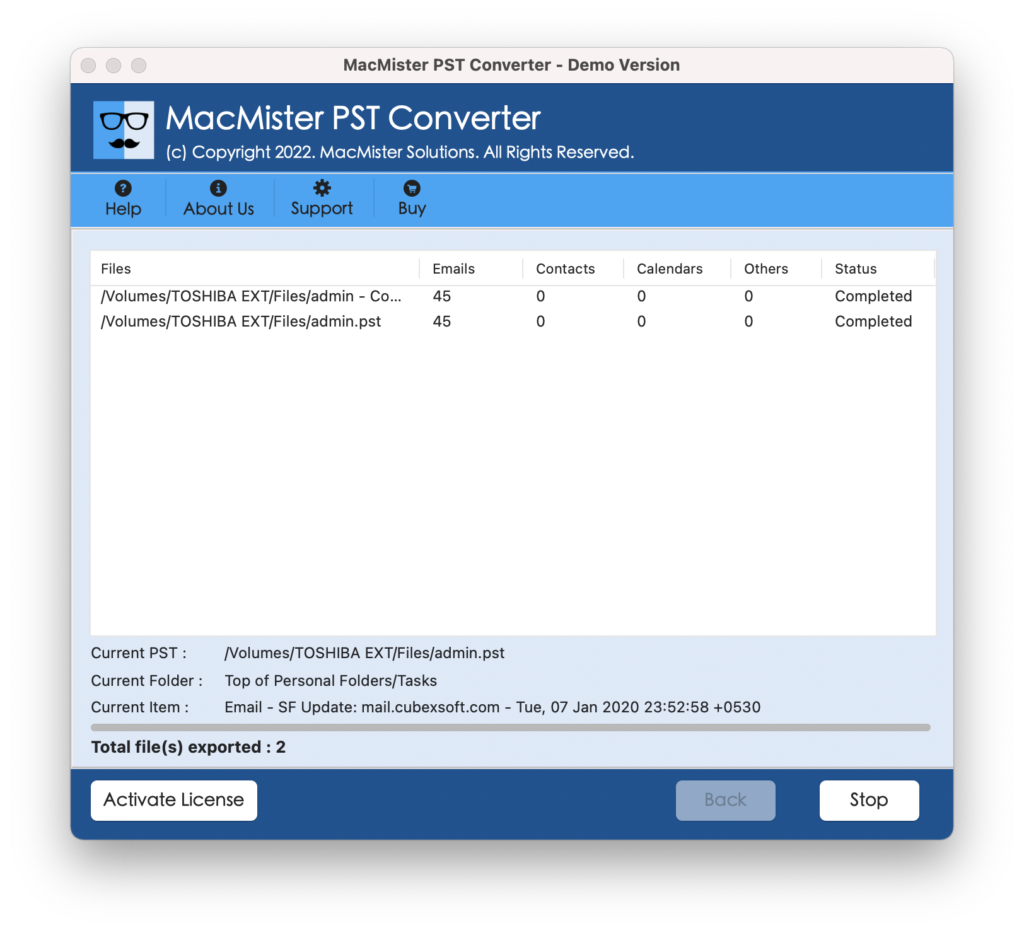
Step 6. Check live process using Live Conversion Report appearing on the screen.
Things to Remember before Backup
Five minutes before you navigate to your Microsoft account dashboard for the final “Close Account” click, read this checklist. A mailbox isn’t just the content of the emails inside.
- Verify Your Contacts: Your contacts are included if you export a PST file. If you are exporting via the web or manually saved, go to the People tab in Outlook and specifically export as .csv file. This will allow you to import your address book into Gmail, Apple Mail or a CRM.
- Export Your Calendar: If you have years of appointments, flight history, and meetings logged, navigate to your Calendar in Outlook, click File > Save Calendar, and export as an iCalendar (.ics) file.
- Update 2FA (Two-Factor Authentication): This is the biggest mistake people make. Is your Outlook account email being used as the recovery email address for your bank, social media sites, or streaming services? Change those accounts to your new email before you delete Outlook.
- Create a Temporary Auto-Responder: If possible, do not delete the account right away. Create an auto-reply that says: “This account is being deactivated. Please reach me at my new address: example@domain.com.” Leave this running for 30 days to ensure anyone who missed the flyer can still find the message.
Final Thoughts
After your account is deleted, your local PST file is your life raft. To see these emails in the future, you don’t need a live Outlook email address; you only need the Outlook application (or a free PST viewer tool). Open it by selecting File > Open & Export > Outlook Data File in any Outlook app.
Alternatively, without more ado, utilize the suitable approach and save all emails from Outlook before deleting account with 100% accuracy.