How to Transfer DreamHost Emails to IMAP Account on Mac?

This guide explains how to transfer DreamHost emails to IMAP account on Mac, including a manual approach and an automated solution for handling multiple mailboxes and maintaining important email properties.
DreamHost is widely used for hosting websites and managing business email accounts. Over time, users may need to move their existing DreamHost mailbox data to another IMAP account for account consolidation, email management, or migration to a different email service. When the mailbox contains a large number of emails, attachments, and folders, transferring everything manually can require considerable time and effort.
Overview of DreamHost and IMAP Account
DreamHost email accounts can be accessed through standard email applications and support IMAP-based mailbox access. IMAP keeps email data synchronized with the mail server, allowing users to access their messages and folders from different devices.
IMAP account can also be used as a destination when moving mailbox data from one email service to another. During migration, users may want to retain the original folder organization, email content, attachments, and other properties.
Therefore, transferring DreamHost emails to another IMAP account can be useful when moving mailbox data while continuing to work with supported email service.
Why Transfer DreamHost Emails to IMAP Account?
- To migrate emails to a new email service.
- To consolidate messages from different accounts.
- To maintain access to older DreamHost emails.
- To move business or personal mailbox data to another IMAP account.
- To preserve folders and email attachments during migration.
- To transfer multiple mailboxes as part of an account migration project.
Manual Method to Move DreamHost Emails to an IMAP Account
A manual migration can be performed through an email application that supports IMAP accounts.
Step1 – Configure DreamHost Account – Open an IMAP-supported email application on your Mac and add the email account using the required account credentials and server settings.
Step2 – Add the Destination IMAP Account – Configure the new IMAP account in the same application and verify that both accounts are accessible.
Step3 – Move Emails – Select the required folders and emails from the DreamHost account and move or copy them to the corresponding folders under the destination IMAP account.
Step4 – Verify the Migration – After transferring the messages, check the destination account and verify folders, emails, and attachments.
This method may work for a small mailbox, but manually moving a large amount of data can become difficult.
Limitations of the Manual Method
- Manually transferring a large number of emails can be time-consuming.
- Multiple mailboxes require repeated configuration and transfer steps.
- Folder organization may require additional checking after migration.
- Large attachments can increase the migration time.
- Selecting specific emails manually can be inconvenient.
- There is a greater possibility of missing messages during a large-scale transfer.
- Managing multiple accounts simultaneously can make the process more complicated.
Smart Solution to Transfer DreamHost Emails to IMAP Account
For users who need to migrate a larger mailbox or multiple DreamHost accounts, MacMister DreamHost Email Backup tool for Mac provides a dedicated way to transfer mailbox data directly from DreamHost to IMAP account.
|
|
|


The tool is designed to simplify the migration process by allowing users to connect their DreamHost account, enter the destination IMAP account details, and transfer mailbox data without manually moving individual messages.
It also supports batch migration, making it possible to process multiple DreamHost accounts together. This can be useful for organizations or users managing several mailboxes.
Key Features of DreamHost to IMAP for Mac Tool
- Direct Migration – Transfer email data directly from a DreamHost mailbox to the selected IMAP account.
- Batch Migration – Process multiple DreamHost accounts in a single migration session instead of handling each mailbox separately.
- Preserve Email Properties – The software maintains important email properties such as sender, recipient, subject, date, message content, formatting, and other available email attributes during the transfer.
- Maintain Folder Structure – Mailbox folders can be transferred while retaining their organization, helping users access migrated messages more conveniently.
- Attachments Preservation – Email attachments are transferred along with their associated messages.
- Advanced Filters – Users can apply available filtering options to select the required mailbox data instead of transferring everything. Filters can help narrow down emails according to specific migration requirements.
- Transfer to Any IMAP-Supported Client – Users can transfer DreamHost emails to any IMAP-supported mail client or webmail client, making it easier to access migrated mailbox data through their preferred email platform – Apple Mail, Mozilla Thunderbird, Microsoft Outlook, eM Client, Gmail, Yahoo Mail, Outlook.com, and other IMAP-compatible email services.
- Mac Compatibility – The software supports all major Mac editions, allowing users to perform DreamHost email migration across supported macOS environments, including macOS Tahoe, Sequoia, Sonoma, Ventura, Monterey, Big Sur, Catalina, Mojave, High Sierra, and Sierra.
- User-Friendly Interface – The migration process is organized into simple steps, making it easier to configure the source and destination accounts and begin the transfer.
Steps to Transfer DreamHost Emails to IMAP on Mac
Download and launch MacMister DreamHost to IMAP for Mac Tool.
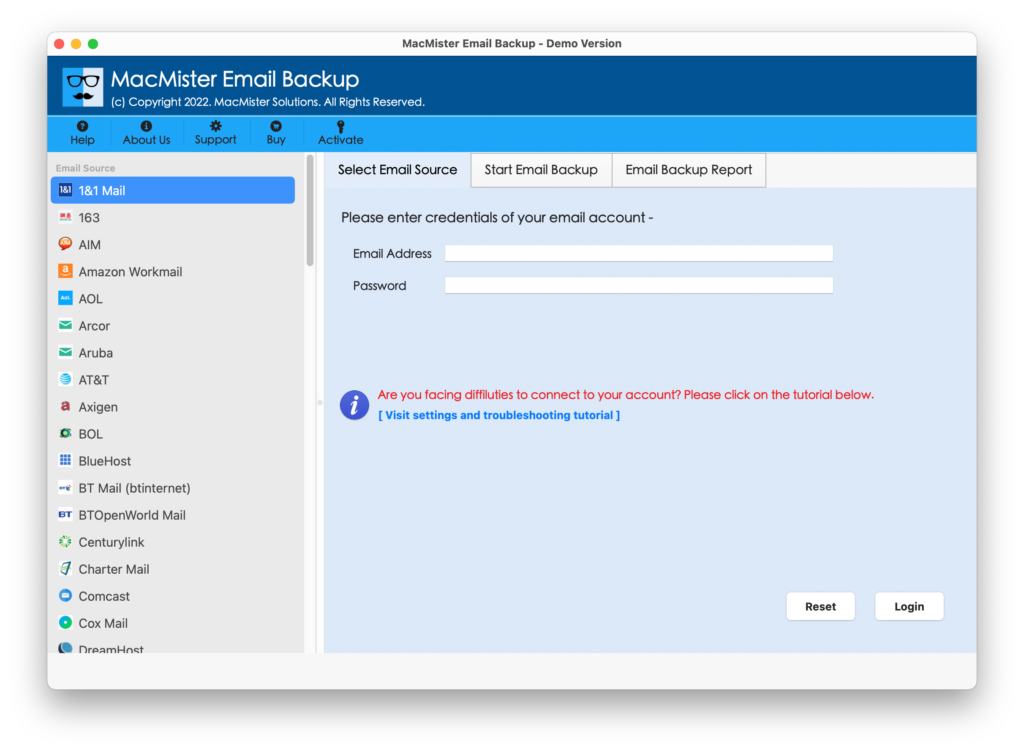
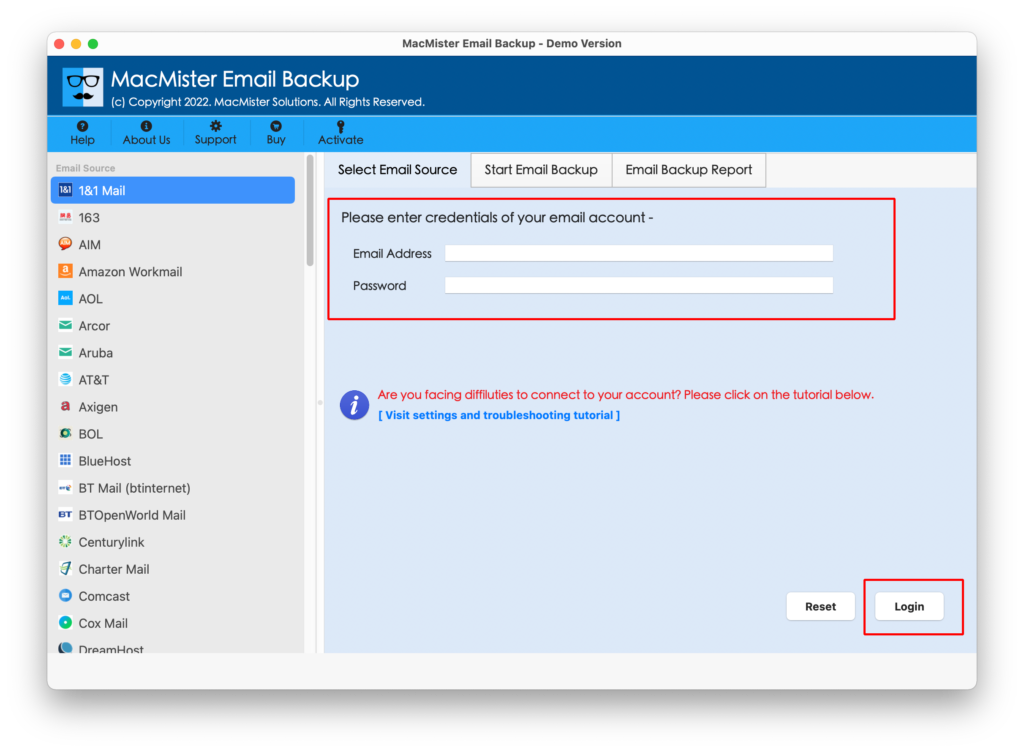
Select DreamHost Webmail account and enter the required DreamHost account credentials.
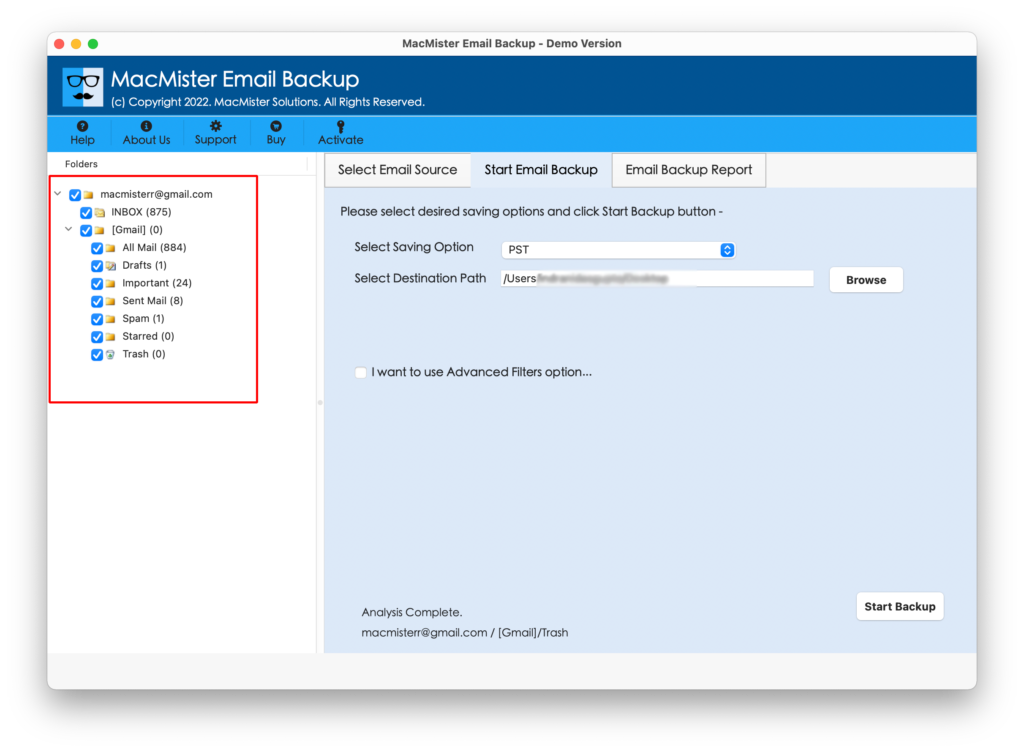
Select the folders or mailbox data you want to transfer.
Choose IMAP from the list
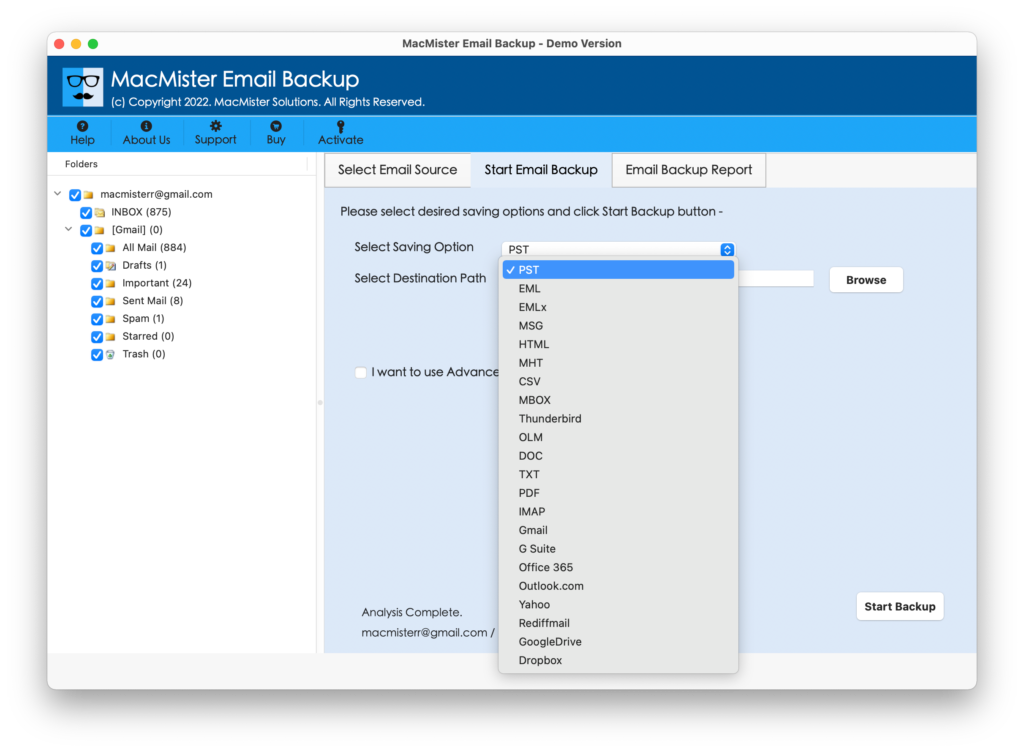
Enter the destination IMAP account credentials.
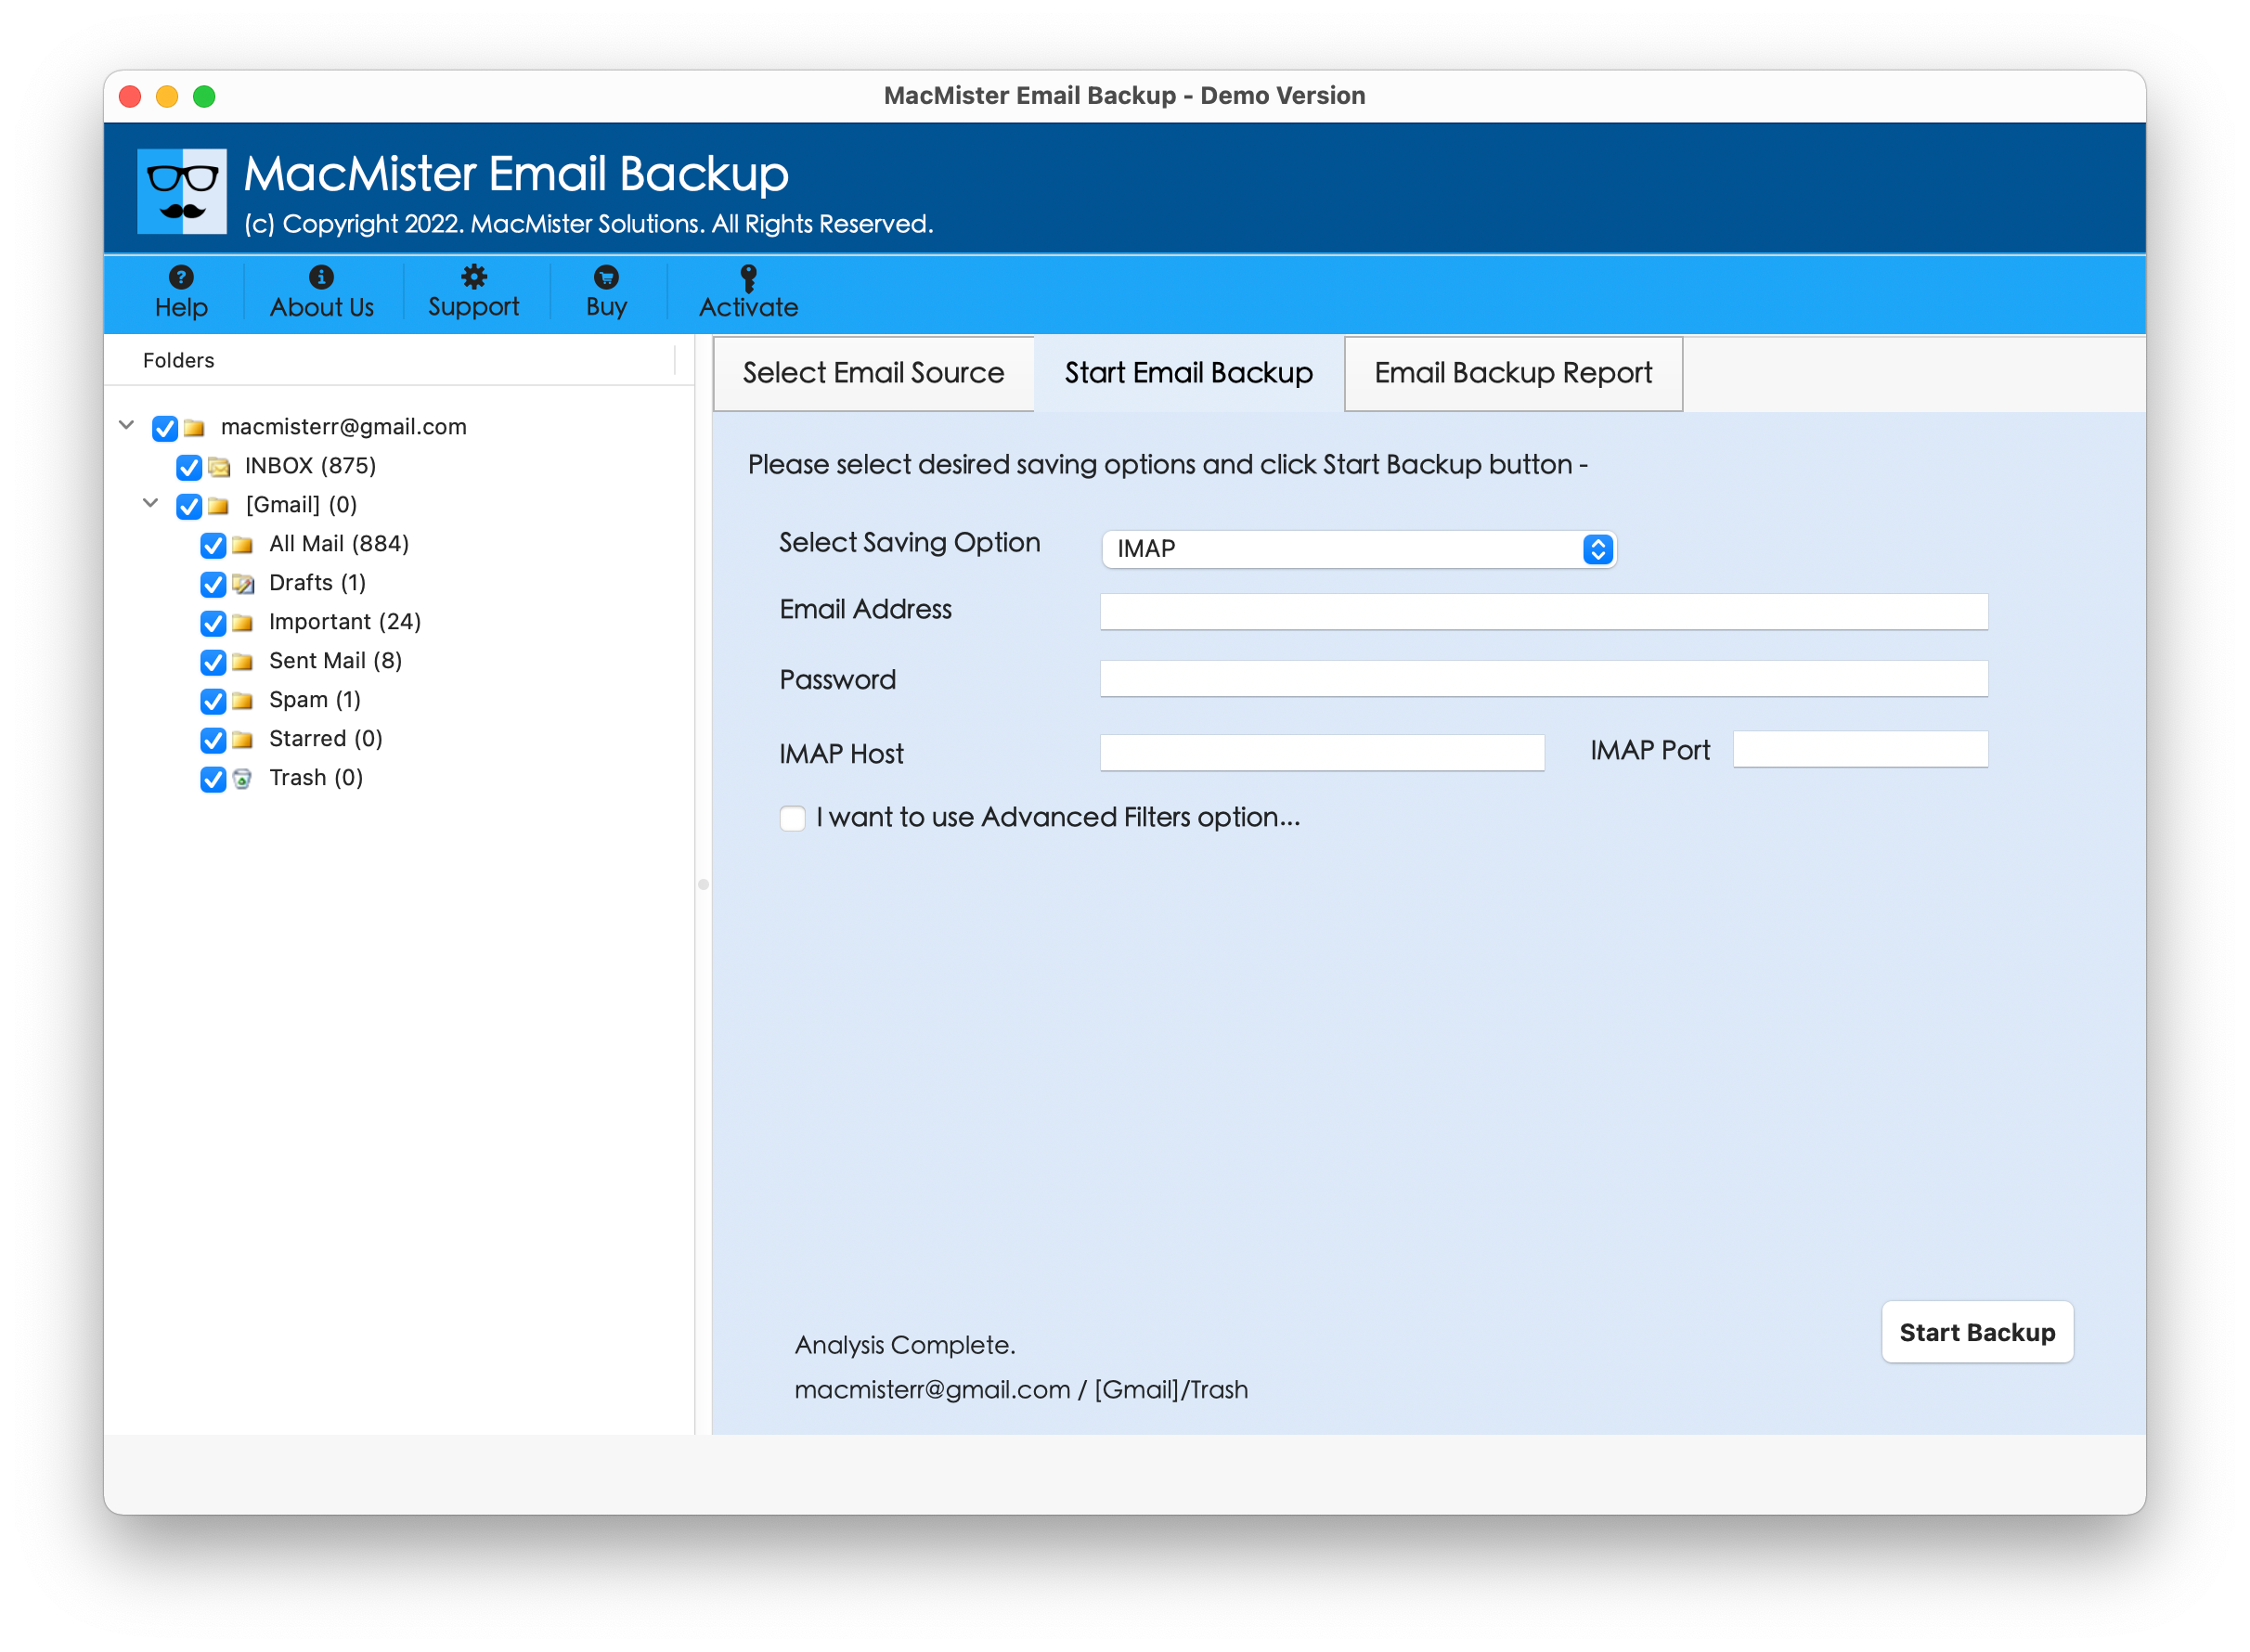
Click on Start Backup button to start the transfer process.
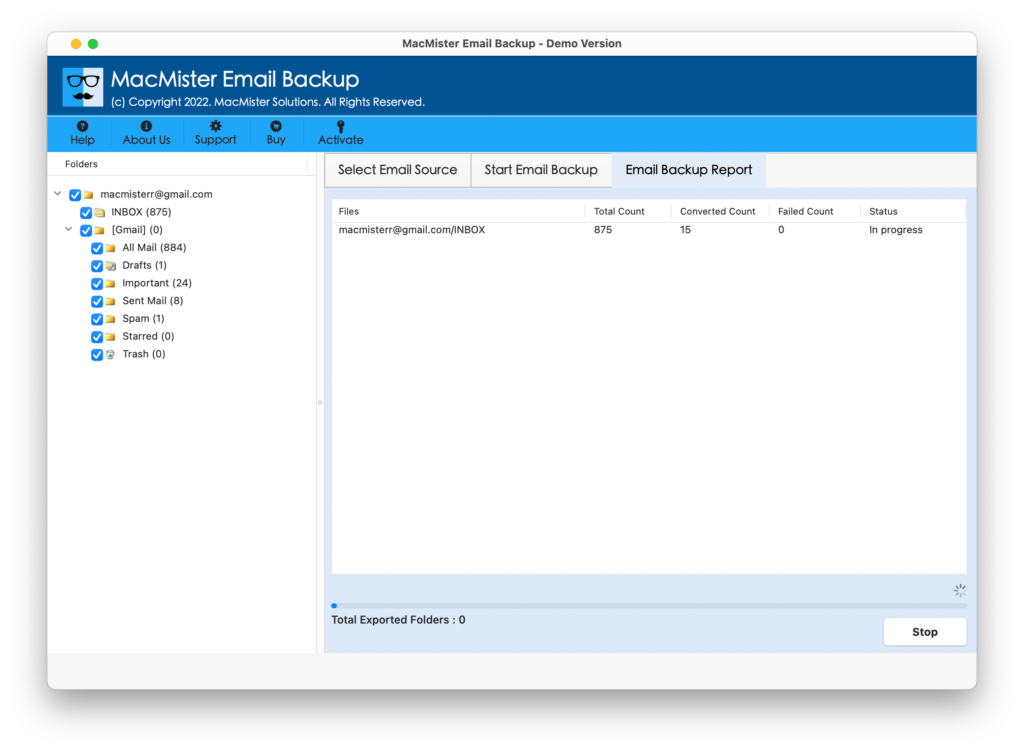
For multiple accounts, the batch option can be used to process the required mailboxes together.
Frequently Asked Questions
Q. Can I transfer DreamHost emails directly to an IMAP account on Mac?
Ans. Yes. The DreamHost to IMAP for Mac tool provides a direct option to migrate DreamHost mailbox data to IMAP account.
Q. Can I migrate multiple DreamHost accounts at once?
Ans. Yes. The software supports batch migration, allowing multiple DreamHost accounts to be processed together.
Q. Will email attachments be transferred?
Ans. Yes. Email attachments are transferred along with their corresponding messages during the migration.
Q. Can I select specific emails for migration?
Ans. Yes. The available filtering options can be used to narrow down the mailbox data according to your migration requirements.
Q. Does the software preserve email properties?
Ans. Yes. The tool is designed to retain important email properties and mailbox information during the transfer.
Q. Is the DreamHost to IMAP tool compatible with Mac?
Ans. Yes. the DreamHost to IMAP account tool supports all major Mac editions.
Conclusion
Transferring DreamHost emails to an IMAP account can be performed manually by configuring both accounts and moving messages between them. However, this approach can become difficult when dealing with large mailboxes, multiple accounts, folders, and attachments.
The DreamHost to IMAP Backup Tool for Mac provides a dedicated migration option for transferring emails directly to an IMAP account. With batch migration, email property preservation, folder and attachment support, filtering options, and compatibility with Mac editions, it can simplify the process of handling larger migrations.