How to Import Outlook PST File from Windows to Mac?
IT specialists and everyday Mac users face a frustrating platform problem when trying to deal with email archiving in ecosystems. If you use Microsoft Outlook for Mac, you will understand that the application export data into an OLM (Outlook for Mac) file format by default
But Windows Outlook uses only the PST (Personal Storage Table) file format. In case you need to backup your mailboxes for compliance, move to another computer, or generate an archive from old data in a universal corporate format, then it is important to overcome the OLM-to-PST obstacle.
In this practical guide, we will talk about why such a common obstacle is existing, failure modes of manual solutions, and how to convert OLM files into PST using the professional approach
The Core Technical Conflict: OLM vs. PST
Prior to making any changes to your configuration, it is important to realize why this process is not as simple as just “Save As.”
- The PST format is designed by Microsoft to run on Windows systems, PST files are database files that serve as an archive of emails, calendar events, contacts, and task lists.
- When Microsoft designed Outlook to be compatible with the macOS system, they chose to create the OLM database package in order to fit their specific File System called APFS.
As the two formats employ different database structures, a Windows computer will not be able to open and read a Mac’s default OLM file. For smooth transfer of data, one needs to convert the data structure itself.
Method 1: The Primary Manual Workaround (And Its Critical Limitations)
There is one approach which does not require any third party tool and is a free one that can be utilized to export the information in PST form; however, there are severe limitations on its use. The process involves the use of a cloud-based server (IMAP or Microsoft 365) to transfer the data.
The Manual Synchronization Procedure
In case you have a smaller mailbox (below 2 GB) and both a Mac and a Windows computer, do the following:
- Create a free IMAP mail account (Gmail, Outlook.com, and others) in your Mac Outlook program.
- Create a folder hierarchy within this IMAP account and transfer your emails from the Mac Outlook program into this folder. Let the program sync entirely with the cloud service.
- Start up the Windows machine and set up the identical IMAP account in Windows Outlook.
- When you ensure the synchronization between the mail stored in the cloud and your desktop version, go to File > Open & Export > Import/Export and select Export to a file, format it as Outlook Data File (.pst) and export the selected IMAP folder.
Why the Manual Workaround Frequently Fails?
Free though it is, this system presents great operational risks when dealing with corporate archives or even large personal archives:
- The process of uploading/download gigabytes of messages and attachments is extremely slow and usually ends up failing halfway through owing to server timeout issues.
- The drag-and-drop procedure commonly loses raw metadata, such as flags, read/unread status, and inline attachments.
- Deeply nested folder structures usually get flattened in the IMAP transition process.
Method 2: Apply Direct Solution
In order to maintain data integrity and avoid the multistep platform hop, the professional migration process utilizes specialized extraction tools. The MacMister OLM Converter for Mac takes advantage of these vulnerabilities by converting the native Mac Outlook database file (.olm) to a Windows-compatible .pst archive on the Mac itself.
Working Steps of the Application
First, you need to export your local information from Mac Outlook by launching the application, selecting Tools > Export, choosing Mail, Calendar, and Contacts and saving the output .olm file to your desktop.
Then, convert the data by performing the following operations on macOS:
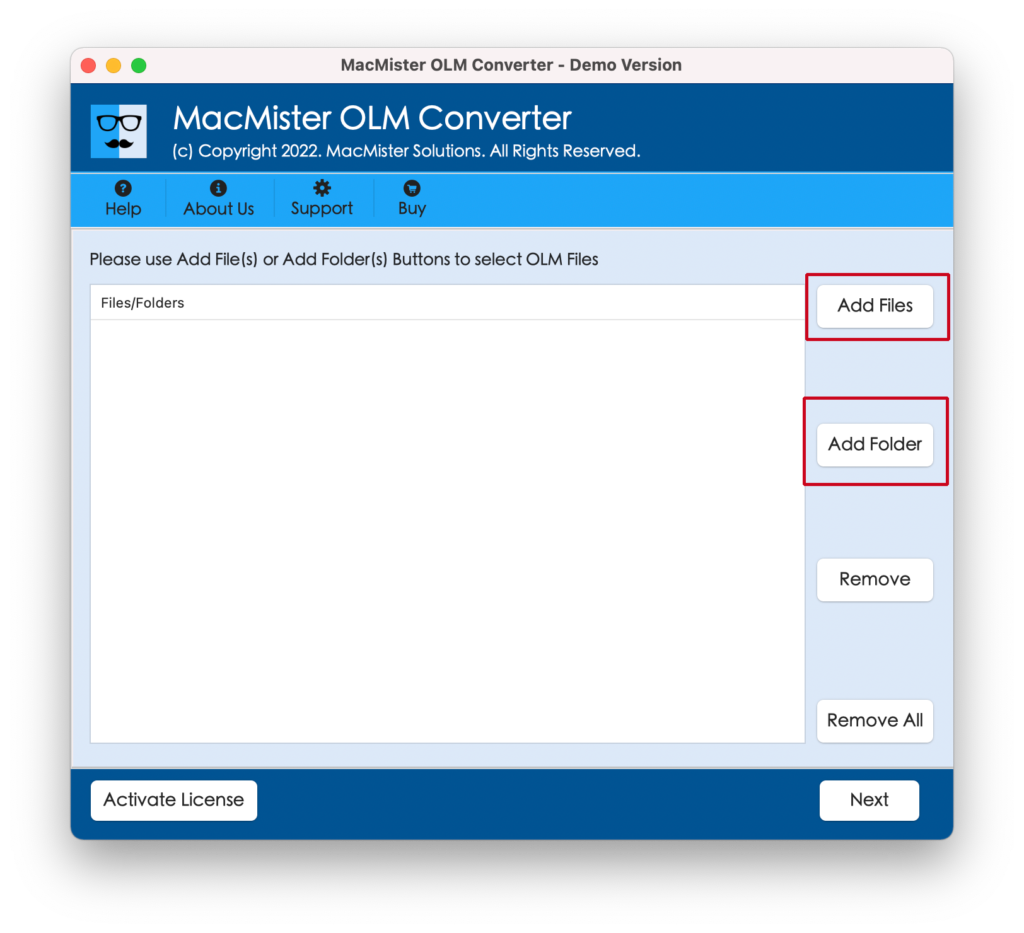
Step 1. Run the application on your Mac system. Tap on Add Files or Add Folders to add the exported OLM archive file stored in your system storage.
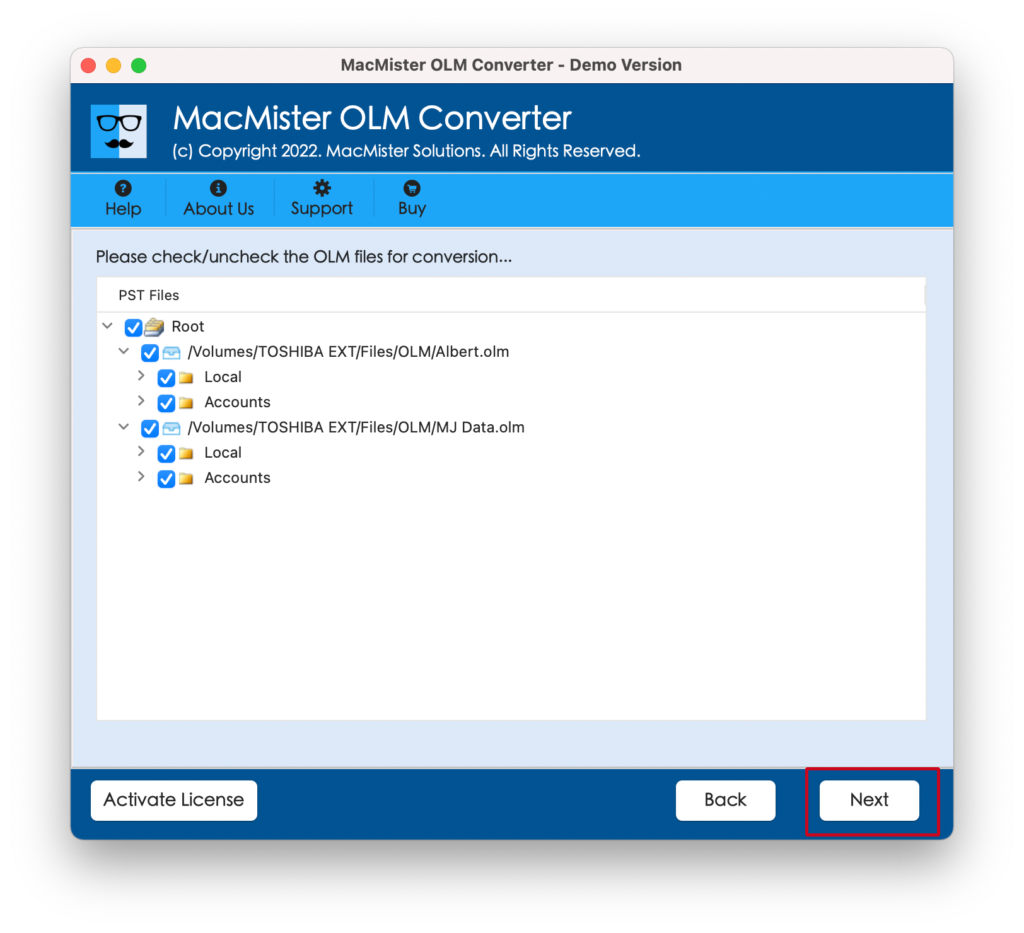
Step 2. The program will scan through the file hierarchy and provide you with an interactive preview window. You can tick off certain folders such as selecting the migration of only the Inbox but not Junk or Deleted Items to filter the data.
Step 3. From the Select Saving Option drop-down list, select PST among all the formats available to you including MBOX, EML, and PDF.
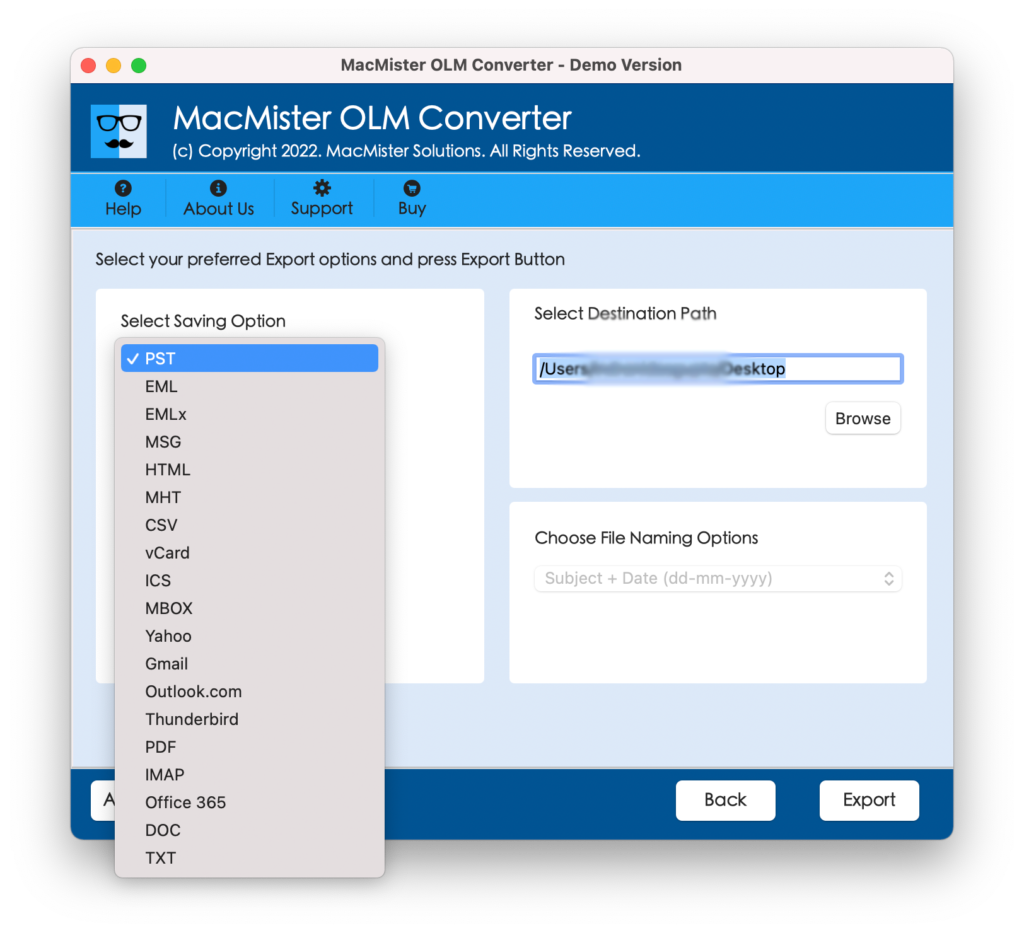
Step 4. Enter the location where you want to save your converted data. Make sure that you select the option for Maintaining Folder Hierarchy and pick file-naming conventions for sorting your output based on date or subject information.
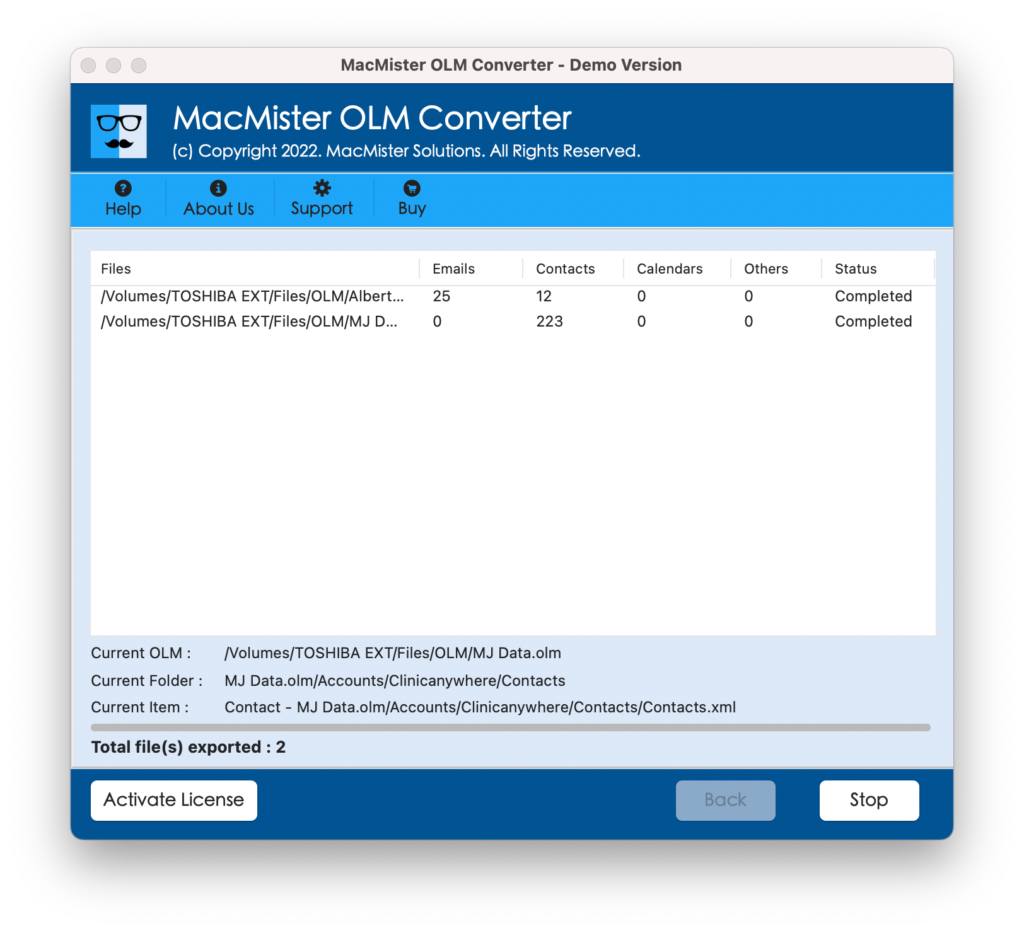
Step 5. Tap on Export. Your database will be precisely converted on bit level. Once done, you will see a confirmation message with your clean and error-free PST file.
Direct Parsing vs IMAP Syncing – Why Is the First Better Solution to Adopt in the Cloud?
When choosing the solution that will help you manage your data, you should pay attention to the software efficiency and algorithms’ safety. And there are several technical advantages that can be offered by the direct parsing method:
- With this technology, you will preserve SMTP headers, routing tags, hyperlinks, embedded images and even nested attachments in their original form.
- Data stored locally on your machine cannot be accessed by anyone else from outside.
- If you have to process confidential legal, financial or medical communication, passing corporate emails through third-party IMAP cloud servers does not comply with basic principles of data safety.
- Local parser engine works fine even when processing large volumes of emails (more than 50 GB).
Epilogue
The conversion process from Mac Outlook to Windows PST file can be done in a matter of hours, rather than days. In case you do not have too many emails, the default process of IMAP synchronization should be enough for you.
However, if you want to save your time, keep your business critical information, and retain the folder structure, then you will need to use a professional tool for this task as discussed in the above section. It is the usual way of doing things. Just download a trial version and see the results yourself.