How to Import Outlook PST File from Windows to Mac?
The migration from a Windows-based computer to Mac is a wonderful experience. Yet, switching from one operating system to another brings about some challenges while migrating the entire data stored in both systems. One of the biggest obstacles that people usually encounter while making such a change is importing email history; in particular, moving data from Microsoft Outlook.
Microsoft Outlook stores all emails, calendar entries, contacts, and tasks in a PST file on Windows. However, Mac computers use other formats to store their emails, such as OLM format for Outlook for Mac or MBOX format for Apple Mail. Therefore, because a Mac computer and its native programs cannot open a PST file directly, you need to migrate this data using certain strategies.
In this step-by-step guide, we will discuss how to efficiently transfer Windows Outlook PST files to a Mac.
How to Efficiently Transfer Windows Outlook PST Files to Mac?
Here, we will be discussing different steps to transfer Windows Outlook PST files to Mac. You may follow them as per your suitability and import PST file from Windows to Mac machine.
Manual Approach to Import PST File from Windows to Mac
Step 1: Export the PST File from Windows Outlook
Prior to any interaction with Mac system, one need to find or create a PST file that will have your information on your Windows system.
The steps to get this file:
Step 1. Launch Microsoft Outlook on your Windows computer.
Step 2. Press File in the upper left corner and then click Open & Export. Then press Import/Export.
Step 3. Select Export to a file in the wizard list and press Next.
Step 4. Press Outlook Data File (.pst) and Next.
Step 5. Select particular mail folders (or even all your mailbox) that you want to migrate. Make sure to check Include subfolders box. Press Next.
Step 6. Press Browse to specify the convenient destination folder for your PST file, for example, your Windows Desktop or external flash drive.
Step 7. Press Finish. If prompted, you may want to secure your PST file with the password or simply leave it blank.
After that, move this PST file to your Mac using the external hard drive, USB flash drive or local network share.
The Manual Method: Importing via Outlook for Mac
In case you plan to go ahead with Microsoft Outlook on your new Mac computer, you can give it a try with the native Outlook import feature.
Important Prerequisite: Before moving forward, ensure that you have a valid Microsoft 365 account or a separate license of Outlook for Mac installed on your Mac system.
Step 1. Open Outlook for Mac.
Step 2. Choose Import option by navigating to the File menu.
Step 3. Select Outlook for Windows archive file (.pst) from the list and then click Continue button.
Step 4. Navigate to your Mac system and search for the PST file which you copied from your Windows computer.
Step 5. Click on the file and click Import.
Step 6. Once done, click on Finish button.
The Direct Limitations of Manual Migration
Although using the manual way seems quite simple, it almost never works perfectly with big and old databases:
- Outlook for Mac is prone to failure and freezing while processing large PST files (more than 10 GB – 15 GB).
- Deep folders may lose their structure and become unorganized with your emails all messed up.
- Foreign letters, pictures, as well as email metadata like “To”, “CC”, “BCC” headers are likely to be lost during cross-platform conversion.
- In case you prefer to use the built-in Apple Mail application on your Mac instead of Microsoft’s paid subscriptions, it will not recognize PST files at all.
Direct Approach to Import PST File from Windows to Mac
To avoid problems related to instability and inflexibility of manual process, use of such an application is highly recommended. MacMister PST Converter for Mac is one of the best solutions developed for macOS in order to perform appropriate migration of email messages.
As compared to manual import tools, this application does not need having Microsoft Outlook installed on your Mac computer to migrate data. It export data directly from PST file without using Outlook and converts it to several saving options.
Explore the step-by-step working of the tool
Migrating your files with the expert software is very easy to perform with the following 4 basic steps:
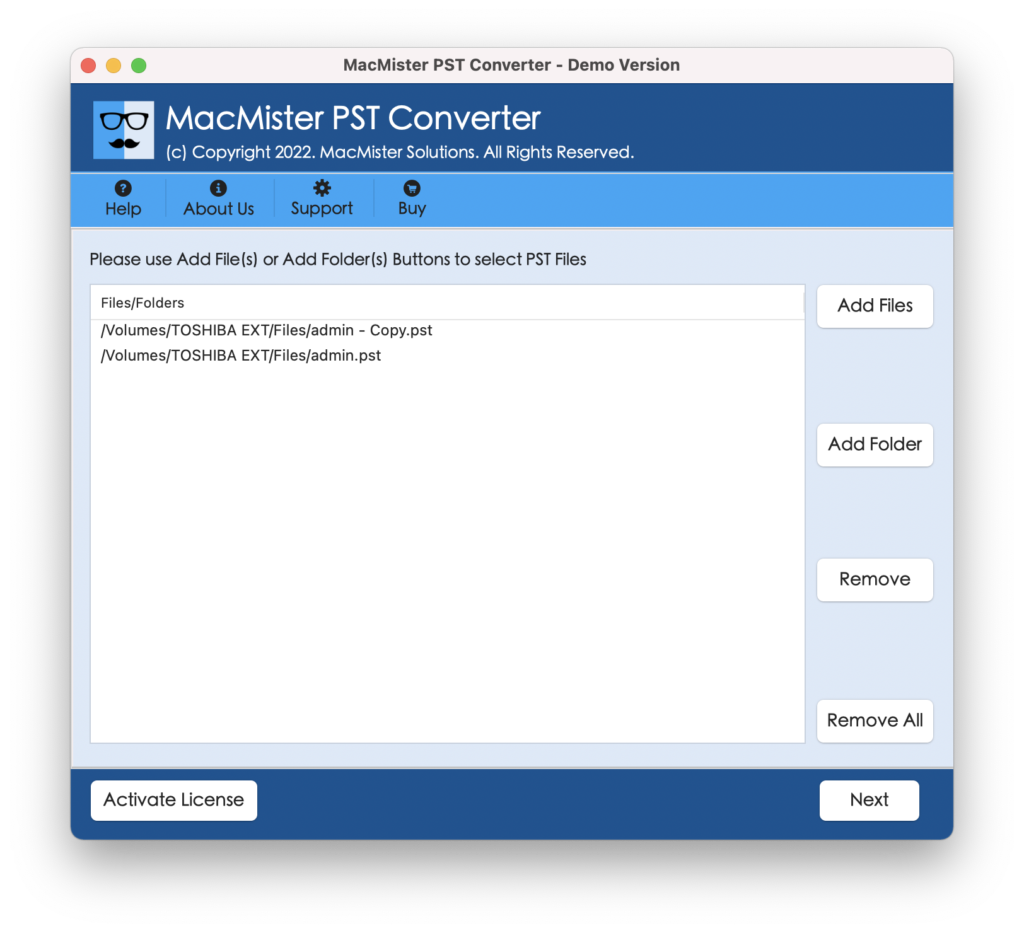
Step 1. Install the application on your Mac computer and open it. You need to click the Add Files/ Add Folder option to add your Windows PST files migrated onto your computer.
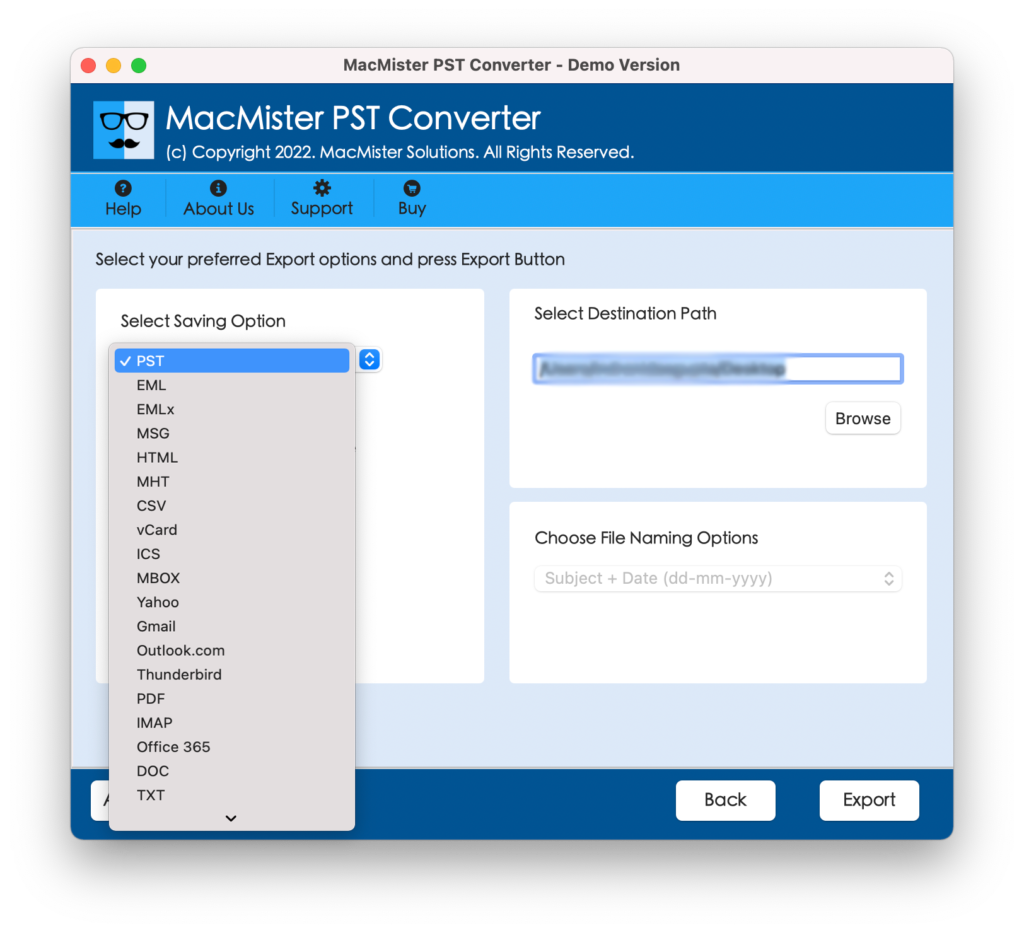
Step 2. Select the ‘Saving Option’ from the drop down menu. For migrating files to Outlook for Mac, select OLM format. However, if you wish to transfer your files to Apple Mail or Thunderbird or any other native macOS app, select MBOX/EML format. Additionally, the direct options are also available.
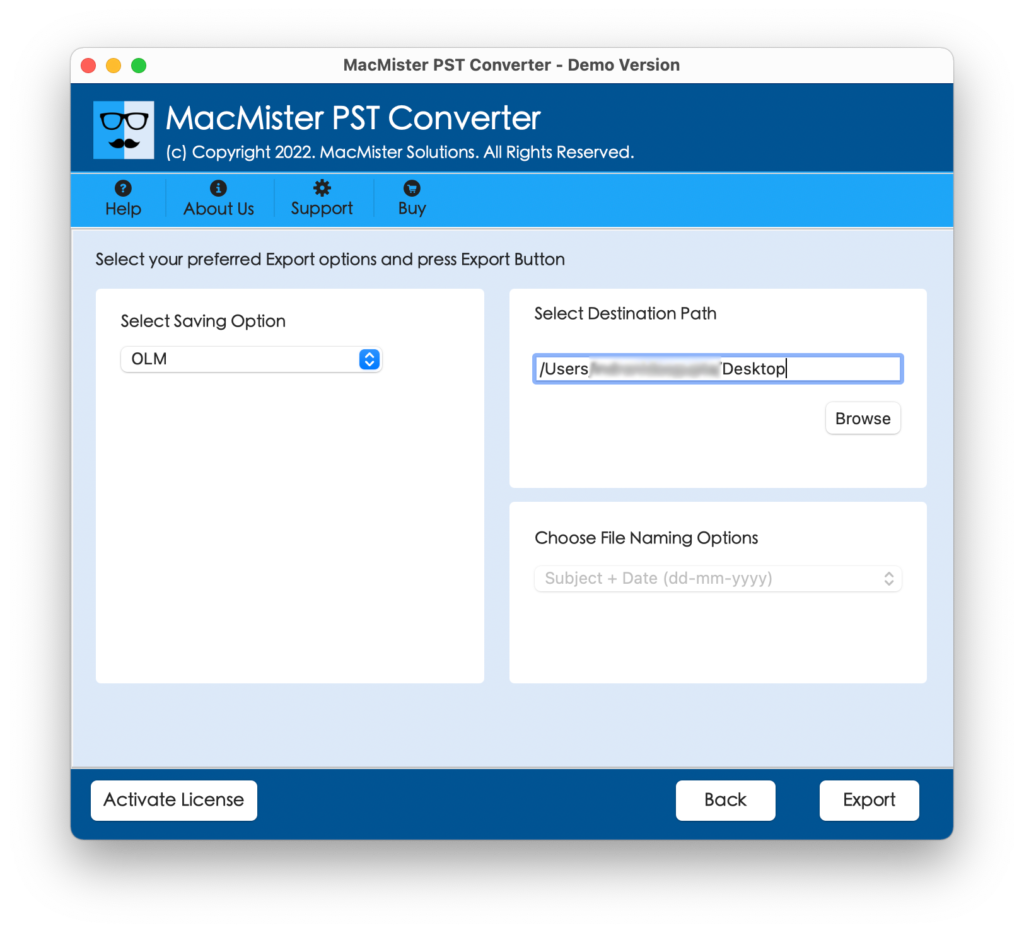
Step 3. Apply various filters like (Subject + Date) to filter out your files and click Browse to set up destination folder location where you will store your converted files.
Step 4. After clicking on the Export option, you will see a live progress report along with generation of complete log file after successful conversion of your files.
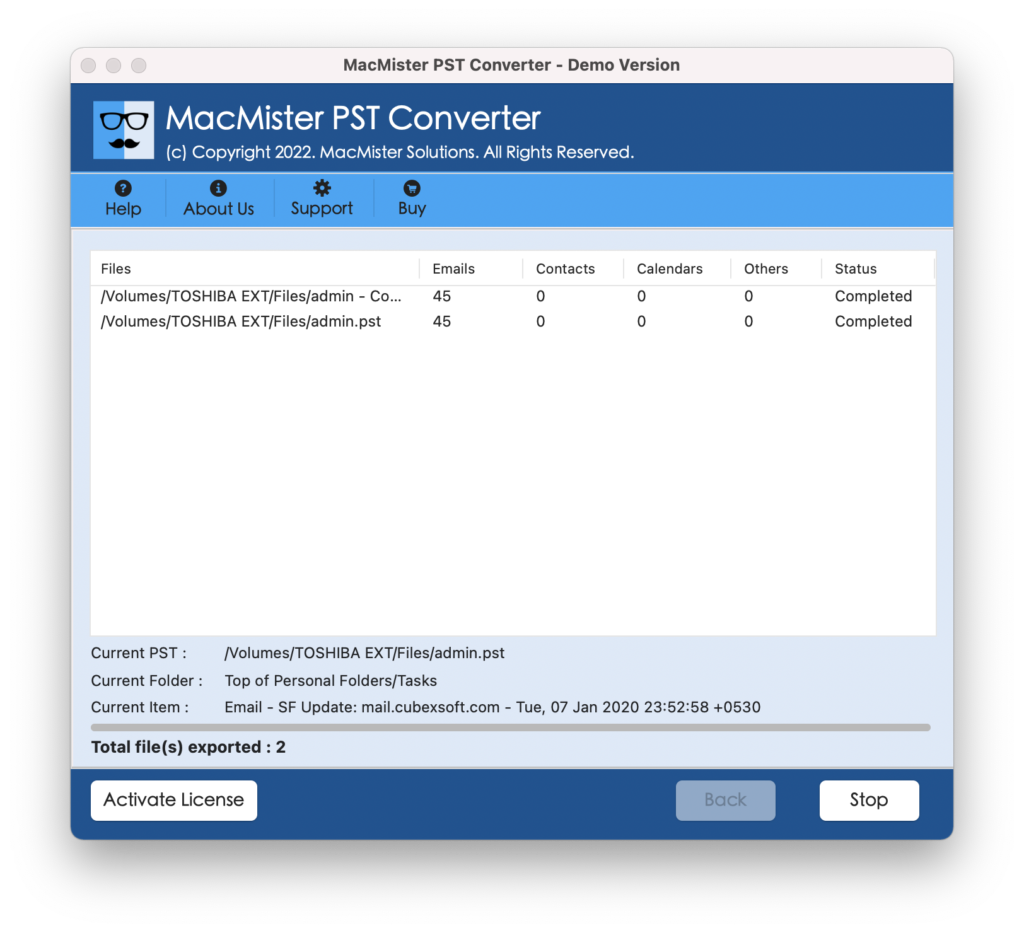
After the process is complete, all you need to do is open the destination app such as Apple Mail/ Outlook for Mac and import your new .mbox/.olm file.
Key Benefits of the Application
- It makes sure that all essential part of emails such as complex attachments, inline images, text formatting, and important metadata headers are converted without losing anything.
- Users’ custom-made folder hierarchy will be preserved perfectly after the migration process is complete.
- Rather than converting individual folders, one can now upload all your large PST files at once to save efforts significantly.
- This tool operates completely offline on your Mac computer without sending your confidential emails to any risky third-party cloud server.
Epilogue
The migration whether it is professional or personal archives from Windows to Mac should not leave you feeling as though you’ve had some important parts of the conversation missing along the way. Though the manual process offered by the system is generally for smaller, easy files, larger corporate archives need a more reliable solution. A solution such as MacMister PST File Converter ensures that all emails, attachments, and directory structures reach your Mac undamaged and well-organized.