How to Securely Erase an HDD on Your Mac?
When getting ready to sell off an old Mac or recycling a retired external hard drive or even transferring a hard disk drive (HDD) from one person to another in your organization, erasing the drive completely is an absolute must from a security perspective.
The hard disk drive is where all sorts of highly sensitive personal information such as financial documents, password files, private images, and system credentials get stored. Just dragging a file into the Trash can or using the quick format feature does not delete your data because it only removes the pointers while the actual raw media remains accessible through many freely available data recovery tools.
The following guide will teach you how to prepare for a secure wipe, erase a drive on macOS using built-in options, and dedicated data destruction tools.
Why Standard Formatting Isn’t Enough for HDDs?
In contrast to Solid State Drives (SSDs) which use flash memory and wear-leveling processes such as TRIM, conventional HDDs utilize magnetic storage on spinning disks.
When one removes a file or formats a drive via the conventional quick format process:
- The operating system labels the sectors as “free” or ready to be rewritten.
- The magnetic storage of the actual binary code (1’s and 0’s) still resides on the physical disks.
- It is very easy for software to read this magnetic data until it gets overwritten by new information on these exact sectors of the disk.
In order to render the magnetic HDD data unrecoverable, the sectors have to be rewritten with random or zeroed data.
Stage 1: Essential Preparation Steps
Perform these preliminary steps prior to wiping your hard drive for safeguarding your files and accounts:
1. Backup Important Data
Copy all the needed files either to a second external drive or transfer it to a reliable cloud-based service like iCloud Drive, Google Drive, or OneDrive. Starting an overwrite makes the process irreversible.
2. Deauthorize and Log Out of the Accounts (For Wiping Main Mac Drive)
In case you are going to wipe a Mac disk, containing your main macOS operating system, take these steps:
- iCloud: Go to System Preferences > Apple ID and click Sign Out.
- iMessage: Open the Messages app, go to Settings > iMessage and click Sign Out.
- Find My Mac: Disable Find My Mac feature.
Stage 2: Securely Erase HDDs Using macOS Disk Utility
The native Disk Utility of Apple computer provides secure erase functions that are meant only for magnetic hard disks.
Note: The secure erase feature of Disk Utility is present for conventional HDDs and external HDDs. It is usually disabled for Apple Silicon and SSD drives as they use different cryptographic erasures.
Step-by-Step Instructions:
- Connect the external HDD with your Mac (or enter Recovery Mode in an Intel-based Mac by pressing Command+R while erasing the internal drive).
- Launch the Disk Utility through Spotlight Search or through Applications > Utilities > Disk Utility.
- In the upper-left-hand corner, click View > Show All Devices.
- Select the physical hard drive you intend to erase from the left sidebar (select the root drive and not the volume within it).
- Click on the “Erase” button on the top toolbar.
- Enter a name for your new partition, select a format (APFS or Mac OS Extended (Journaled), etc.), and select GUID Partition Map.
- Click the Security Options… button at the bottom of the window.
- Security slider settings for the selected overwrite
- Pass 1 (Fastest): Normal quick erase without overwrite of data.
- Pass 2: Overwrite the drive with one pass of random data with subsequent zeros.
- Pass 3 (U.S. DoD 5220.22-M): Overwriting of data three times according to U.S. DoD requirements.
- Pass 4 (Most Secure / Gutmann): Overwrite with 7 passes using magnetic wiping patterns.
- Click OK, then click on Erase.
Stage 3: Advanced Sanitization with MacMister‘s Powerful Wiping Tool
Although Disk Utility comes with basic sliders for security purposes, handling multiple disks, storage arrays, or certain confidential files would need a little more control, certified procedures for erasure, and proper reporting for compliance.
For full compliance with data destruction, the use of a software utility such as MacMister Data Wipe Software for Mac is an appropriate choice.
MacMister Data Removal Tool is tailored for Mac operating systems for achieving military-grade erasure of data files or drives. Users can easily erase individual high-risk folders or whole secondary/external HDDs by international standards.
Main Features of MacMister Data Erasure Tool:
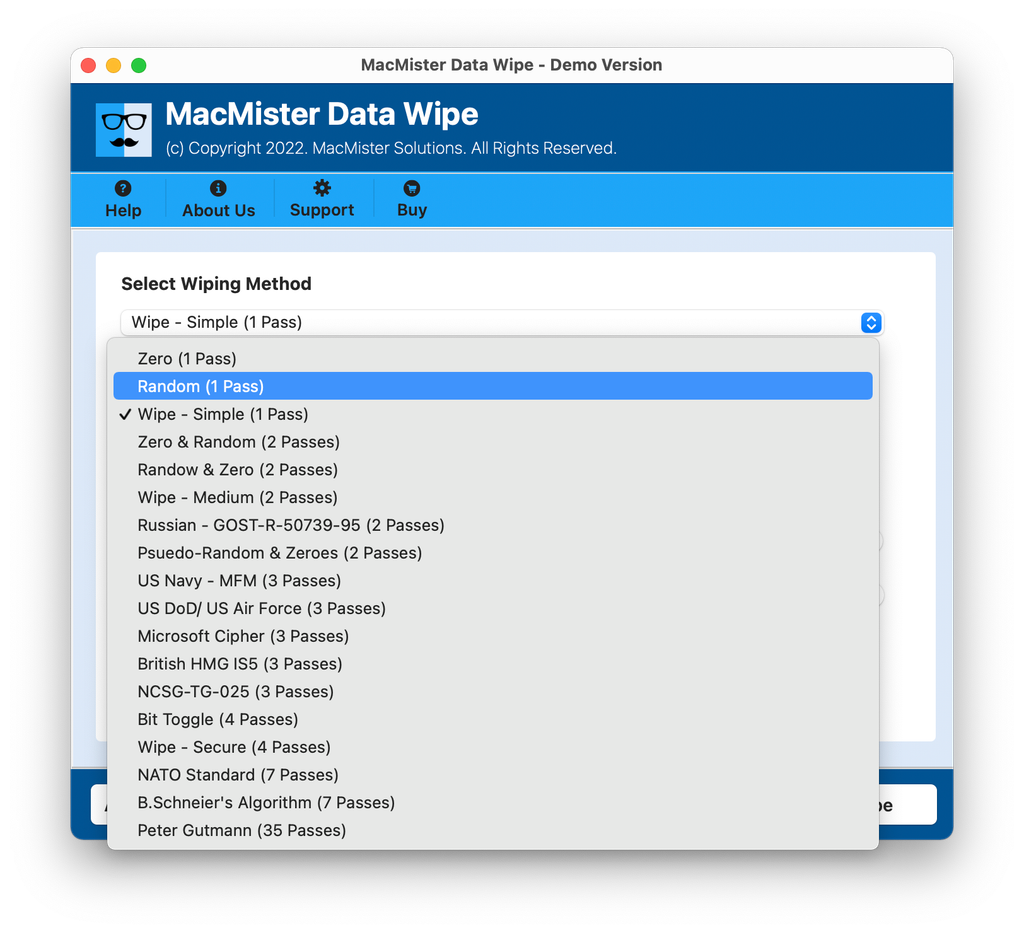
- Supports various sanitization protocols which have been internationally accepted and includes Zero Pass (1 Pass), Random Pass (1 Pass), US Department of Defense DoD 5220.22-M (3 Passes), NATO Standard (7 Passes), and Peter Gutmann Method (35 Passes).
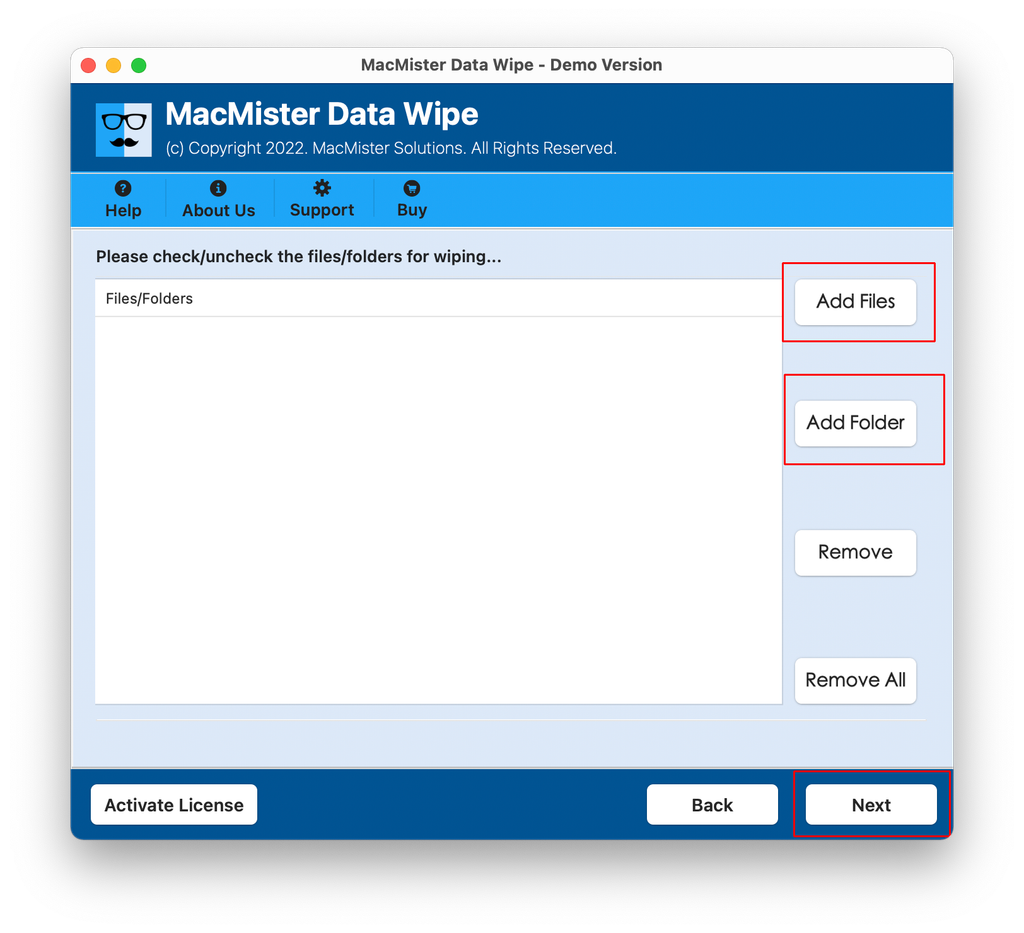
- The software provides options to either wipe an entire drive or folders (Add Files / Add Folder) to clean only particular folders and directories without wiping an entire drive.
- Built-in filters help to select and destroy files having particular extensions or a particular date range.
- Adequate proof of erasure report is generated once the wipe process is completed.
- The software runs perfectly fine on all Apple Silicon (M1, M2, M3, M4) and Intel-based Macs running on macOS Sequoia, Sonoma, Ventura, etc.
Working Guide of the Tool to Securely Erase an HDD on your Mac
Step 1. Launch the app on your Mac.
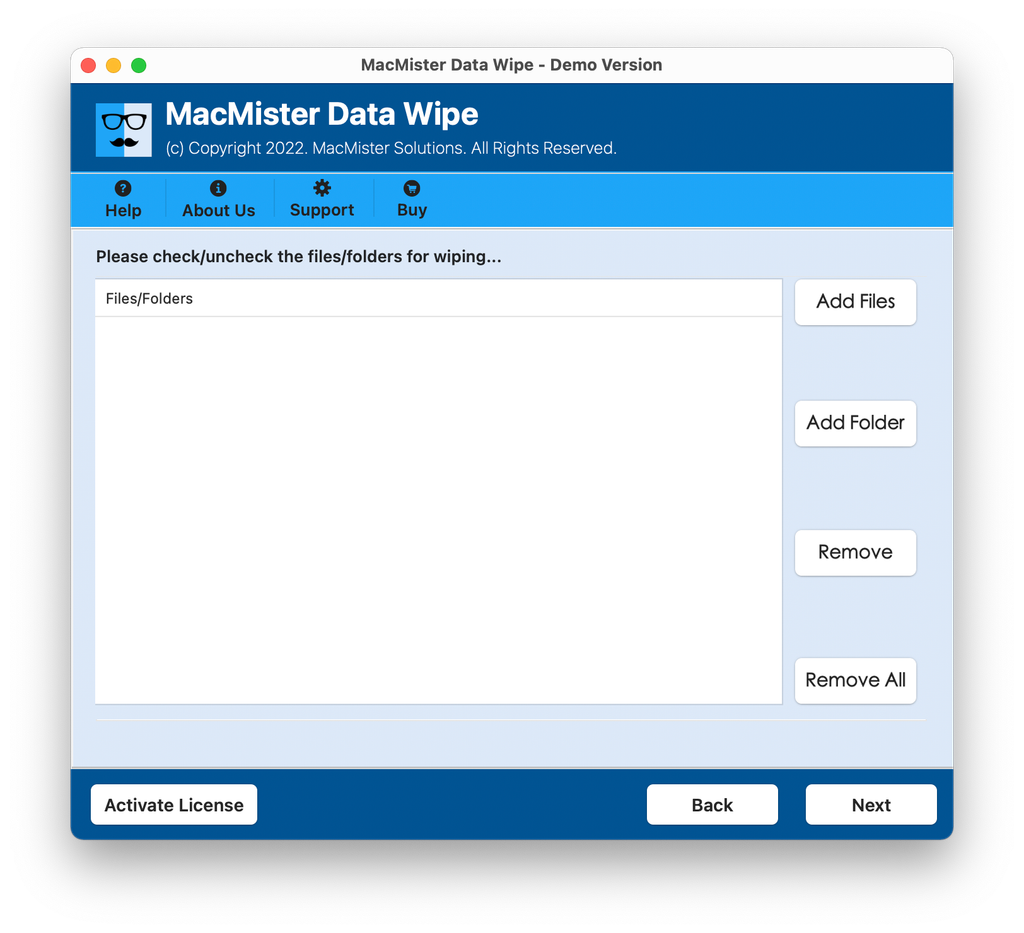
Step 2. Choose Add Files(s)/Add Folder buttons to load files on the software on the panel that need to be discarded and tap Next.
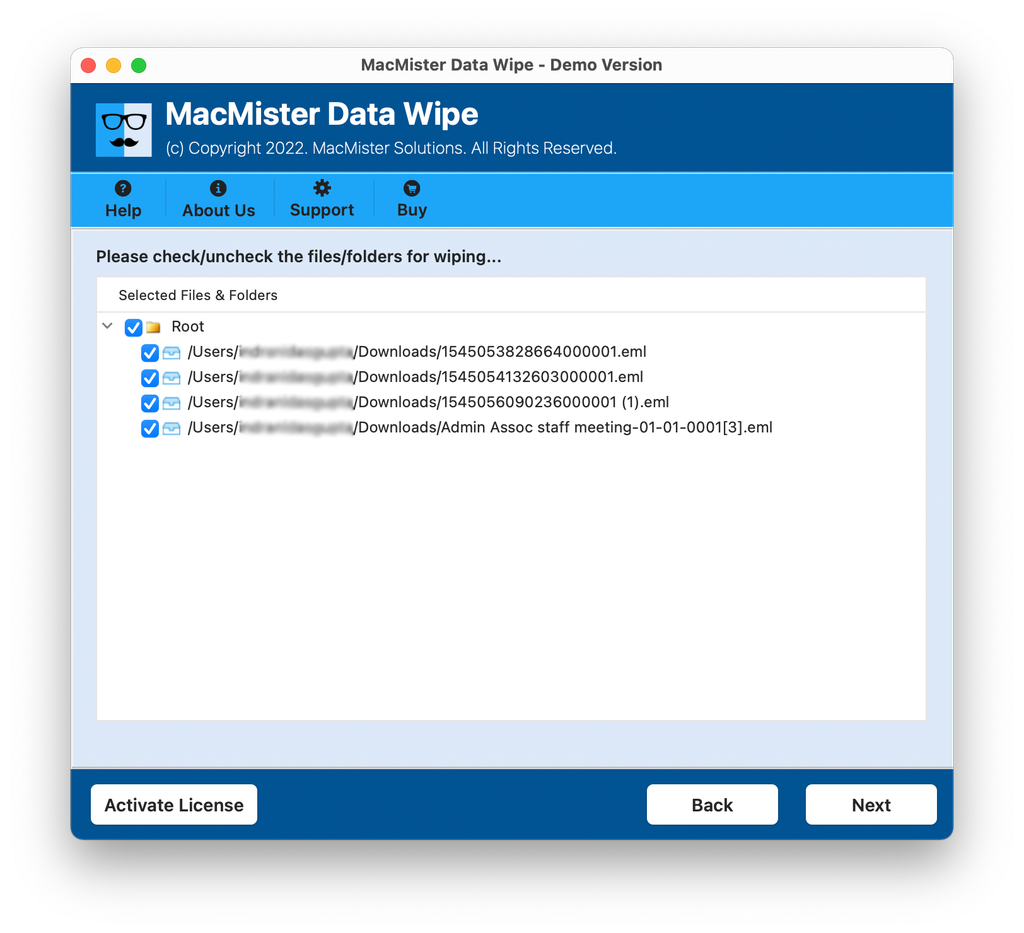
Step 3. Cross-check the files listed and proceed further by clicking Next.
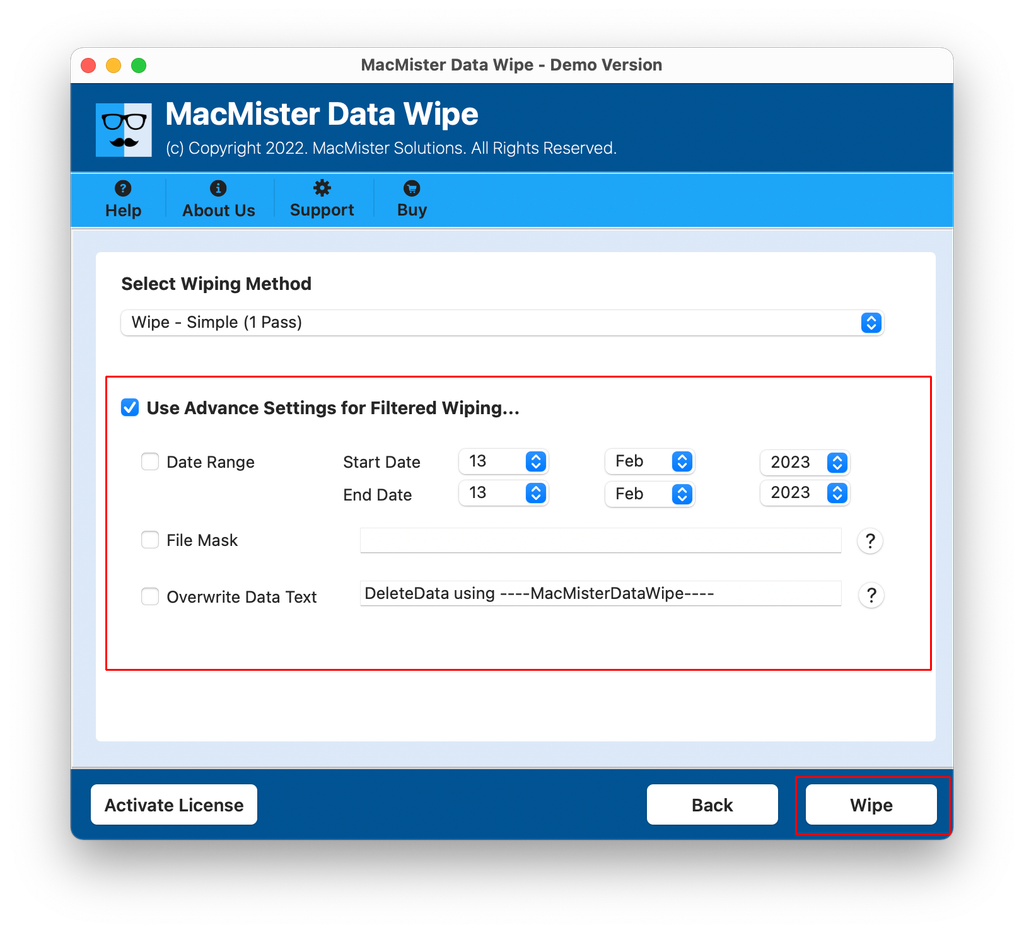
Step 4. Select your target Wiping Standard as per requirements from the dropdown menu.
Step 5. Use Advanced Settings for filtered wiping, if needed and tap Wipe button.
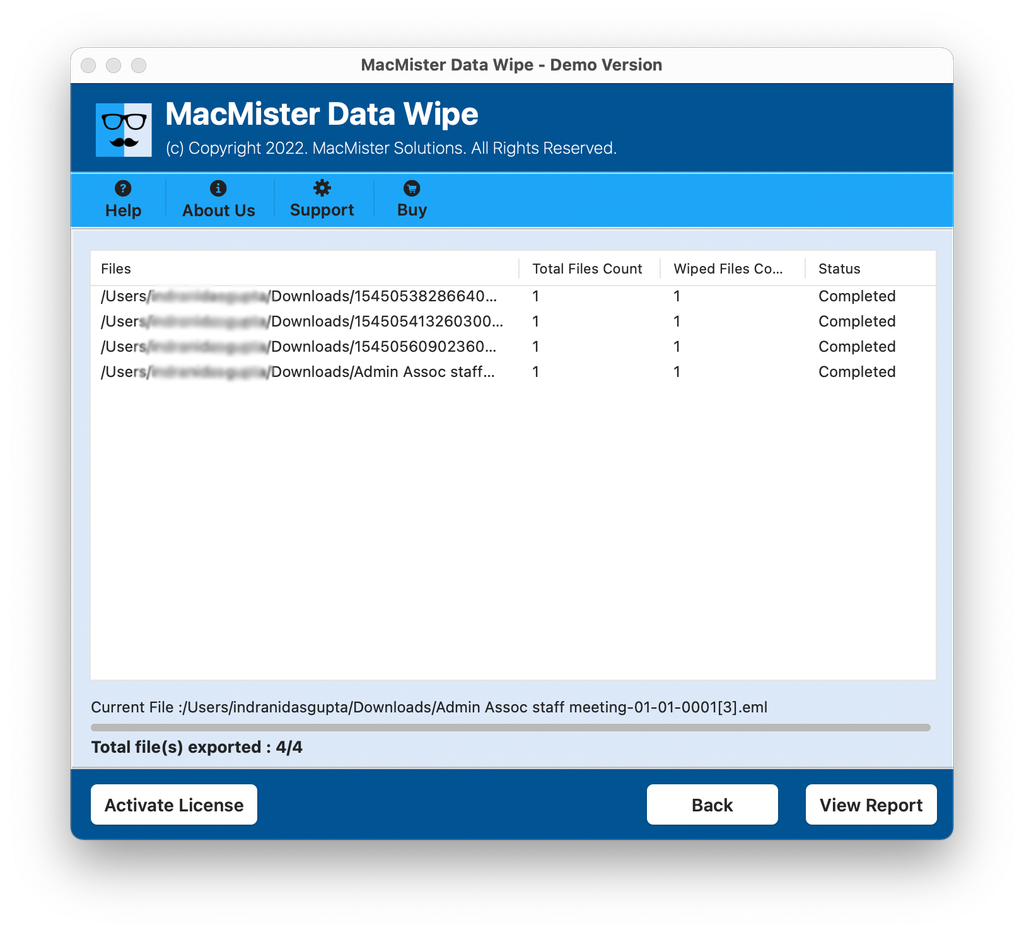
Step 6. Check and track the live wiping status using the screen appears.
Epilogue
In order to protect both your personal information and company data, simply dragging the file into the Trash or formatting your conventional hard drive is insufficient. As the traditional hard drives hold magnetic traces of your information, the process of doing multiple passes of secure overwrite is important before retiring or reallocating the drive.
By taking advantage of the built-in applications such as the Security Options in Disk Utility or using an independent tool such as MacMister Data Deletion Tool for Mac will guarantee that your disk sectors are wiped out.