How to Wipe a MacBook with a T2 Security Chip?
With an inbuilt Apple T2 Security Chip, MacBooks built on Intel processors during the period of 2018 to 2020 possess hardware encryption, secure boot capability, and encryption in storage technology.
Though the T2 chip improves system security, it has also made the process of wiping a MacBook different. Wiping a disk using common multi-pass overwriting techniques in Disk Utility is impossible because of the hardware encryption.
If you intend to sell, trade in, donate, or hand over your MacBook with the T2 chip to someone else, then this tutorial will be useful to you.
Understanding the Apple T2 Security Chip Architecture
However, before formatting your drive, there are some things you need to know about the storage process in a T2-chip enabled MacBook. The MacBooks with T2 chip are:
- MacBook Pro (13-inch, 2020, Four Thunderbolt 3 ports)
- MacBook Pro (13-inch, 2019 & 2020)
- MacBook Pro (15-inch & 16-inch, 2018-2019)
- MacBook Air (Retina, 13-inch, 2018-2020)
In the T2 chip enabled MacBooks, the SSD controller is embedded inside the chip itself. Every piece of data written onto the built-in SSD is automatically encrypted using a unique key contained inside the chip’s Secure Enclave.
Due to such system design, standard options for secure file deletion (DoD 5220.22-M 3-pass or Gutmann 35-pass) in Disk Utility will be greyed out and unavailable because overwriting with multi-pass zeroes an already encrypted SSD makes no sense and is useless, since the data is instantly destroyed upon removing/destroying the keys.
Step 1: Essential Pre-Wipe Checklist
To make sure that all is done before erasing the system from your MacBook, follow the procedure below to unlink your MacBook from your Apple ID account and other services online:
- Perform this task through Time Machine or using an external drive or cloud storage.
- Log out of iCloud:
- Access System Preferences > Apple ID (or System Settings).
- Select Overview then choose “Sign Out.”
- Turn off Find My Mac if the system prompts you.
- Sign out of iMessage and FaceTime: Start by going to Messages > Settings > iMessage > Sign Out.
- Unpair Bluetooth devices: If you want to retain your Bluetooth accessories like headphones and keyboards, unpair them now.
- Clearing NVRAM/PRAM: Shutdown your Mac, restart your Mac and hold down “Option+Command (⌘)+P+R” for 20 seconds.
Method 1: Use “Erase All Content and Settings” (macOS Monterey or Later)
In the case that you are using a T2 MacBook which is operating under macOS Monterey or macOS Ventura/Sonoma, macOS will have the feature of a simple and factory-reset utility just like iOS.
- Go to the Apple menu () from the top left corner and open up System Preferences (or System Settings).
- For macOS Monterey, go to System Preferences from the menu bar and click on Erase All Content and Settings.
- For macOS Ventura and above, click on General > Transfer or Reset > Erase All Content and Settings.
- Enter your admin password.
- Check the list of things that will be erased (ICloud settings, Find My status, Bluetooth connections, and encryption keys).
- Click continue and enter your Apple ID password to log out and reset the device.
The system will instantly destroy the T2 encryption keys, clear user partitions, and restart to the factory setup assistant screen.
Method 2: Manual Erase via macOS Recovery Mode
Should your T2 MacBook run on macOS Big Sur and prior operating systems, or should you not be able to log in to the desktop of the Mac operating system, there is always the option of a manual erase using Recovery Mode:
- Shut down your MacBook entirely.
- Press the Power button and then quickly press Command (⌘) + Option + R to see the globe (Internet Recovery).
- Choose your Wi-Fi network and type the password.
- In the macOS Utilities window, launch Disk Utility by clicking Continue.
- Click View at the top left of the Disk Utility window and choose Show All Devices.
- Choose the top-level internal hard drive (e.g., APPLE SSD).
- Click Erase at the top menu bar.
- Specify the following:
- Name: Macintosh HD
- Format: APFS
- Scheme: GUID Partition Map
- Click Erase (or Erase Volume Group if necessary).
After finishing, close the Disk Utility and choose Reinstall macOS should you hand over the laptop to a new user.
Wipe a MacBook using Alternative Powerful Solution
While Apple’s built-in procedures take care of the encryption keys, there is a need for multi-pass data destruction procedures (like DoD 5220.22-M or NATO) in case of enterprise requirements, legal requirements, or even users who value their privacy in regard to their external drives or second volumes.
In cases where macOS grayed out the secure erase procedures because of T2 SSD, MacMister Data Wipe Software for Mac is the alternative tool of choice.
Advanced Features of the Application:
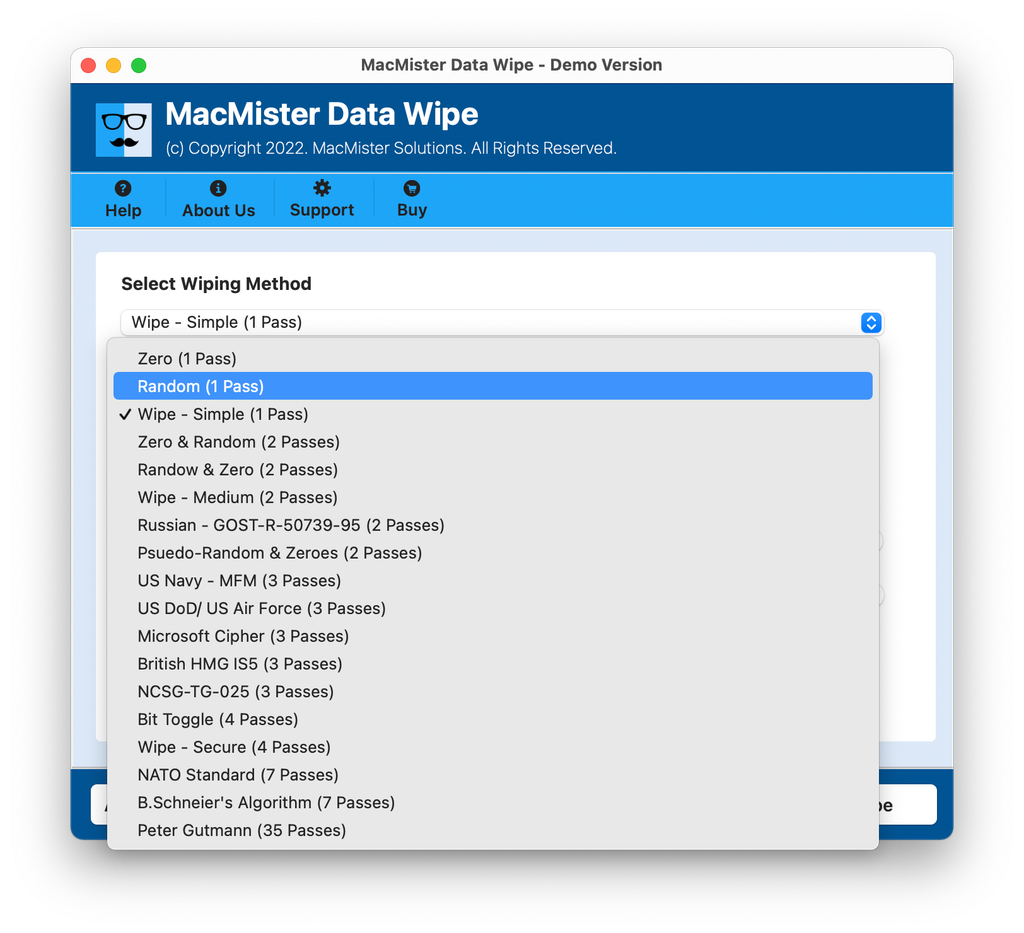
- Supports certified erasure algorithms including Zero Overwrite (1 pass), US DoD 5220.22-M (3 passes), NATO Standard (7 passes), and Peter Gutmann (35 passes).
- Allows users to select full external drives, secondary internal volumes, specific user directories, or free space without needing complex command-line scripts.
- Generates erasure logs to verify that target data has been overwritten beyond recovery for auditing purposes.
Working Guide of the Tool:
Step 1. Install and run the software on your MacBook computer.
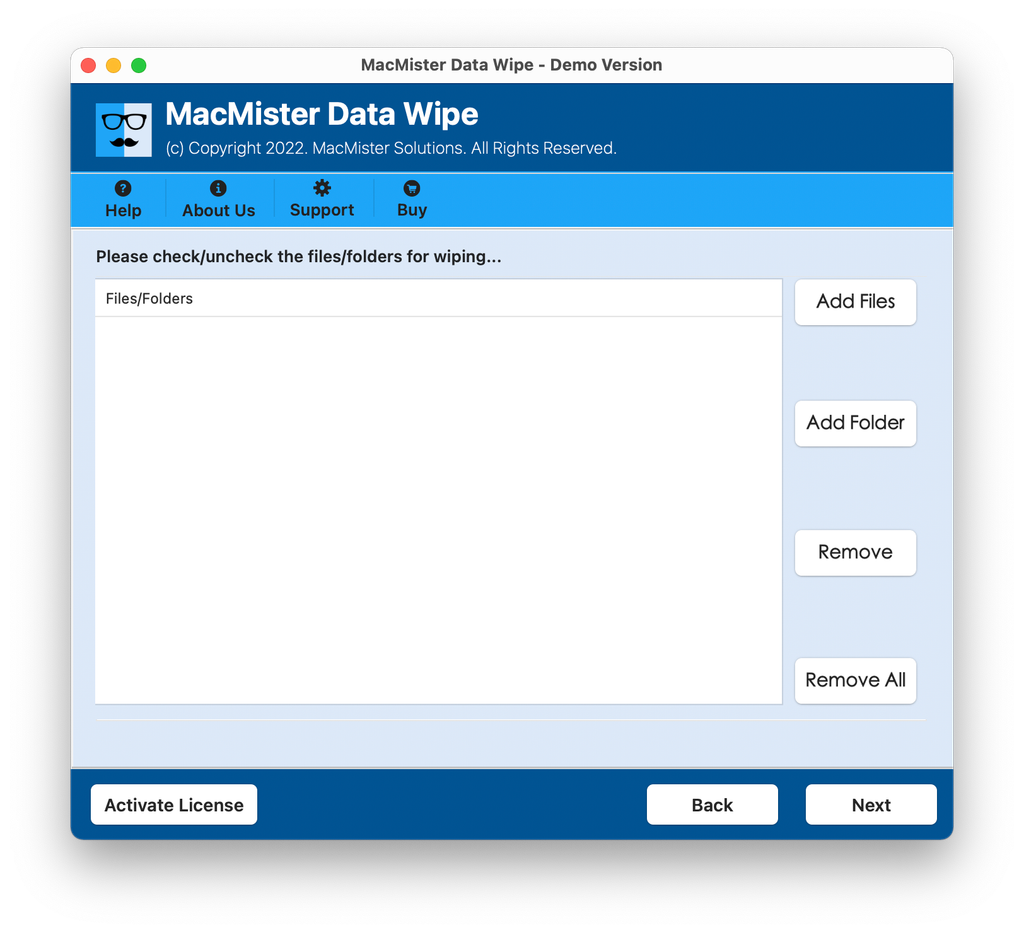
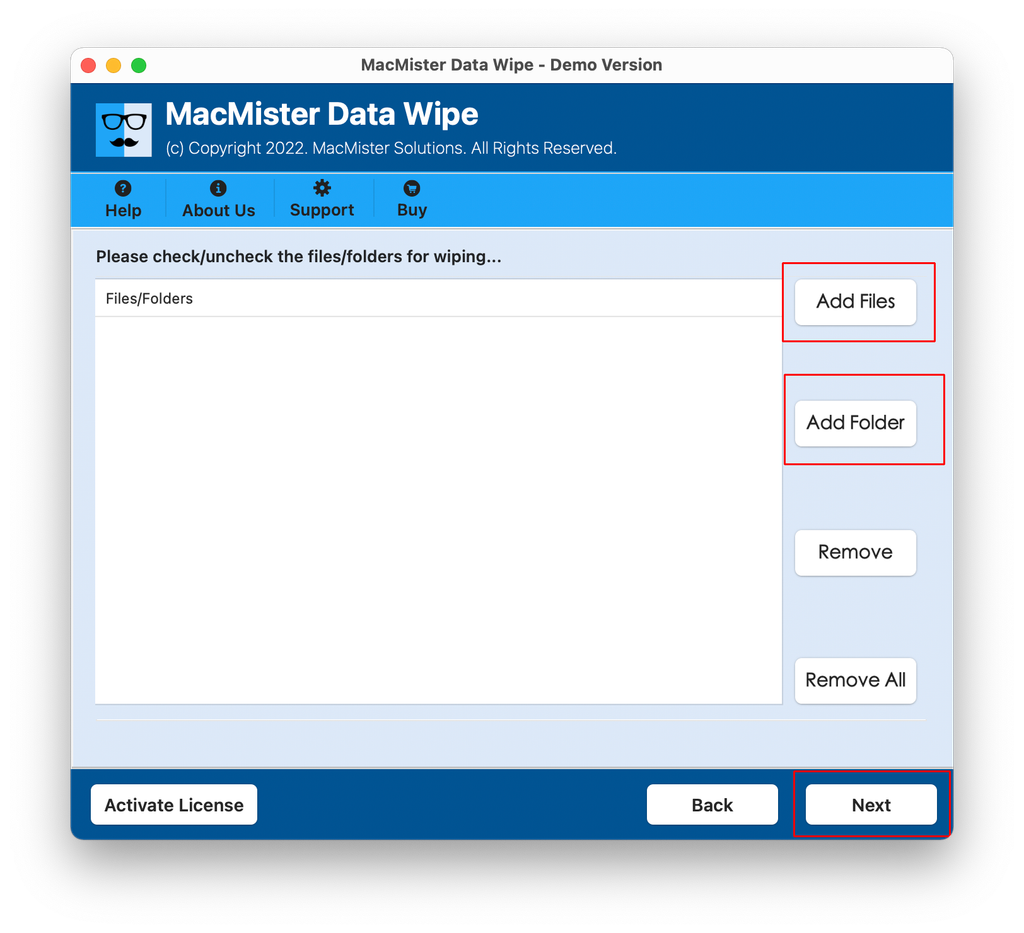
Step 2. Select the Files, or folders for data removal using Add File(s)/Add Folder buttons.
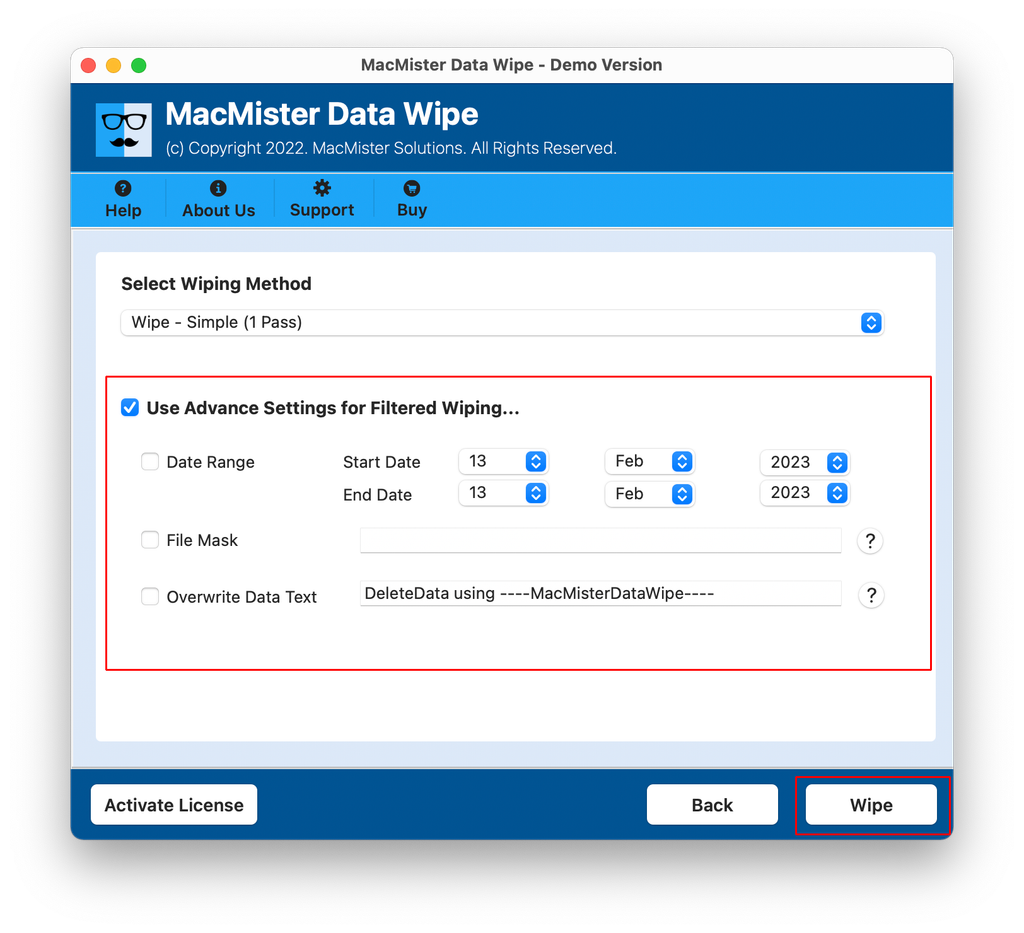
Step 3. Choose the required wiping methods, also simultaneously apply required data filtering for selective wiping. Then, tap Wipe.
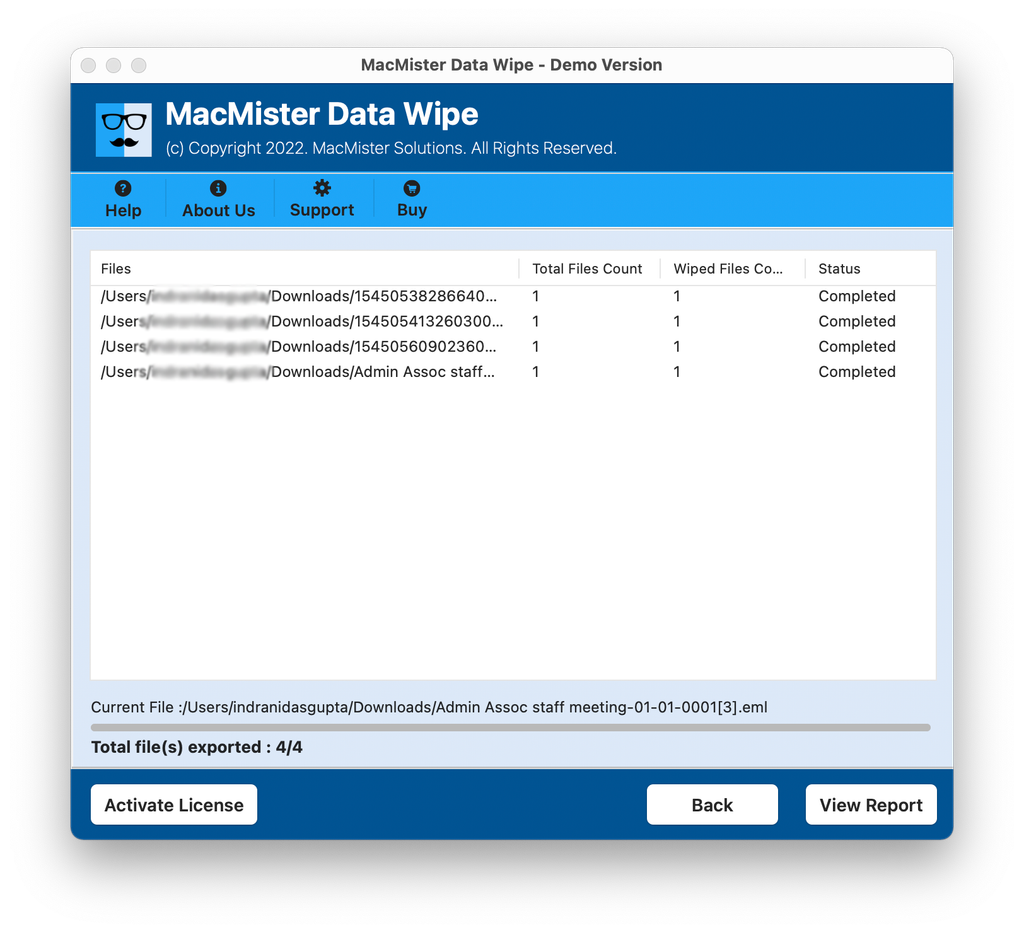
Step 4. Check the Live Data Erasure Report and track the process.
Epilogue
Erasing a MacBook with an Apple T2 Security Chip is not the same process as wiping a traditional Mac computer. Since the Apple T2 Security Chip handles the hardware encryption of the machine, erasing the machine becomes a breeze using built-in options such as “Erase All Content and Settings” and MacOs Internet Recovery that wipes out the vaults on the MacBook.
Where organizational compliance and verification of the erase process is necessary, third-party tools like MacMister Data Removal for Mac can be used as an effective alternative. It is crucial to ensure that your private or corporate data remains irretrievable before handing the MacBook over to the next user.