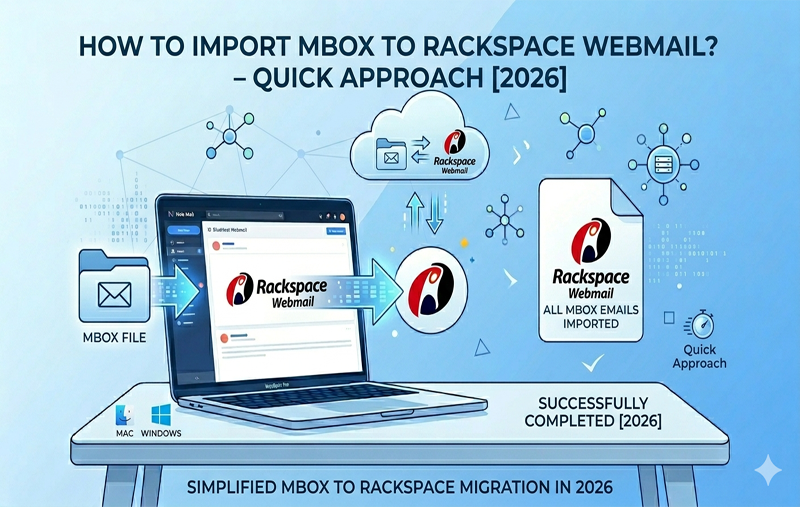
How to Import MBOX to Rackspace Webmail? – Quick Approach [2026]
Go through a complete guide offering different solutions to directly import MBOX to Rackspace webmail without loss of data. Know manual approach which can be done through Mozilla Thunderbird or make use of MacMister professional technique for the same.
MBOX file is an email storage file type that preserves multiple emails with attachments and metadata at one place. MBOX files are widely used to save or transfer emails as they are compatible with other email applications as well such as Thunderbird and Apple Mail and can be directly exported from Google Takeout.
On the other hand, Rackspace is a cloud-computing service provider that also delivers IMAP-supported email hosting solutions. Until date, Rackspace hosted email services are used by 136,070+ companies worldwide.
In order to import MBOX to Rackspace on Mac or Windows, make sure to have an email client Mozilla Thunderbird for manual process or a professional MBOX to Rackspace Migration Tool. As a Rackspace webmail or a Rackspace administrative control panel do not possesses direct MBOX import option.
Why to Import MBOX to Rackspace?
There are plentiful reasons for importing MBOX to Rackspace; few of them are discussed here –
- Switching to a Rackspace email service from any free or outdated email app.
- To preserve old MBOX mailboxes into Rackspace webmail to create space for new emails in MBOX-supported email applications.
- Restoring MBOX to Rackspace helps accessing MBOX files from anywhere anytime.
- To fulfill the business-linked ediscovery solutions.
- For enhanced security in long-term archival on cloud-supported accounts.
Essential Things to do before Importing MBOX to Rackspace
Making sure that there is no loss of data or corruption as well as folder hierarchy is maintained while uploading large size MBOX files to Rackspace account is one of the important things for many businesses and users.
Follow the checklist mentioned below before adding MBOX files to Rackspace –
- Rackspace account should have equivalent or more storage than large size MBOX file.
- Holds stable internet connectivity for trouble-free import.
- Creates app password in case 2FA is enabled for IMAP connections.
- Generates backup of both MBOX and the original Rackspace email data (if any).
Note. MBOX files carries only emails and attachments, thus contacts and calendar cannot be imported.
How to Import MBOX to Rackspace? – Explore Different Methods
Picking the right approach to import MBOX files to Rackspace is essential to cater users’ requirements. And there are both the ways to perform the process – one is manual which is free to use and another is professional.
Method 1. Using Manual Method
Method 2. Professional Approach
Quick Note. Rackspace is equipped with Self-Service Migration Tool that is only suitable for migrating mails from Live Mail accounts to Rackspace and will not work for importing archived or orphaned MBOX files.
Method 1. Manual Method to Import MBOX to Rackspace Account
Mozilla Thunderbird is a desktop-based email client application that works for Mac & Windows operating systems. It supports Import & Export of MBOX files with the help of add-in available in Thunderbird i.e. ImportExportTools NG.
Here are the manual steps discussed to import MBOX to Rackspace webmail account –
Step 1. Install ImportExportTools NG in Thunderbird account
- Run Thunderbird
- Go to Hamburger menu appearing as three lines on the top right.
- Tap Themes and then Add-on.
- Find ImportExportTools NG and tap Add.
Step 2. Import MBOX to Thunderbird
- Right-click the local folder displaying at the bottom Mail section.
- Choose ImportExportTools NG.
- Click Import MBOX Files and select all MBOX files from the directory.
- Select all MBOX folders you need to move into Rackspace webmail account.
- Wait until the import process completes.
Note. You may skip the steps 1 and 2 in case you have completed them already.
Step 3. Set up Rackspace account in Mozilla Thunderbird
- Go to Hamburger menu, the three lines on the top-right.
- Select New Account and click Email.
- Provide Full Name along with Rackspace email ID.
- Verify both IMAP & SMTP Server Settings and proceed.
- Tap Test and then Done.
Step 4. Import MBOX to Rackspace
It is quite simple to transfer MBOX files into Rackspace profile –
- Right-click on the MBOX folder that is imported into Thunderbird residing inside local.
- Click Move to.
- Choose Rackspace account as destination.
You may import MBOX files into already created folders in Rackspace account or create a new folder and upload MBOX files accordingly.
Limitations of Manual Approach
Utilizing Thunderbird add-in ImportExportTools NG is a manual way to transfer MBOX files to Rackspace account. It is suitable for limited data. But somehow not a reliable method if you are having sensitive email data.
It possesses several limitations, such as –
- Large size MBOX files can take lot of time during import.
- Technical skills are needed to operate Thunderbird client.
- Any human error can cause data loss or corruption.
- Steps will be complicated for novice users.
Method 2. Direct Method to Import MBOX to Rackspace
MacMister MBOX Converter for Mac & Windows is a perfect dependable solution to import MBOX files directly into Rackspace account. The application is friendly, secure, and easy to use. Anyone can operate it and perform the import process with ease. It has the ability to bulk import MBOX mailboxes into Rackspace at once. Even large size MBOX files can be transferred easily into Rackspace. And along with Rackspace, users can utilize the same app to import MBOX files into 15+ more saving options.
The tool is built up with remarkable features with the help of users can import MBOX to Rackspace according to the requirements.
Working Steps of the Tool to Import MBOX to Rackspace on Mac
Step 1. Download, launch, and run the app on Mac OS.
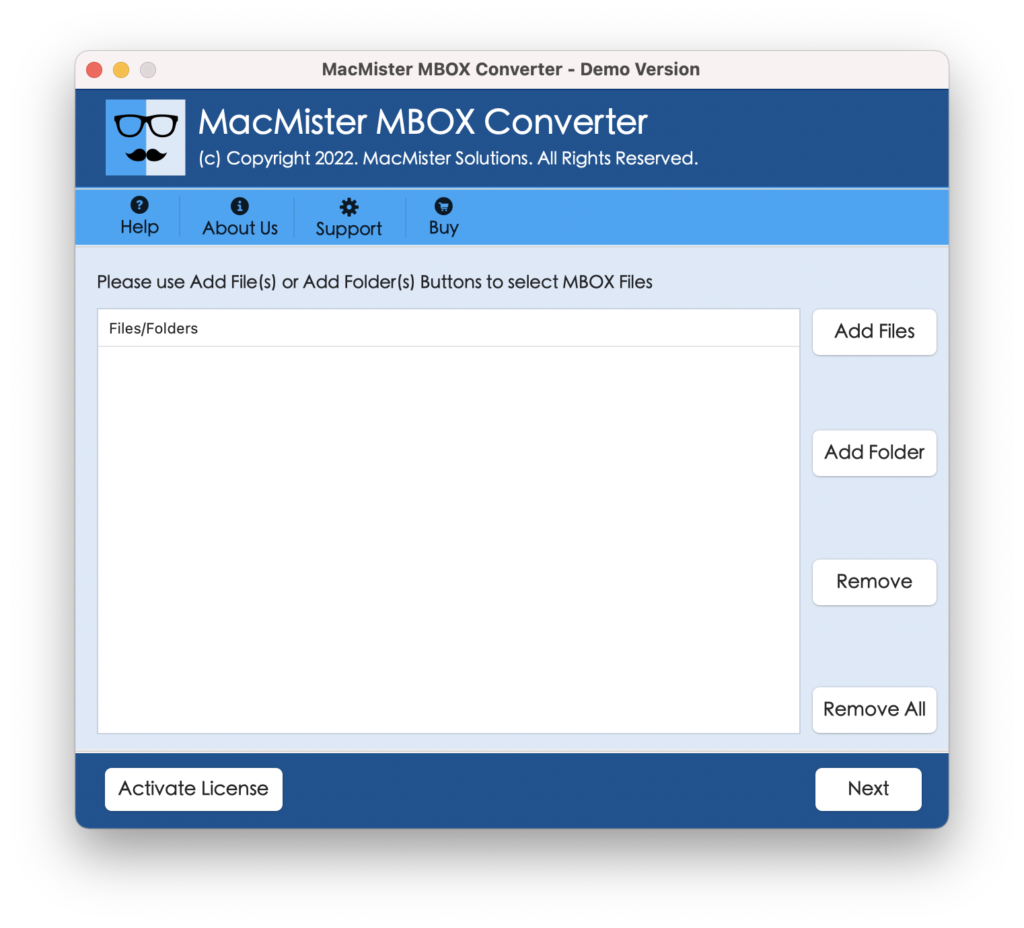
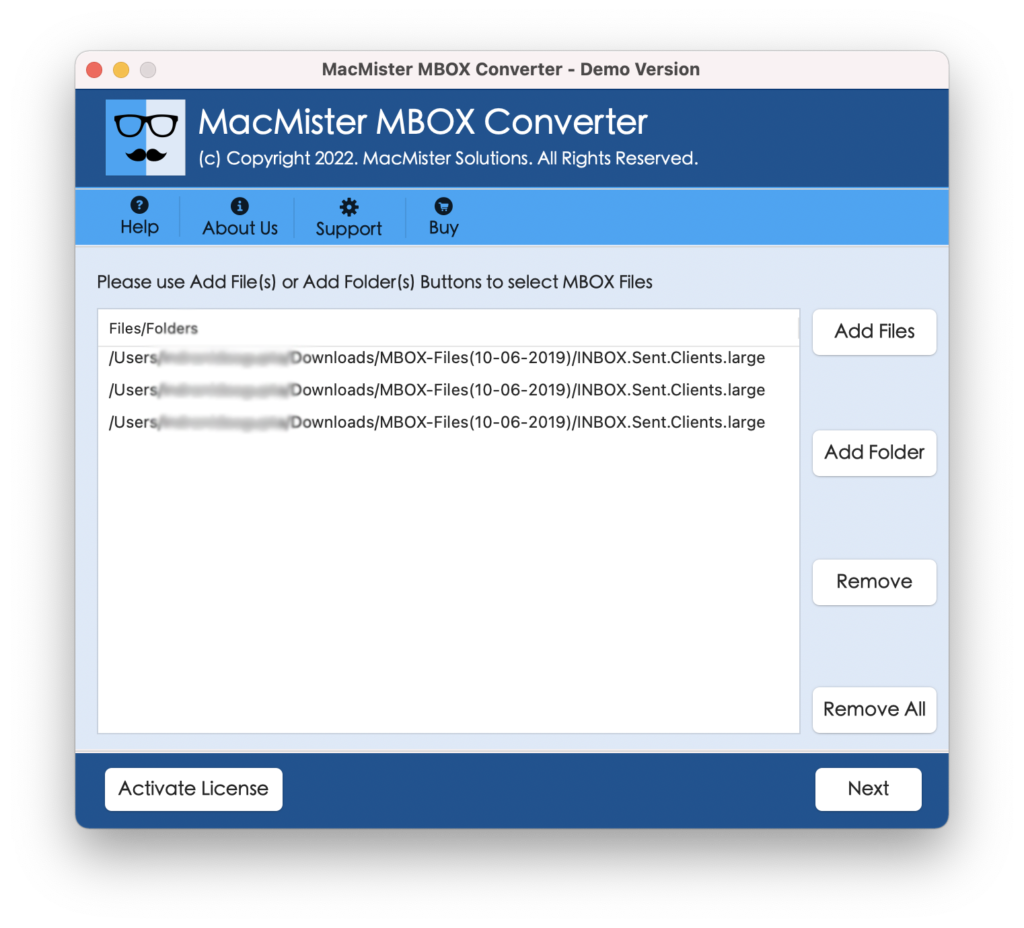
Step 2. Use Add File(s)/Add Folder buttons to load MBOX files and tap Next.
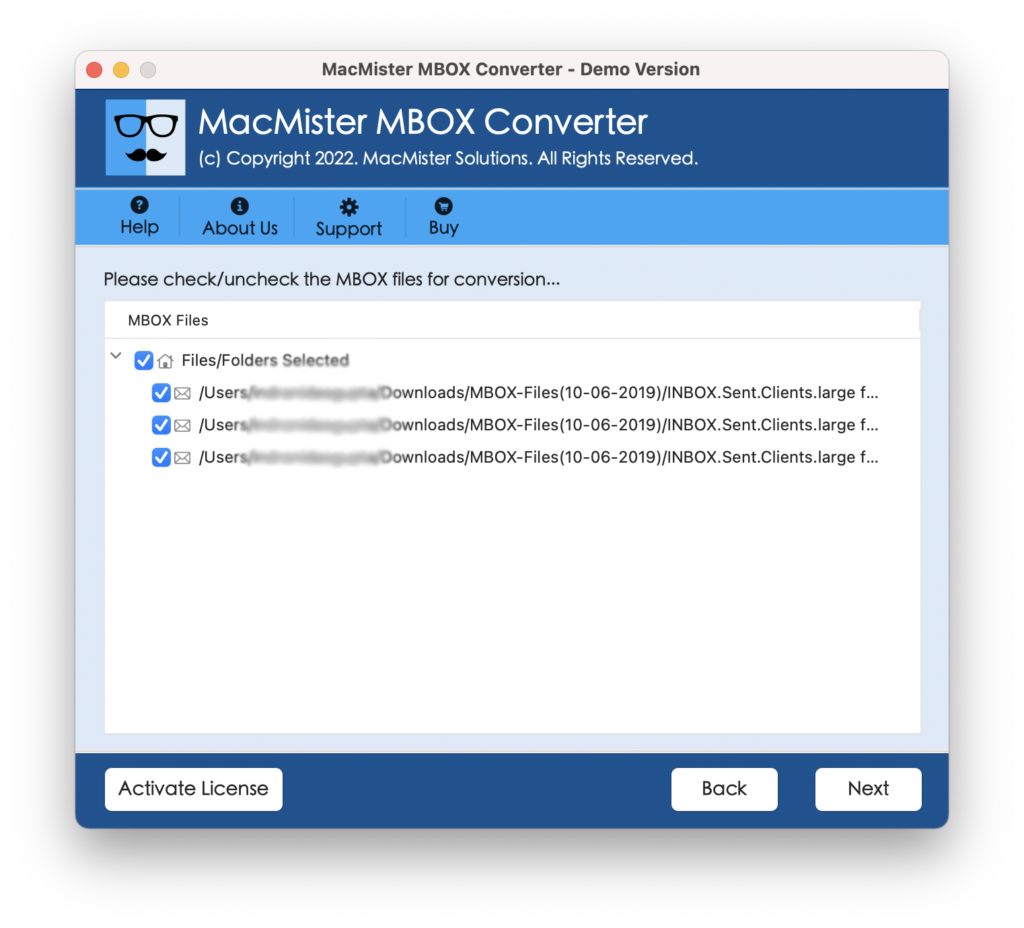
Step 3. Verify the files listed, use the checkboxes for selective files transfer (if needed) and tap Next.
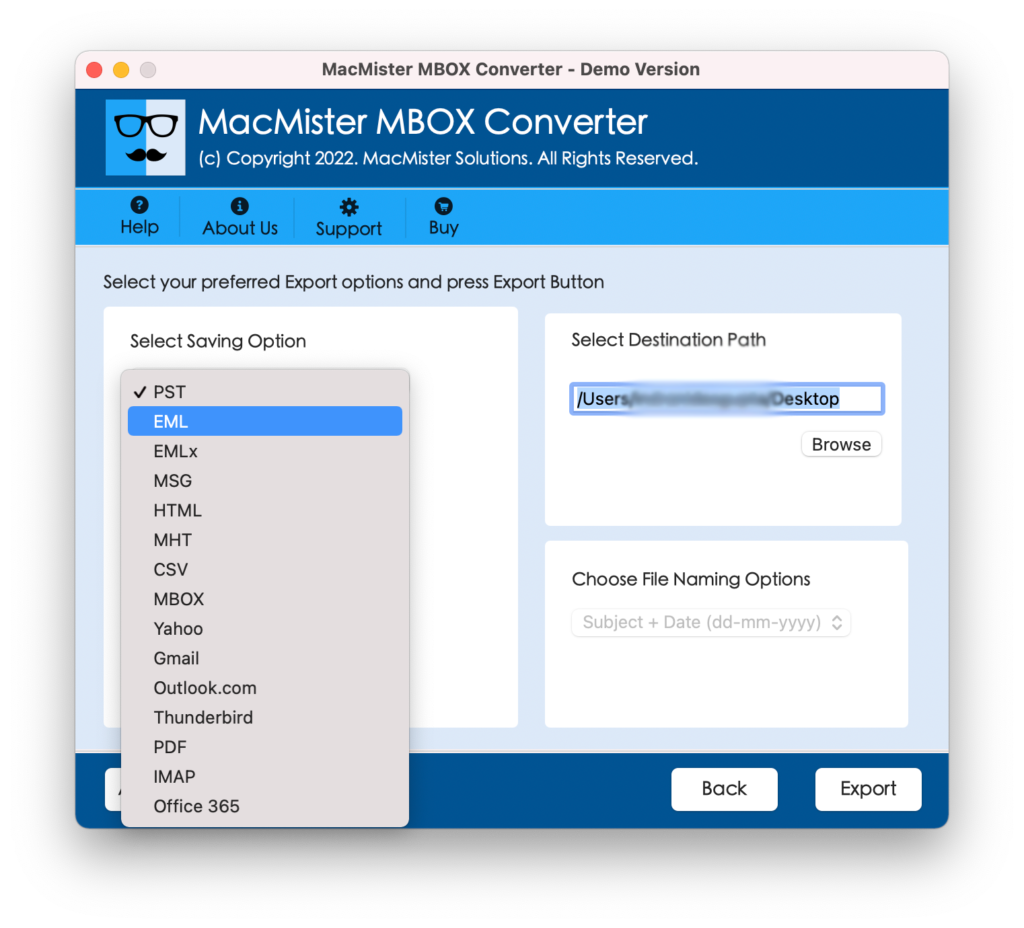
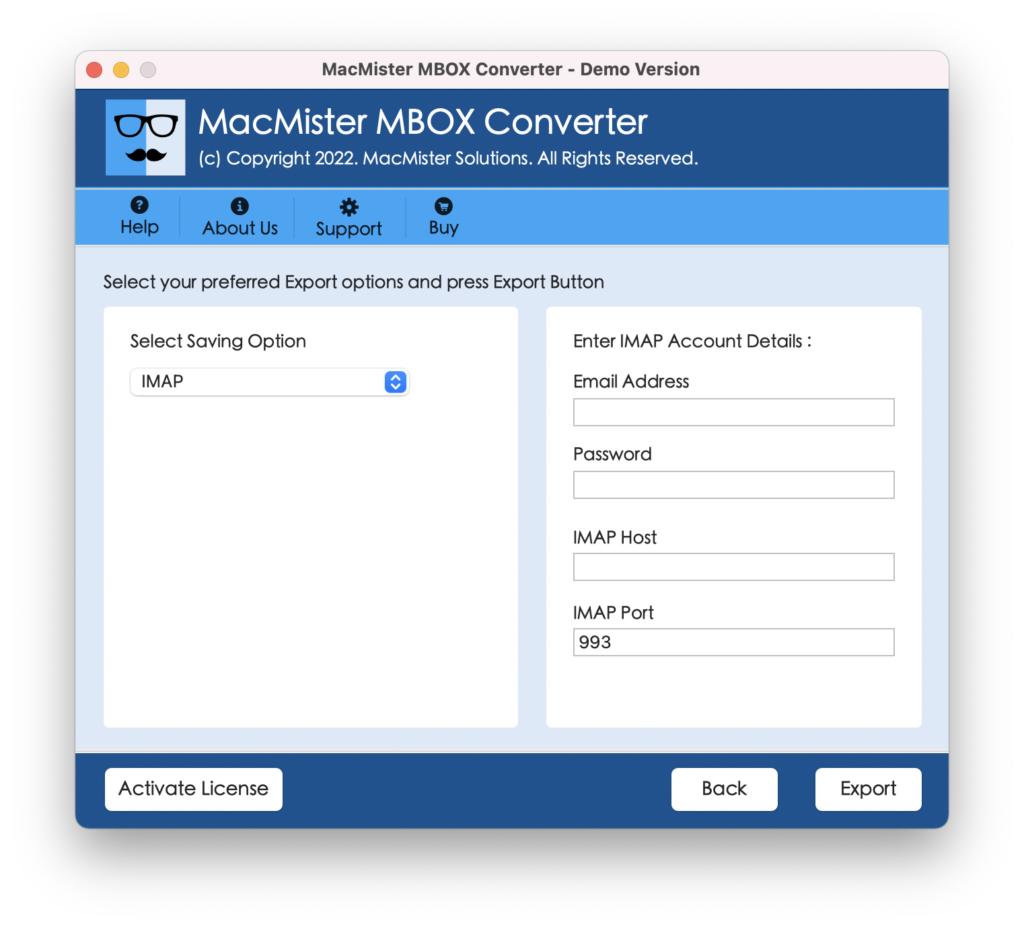
Step 4. Pick IMAP from Select Saving Options list.
Step 5. Add Rackspace webmail account details and click Export.
Step 6. Check the live process using Live Conversion Report appearing on the screen.
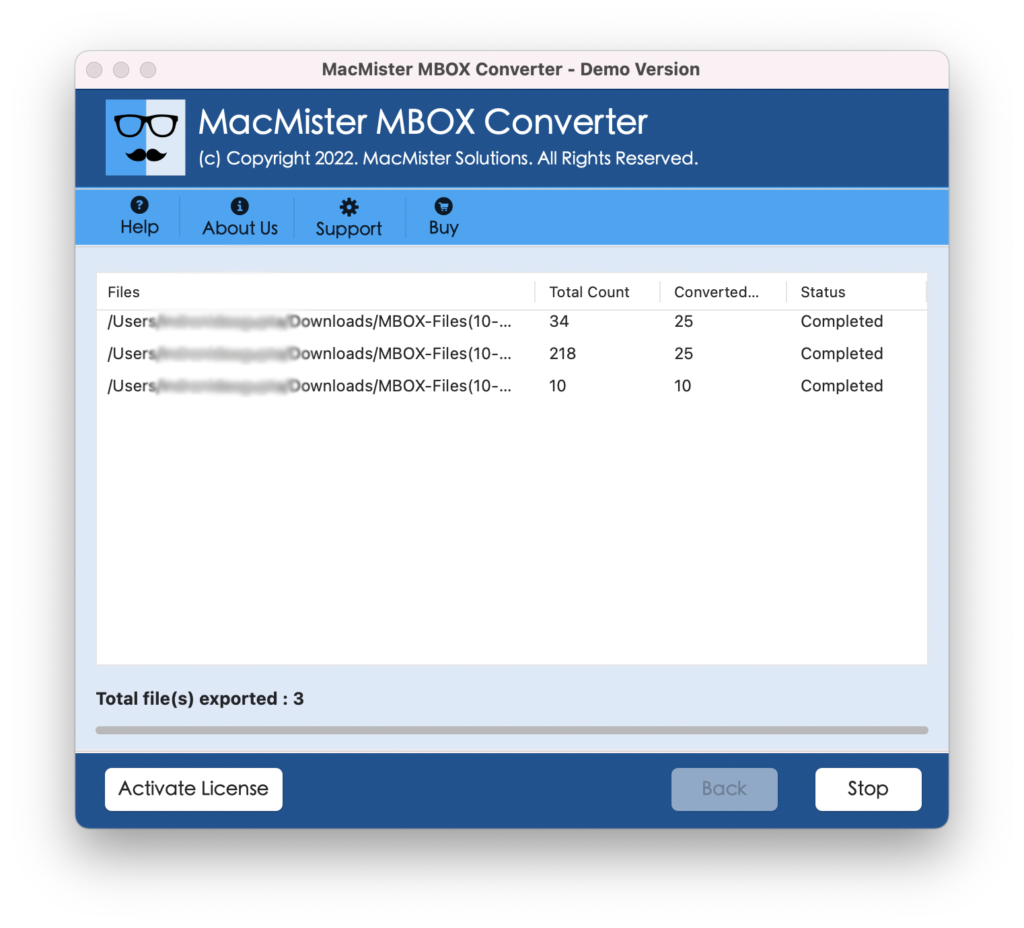
Within few seconds, the process will finish and then “Conversion Completed” notification will appear on the screen. Tap OK and then go to specified Rackspace account to check resultant files.
Benefits of the Application
- Directly import MBOX files into Rackspace with 100% accuracy.
- Keeps the credentials of Rackspace account protected throughout process.
- Handles the import of large size MBOX files with ease.
- Maintains the data integrity of MBOX mailboxes during import.
- With IMAP, supports over 15 saving types to import MBOX files.
- Simple and user-friendly GUI eases the process for all types of users.
- Available for Windows and Mac OS users.
Epilogue
In the write-up, we have discussed two main approaches to import MBOX to Rackspace email account. The first method provided the manual procedure which is free to use but bounded with some limitations. The second method is professional. It is cost-effective, secure, reliable, and expert’s recommended. Users can go through both of them and pick the one which feels suitable.