Complete Guide: How to Completely Wipe an Old Intel MacBook Air?
No matter whether you decide to sell your MacBook Air powered by Intel processors, give it away to someone from your family, or discard it in an environmentally friendly way, it is very crucial to remove all personal data stored on the hard drive. Deleting files by simply dragging them to the trash bin and then emptying it is no way near enough for your documents, passwords saved and photos become easily accessible via the file recovery software.
The following article will help you thoroughly cleanse your Intel MacBook Air in order to get rid of all your data. It will provide you with professional third-party software that will surely help in wiping old Intel MacBook Air completely.
Why Standard File Deletion Is Insufficient?
The pointers to the directory become altered when you delete any files on the macOS computer, but the physical data blocks on your hard disk will not be erased until the new data is written to them. Anyone can recover:
- Private financial information and tax documentation.
- Browser credentials, cookies, and auto-fills data.
- Private photos, messages, and email archives.
- Your identity information via system and application logs.
You should employ a certified process of data sanitization.
Step 1: Backup your important files
Before you begin with the process of erasing permanently, please ensure that you have already backed up all the files that you wish to retain.
Step 1. Plug in an external hard drive or Time Capsule into your MacBook Air.
Step 2. Mount Time Capsule or copy manually important folders like Documents and Photos onto the external drive.
Step 3. Deauthorize yourself from apps such as Apple Music, Podcasts, and license-protected software.
Step 4. Logout from iCloud by clicking on System Preferences > Apple ID > Overview > Sign Out.
Step 2: Utilizing Native Apple Recovery (For Intel Macs)
The Intel-based MacBook Air computers have an inbuilt recovery system that is called the “Recovery System”. In order to do a complete erasure of the startup disk with the help of native applications:
Step 1. Shut down your MacBook Air.
Step 2. Now turn on your computer and immediately press the Command (⌘) + R keys until the Apple logo or the spinning globe shows up. You will be booted into the macOS Recovery on your Mac.
Step 3. When the utilities window shows up, choose the Disk Utility application and click on Continue.
Step 4. In the sidebar, choose the internal hard drive which is usually identified by the name of “Macintosh HD”. Make sure that you select the parent drive and not its volume which is indented.
Step 5. Click on the Erase option in the top toolbar.
Step 6. The window will prompt you to fill the following details – name of the disk, Mac OS Extended (Journaled) or APFS (according to the macOS version you have), and partition scheme of GUID Partition Map.
Step 3: Try the Ultimate Approach
Although Apple’s built-in Disk Utility allows for basic formatting, it may not always offer more advanced internationally certified standards for thorough wiping to guarantee total security in cases when you have Intel MacBook Air with multiple drive partitions or different sectors on your disk.
The solution in this case would be using specialized software such as MacMister Data Wipe Software for Mac.
Step-by-Step Tutorial of the Application
Step 1. Download the app on your Mac and launch the tool.
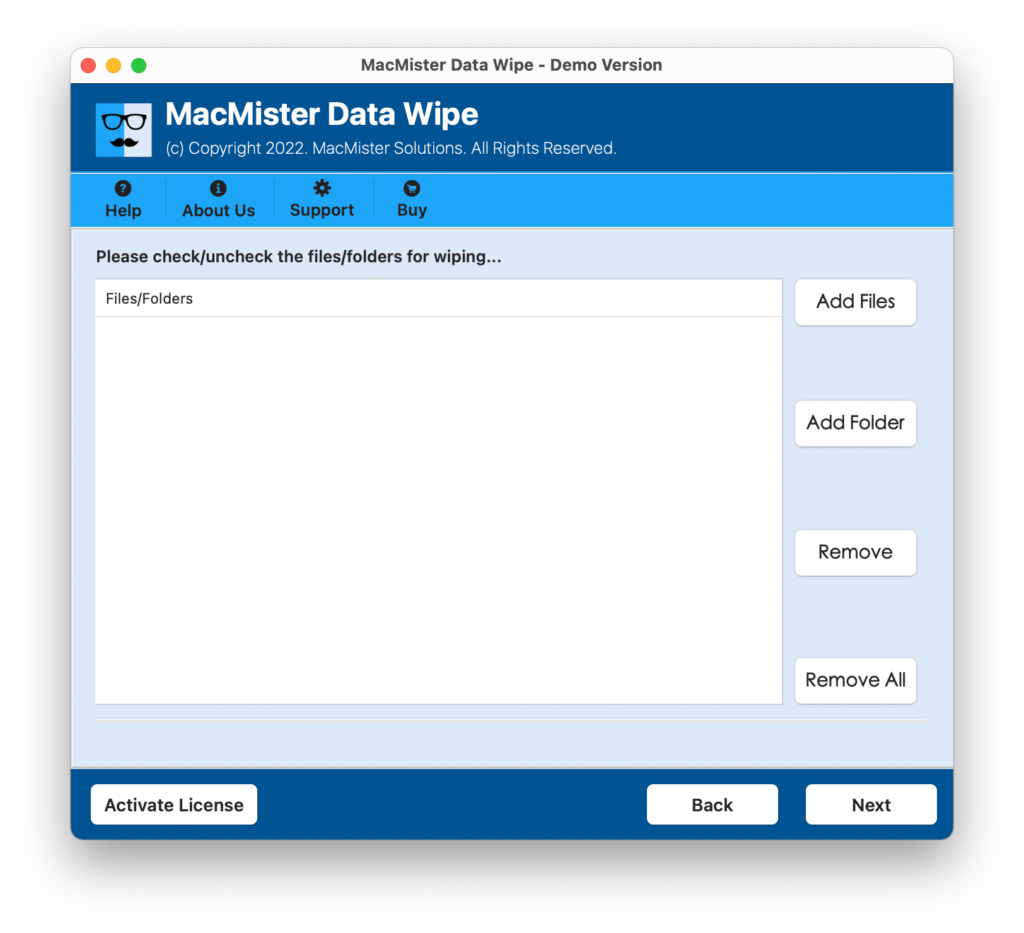
Step 2. Choose between the File & Folder mode for desired deletion.
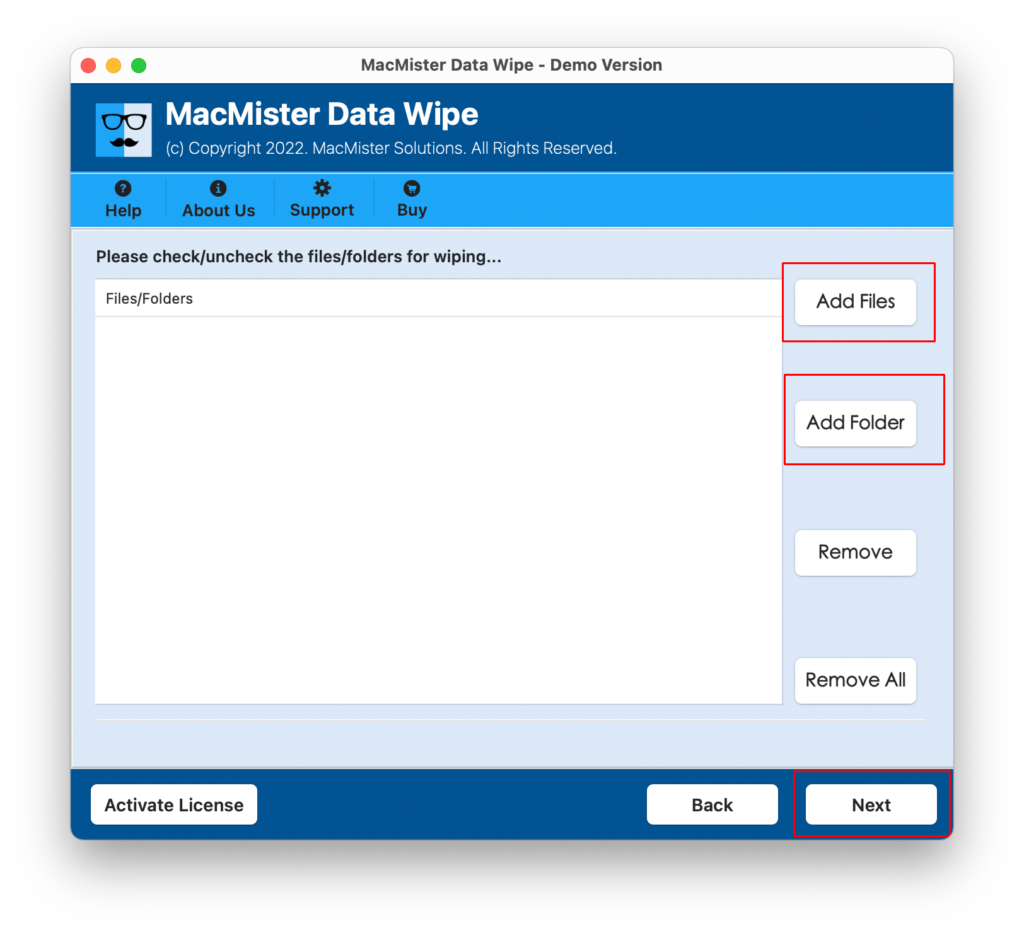
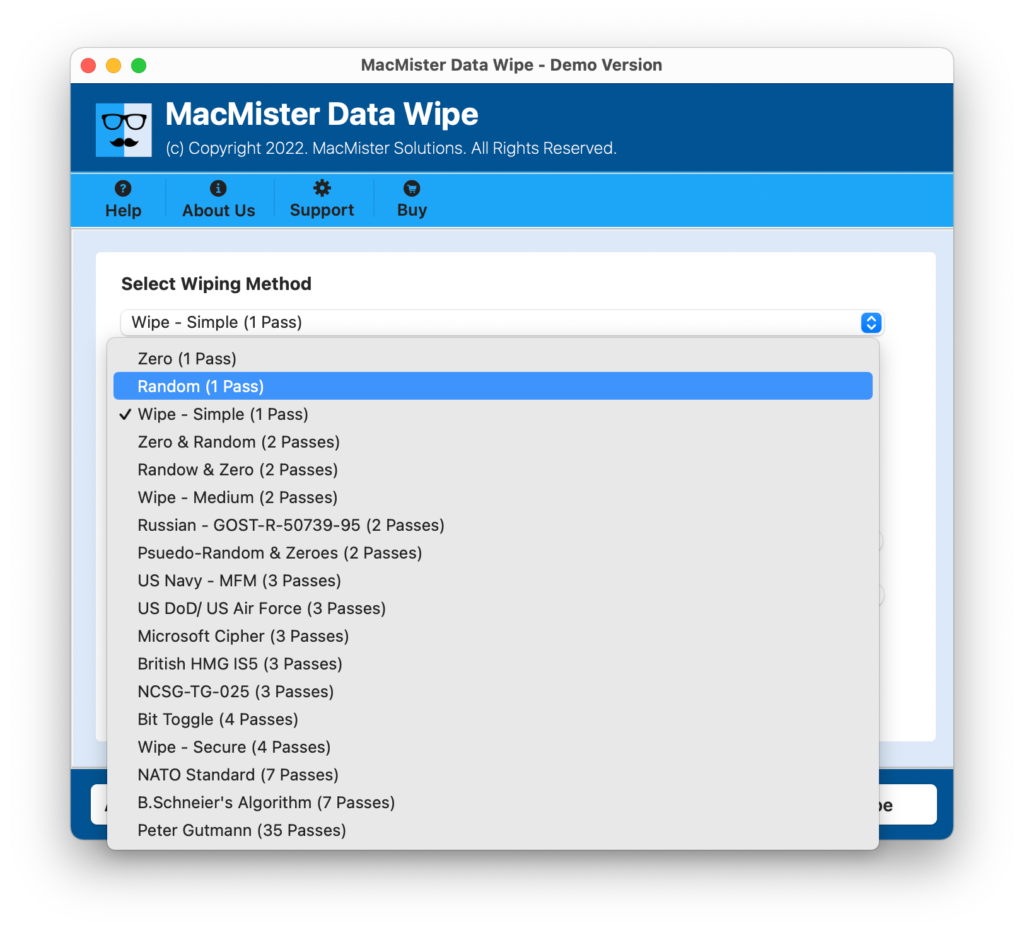
Step 3. Navigate to the wiping options menu and choose the required wiping standard.
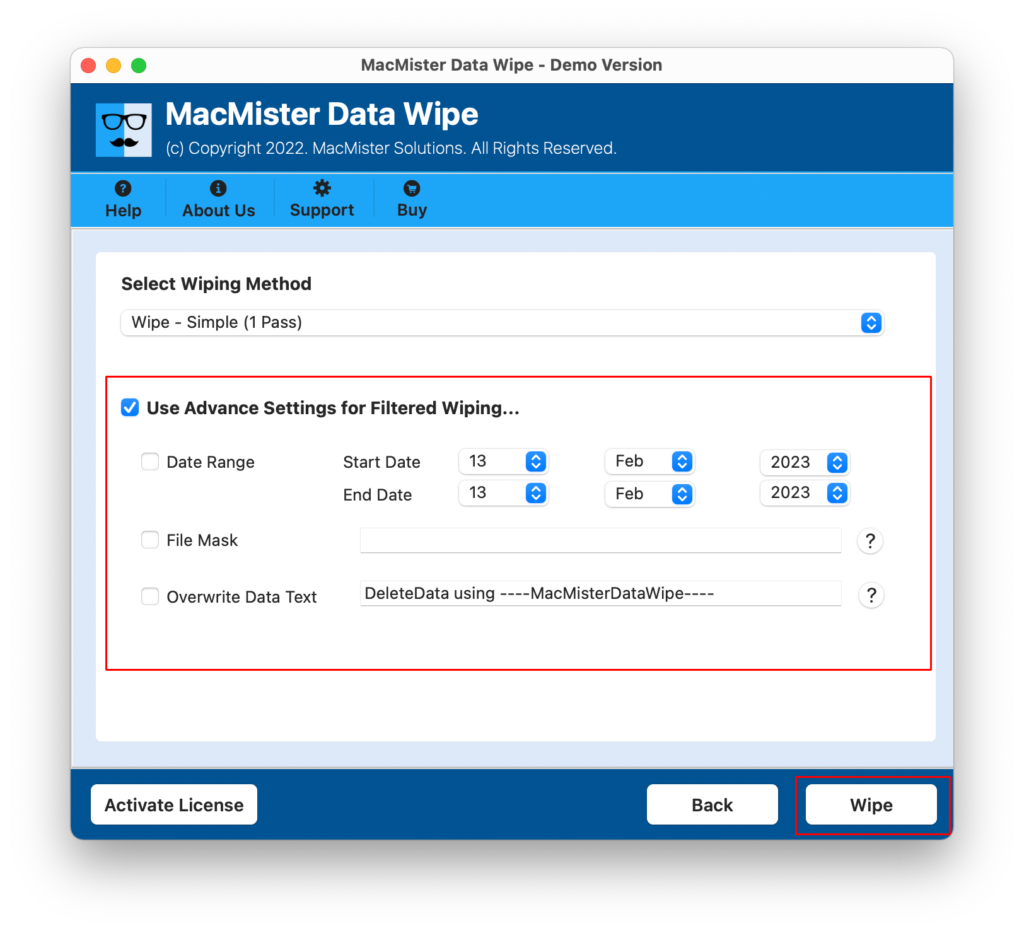
Step 4. Set Advanced Data Filtering for implementing selective erasure procedure. Then, tap Wipe button.
Step 5. Check the live erasure process via Live Wiping Progress screen.
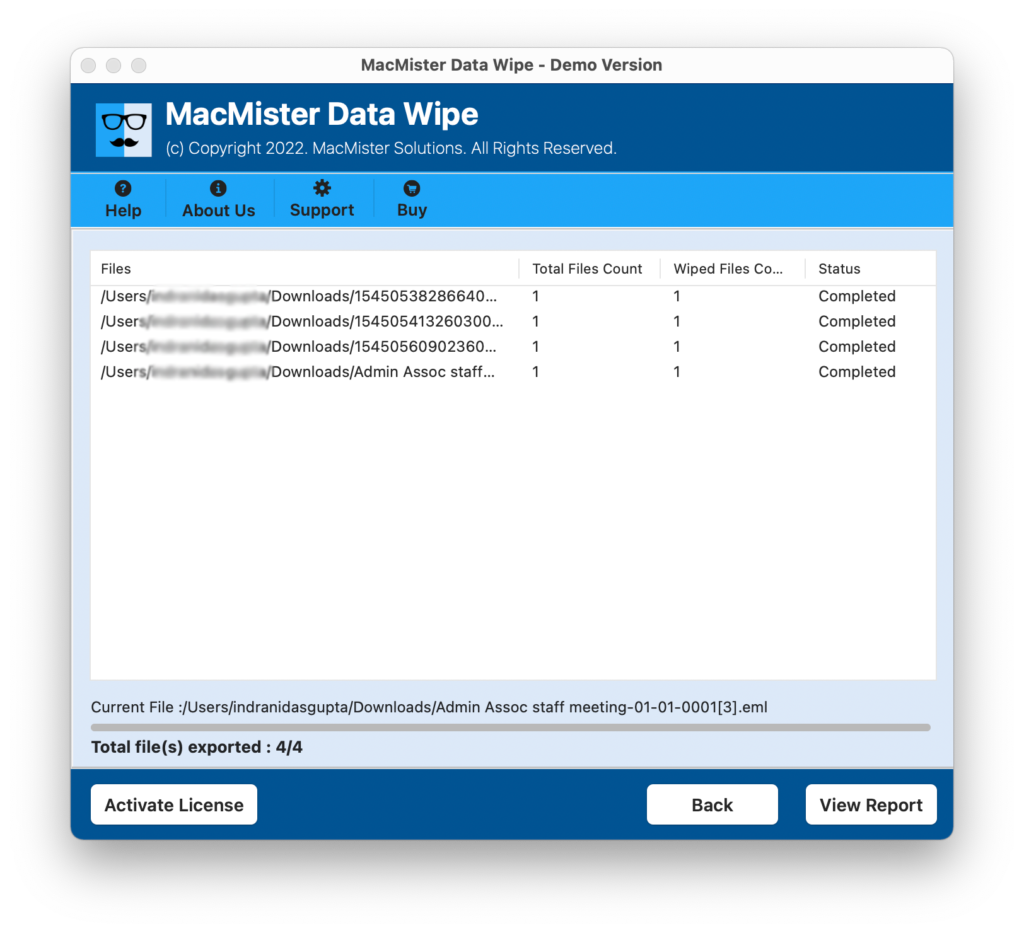
Why Choose MacMister Data Removal Tool?
- With more than 15+ international data erasure methods available (for example DoD 5220.22-M, US Navy method, zero/random overwrite, and NATO standards), your data is ensured to be securely sanitized.
- It allows you to delete your confidential files/directories or perform removal on all Macintosh HD storage systems.
- Data removal is done using a random/zero overwrite of the sectors making it completely unrecoverable by any means either software or hardware.
- It provides you automated log containing the information of data erasure process.
Step 4: Reinstalling a Clean macOS
Once your drive has been thoroughly wiped and sanitized, you will want to leave the Mac in a pristine, out-of-the-box state for the next user:
- Keep Intel MacBook Air connected to a stable Wi-Fi network.
- Return to the main macOS Recovery utilities window.
- Select Reinstall macOS (or Reinstall OS X depending on your model’s factory operating system) and click Continue.
- Follow the on-screen prompts, select your freshly wiped drive, and let the installation complete.
- When the Mac restarts to the Setup Assistant (the welcome screen asking you to select your country/region), do not proceed further. Instead, press Command (⌘ + Q) to shut down the Mac.
Your old Intel MacBook Air is now completely clean, privacy-secured, and ready for its next owner.
Epilogue
Cleaning the used MacBook Air made by Intel is one of the essential processes that must be completed in order to ensure that personal papers, financial records, and other sensitive information will not be disclosed to third parties. Even though it is possible to use some of the default tools for Mac, such as Disk Utility or Recovery Mode, these methods may occasionally leave some fragments behind or fail to implement special military-grade sanitizing protocols.
With the help of default Apple formatting together with a special program like MacMister Data Erasure Software for Mac, you will get rid of all security threats. This process guarantees not only hiding the files, but also completely erasing them from the device. It does not matter whether you want to sell, trade in, or recycle the device; using this procedure will bring you peace of mind.