How to Resolve “Erase Assistant is not supported on this Mac” Error: A Complete Guide
Selling, trading, or restarting your Mac should be relatively simple processes. Starting from the more recent versions of the macOS operating system, Apple offers an internal tool called Erase Assistant (accessible from the menu of Erase All Content and Settings). This tool allows for an effortless wipe similar to that found on iPhones and iPads. But if you are trying to clean your computer’s hard drive and receive the following error: “Erase Assistant is not supported on this Mac,” then do not panic.
This detailed article covers all reasons behind receiving this specific error, manual solutions for wiping your Mac using internal Apple tools, and explains how to use the certified software MacMister Data Wipe for Mac.
Reasons behind Erase Assistant is not supported on this Mac Error
In order to better understand why Erase Assistant is malfunctioning, it is important to consider the necessary hardware specifications set forth by Apple for this feature to work.
The contemporary Erase Assistant makes use of hardware-based crypto erase technology. It operates by rapidly deleting cryptographic keys from secure hardware, making it impossible for anyone to read any data from your SSD, which is scrambled beyond recognition almost instantly. In order to utilize this automated process, your machine should satisfy the following two requirements:
- Operating System: Your computer needs to have macOS Monterey (version 12) or a newer one (Ventura, Sonoma, or Sequoia).
- Hardware Chip: Either the Apple Silicon chip (M1, M2, M3, or M4 series), or an Intel-based CPU featuring the Apple T2 Security chip (used in high-end Macs released from 2018 to 2020).
Otherwise, if your computer is based on the old legacy hardware (Intel CPUs from before 2018 without T2 chip) or your recovery partition has been somehow damaged or compromised as a result of the use of Boot Camp or another dual-boot environment, macOS will recognize it as an error and display the “Erase Assistant is not supported” message.
Method 1. Resolve the Error Using Recovery Mode Disk Utility
The second solution from Apple’s side is to remove data manually using the Disk Utility tool accessed from Recovery Mode. This process depends on the particular type of your processor, either Intel or Apple Silicon.
Procedure for Older Macs with Intel Processors (No T2 Chip)
- Firstly, turn off your Mac.
- Next, press the Power button and press the Command + R keys simultaneously.
- Hold down these keys until you see an Apple icon or a spinning globe.
- Then, from the macOS Utilities window, choose Disk Utility and click Continue.
- Select your main internal hard drive from the list on the left panel. Normally, the drive will be called Macintosh HD.
- Push the Erase button from the toolbar at the top.
- Select the APFS file format (you can use Mac OS Extended (Journaled) in case of macOS older than High Sierra) and click Erase Volume Group.
Alternative Process for Newer Apple Silicon Macs (In case Assistant Fails due to Software Bugs)
- Shut down your Mac completely.
- Hold down the Power button until you see “Loading startup options” message on your screen.
- Choose Options, and then select Continue after entering your administrator password.
- Launch Disk Utility, select Macintosh HD, and then press Erase.
- Format your hard drive and return to the main menu where you will be able to reinstall macOS.
The Drawbacks of Manual Approach
Apple’s official method of using Recovery Mode in order to prepare the device for a clean install of a new version of macOS has several security vulnerabilities.
The process of standard formatting only removes file paths and signals an operating system that certain sectors are now available to write new data in.
Until new data is actually written to the sectors, the initial data will remain intact. An advanced user will be able to recover your personal photos, financial documents, and even stored passwords in your web browser.
Additionally, SSDs employ special wear leveling algorithms that make it virtually impossible to guarantee that certain sectors with important data have been cleaned up properly via simple formatting tools.
Method 2. Apply Safe & Secure Approach
When you are looking for total peace of mind that your personal data will not be recovered even by using microscopic lenses, it is advisable that you utilize one of those military grade-certified data destruction tools. MacMister Data Wipe for Mac is one of these specialized software solutions designed particularly to overcome the deficiencies of both Apple’s Erase Assistant utility and normal disk formatting using Disk Utility.
The application operates like an effective standalone tool, which is fully compatible with many environments, from as far back as macOS 10.10 Yosemite up to very recent versions. Instead of deleting files, the tool overwrites each sector of your hard drive storage with various characters or zeros.
Advanced Wiping Capabilities
These wiping algorithms maintain the privacy of your personal data by incorporating over ten internationally acclaimed and acknowledged wiping algorithms, including:
- Zero (1 Pass) / Random (1 Pass): These fast algorithms work by writing zeroes across your hard drive entirely.
- US DoD / US Air Force (3 Passes): Writes over the data fields using characters, complements, and random numbers, along with strong overwrite validation.
- US Navy – MFM / RLL (3 Passes): This algorithm has been developed for dealing with deep signal analysis of magnetic residue on older hard drives.
- NATO Standard (7 Passes): This is a thorough multi-pass wiping process using specific overwrite algorithms.
Step-by-step Process to Securely Wipe Data with the Help of MacMister
The process through which one is able to leverage this utility tool to overcome the problem of securely deleting data is quite simple and logical. It is step-by-step wizard-driven.
Step 1: First, download and run the application on your Mac.
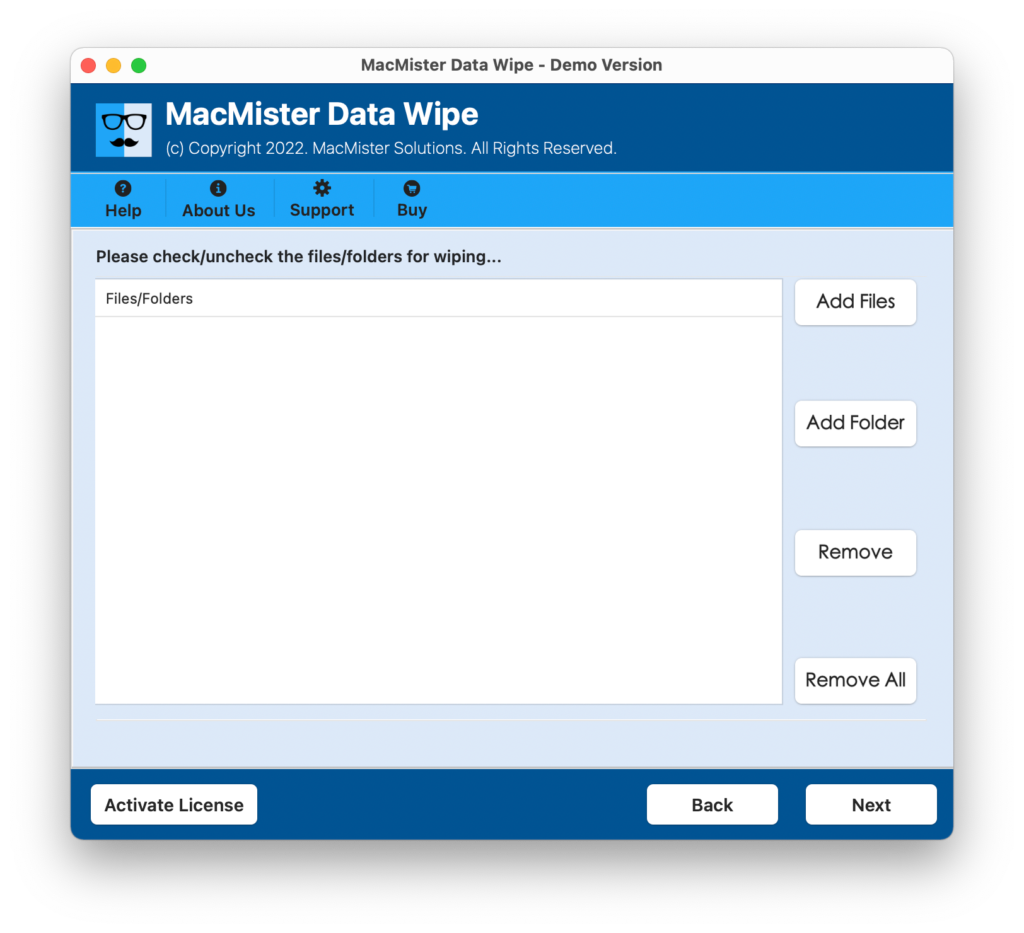
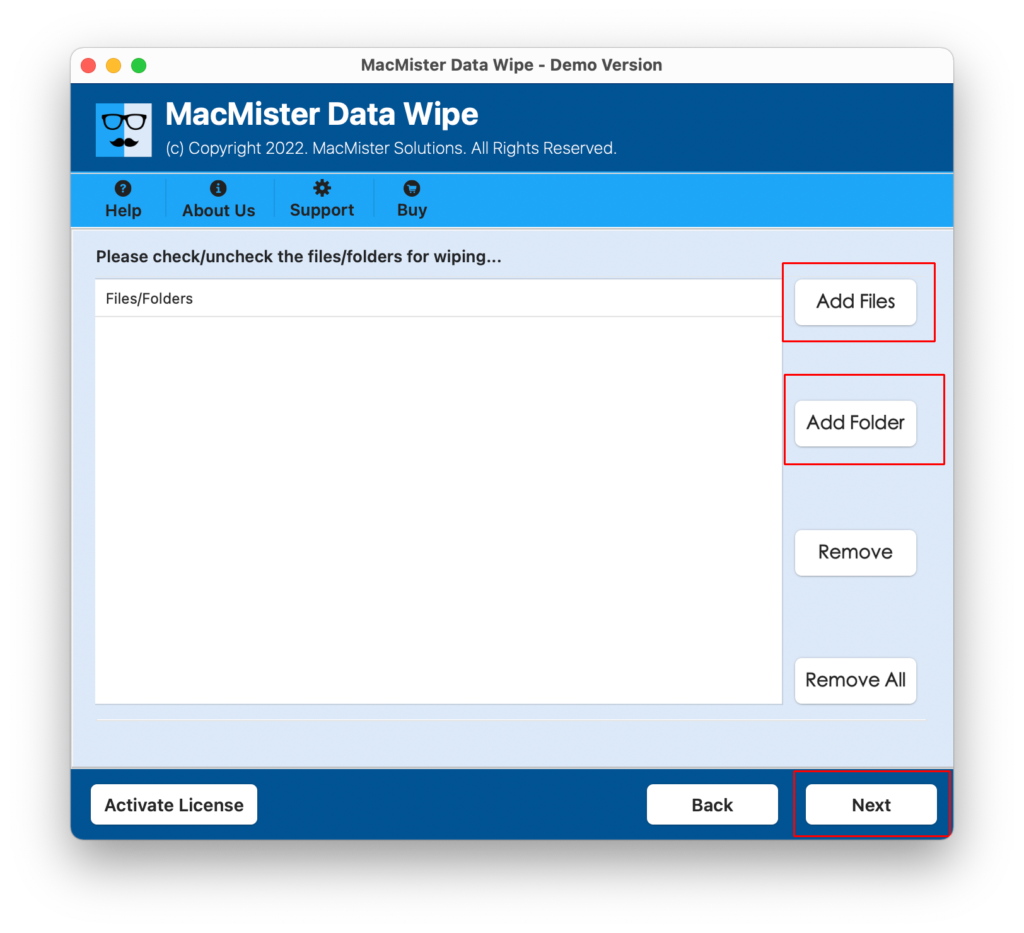
Step 2: The app is equipped with Add File(s)/Add Folder buttons with the help of users can select files or folders that need to be deleted.
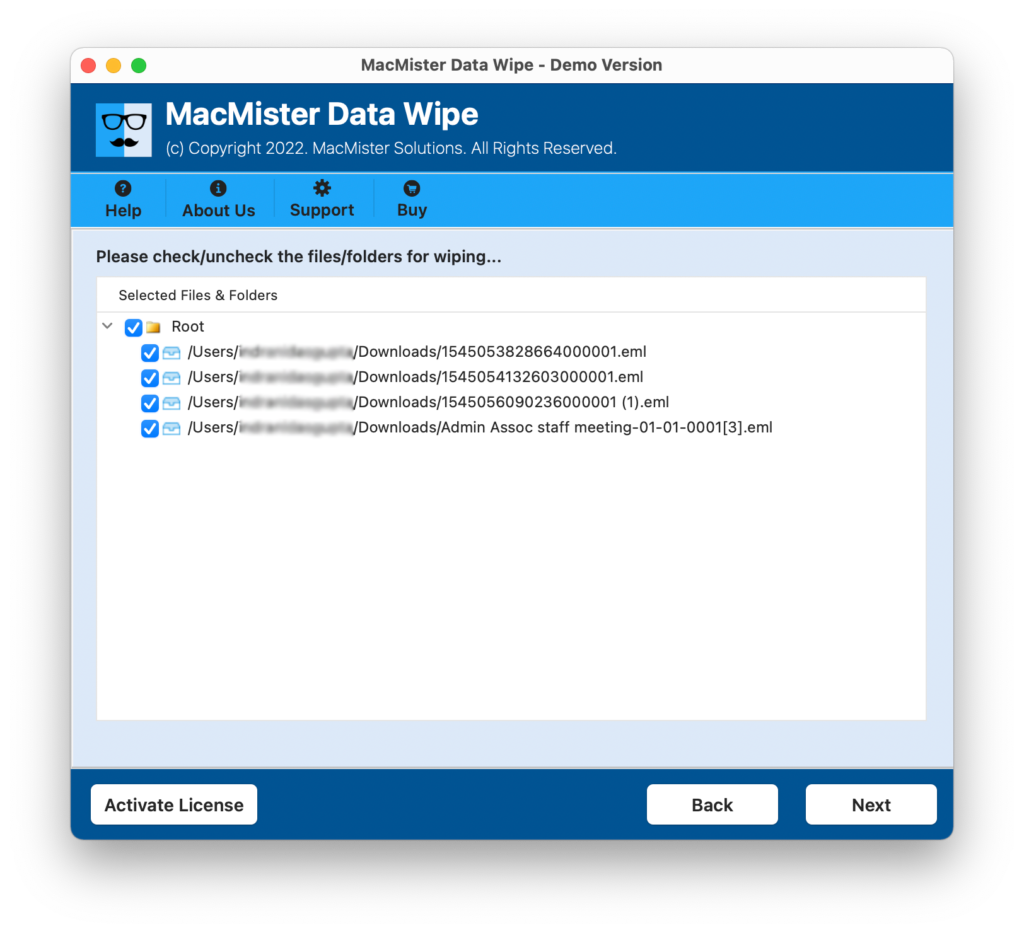
Step 3. Go through the listed files and verify them.
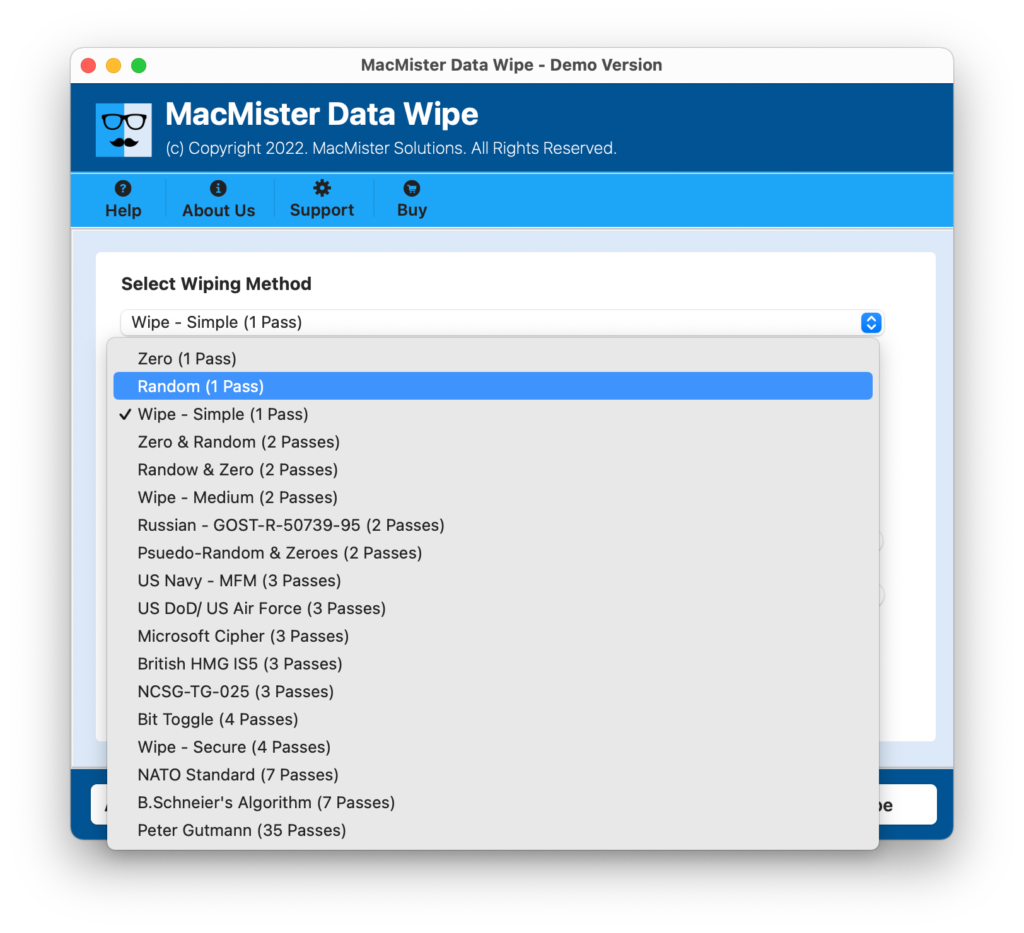
Step 4: In the drop-down box, users can select their desired wiping option from an array of sanitization algorithms like ‘Zero 1-Pass’ for quick deletion, and ‘US DoD 3-Passes’ for security clearance requirements. Advanced options for data filtering can also be selected at this point.
Step 5: Simply click on ‘Wipe’. A message box would alert you about the process. By clicking ‘OK’, the process will permanently delete data, making it unrecoverable by any data recovery program in the market.
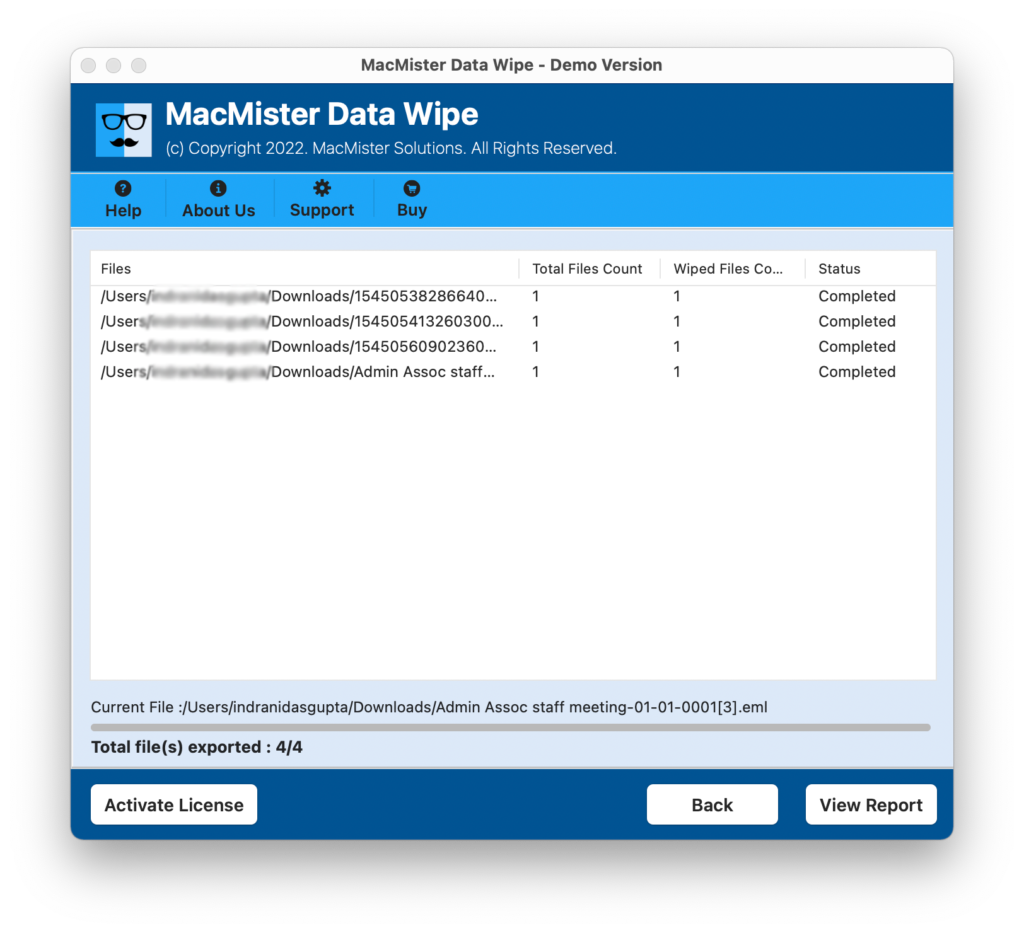
Within seconds all the necessary data will successfully removed from Mac OS.
Epilogue
Running into the “Erase Assistant is not supported” error message does not mean your data wipe strategy is compromised. By understanding your hardware requirements and leveraging advanced utilities like MacMister Data Erasure for Mac, you can confidently bypass system limitations and ensure your digital footprint is entirely erased before parting with your device.