How to Transfer Emails from CenturyLink to Gmail on Mac & Windows?
Are you deciding to change your email platform, moving to Gmail from CenturyLink? Having some sensitive emails stored in CenturyLink account that you do not want to lose? Wondering how to transfer emails from CenturyLink to Gmail safely? Searching continuously for some techniques to handle the necessary task? No worries because in the segment you will come across a method that will keep the emails secure and help you to transfer them immediately to Gmail account with ease.
Overview of CenturyLink & Gmail
CenturyLink is a global innovation organization that provides variety of services to users. It offers cloud solutions, business network solutions, managed services, email security, phone, and more. Along with, deliver the support of webmail service that is useful for private and professional individuals, enterprises, public spaces, etc. to connect, collaborate, and communicate with others all over the globe.
On the other hand, Gmail is a Google service which is free-to-use, simple, and highly secure. It is equipped with powerful productivity tools and advanced features. Moreover, Gmail’s multiple security options and 15 GB of storage capacity makes it a preferable choice among users and professionals.
One can say, Gmail is definitely a today’s online application for email management which is one of the reasons to migrate from CenturyLink.
However, there are different ways to transfer emails from CenturyLink to Gmail account. Let us discuss both of them in the further section.
How to Transfer Emails from CenturyLink to Gmail Account Manually?
Follow the steps to manually transfer CenturyLink email to Gmail webmail service –
Step 1. Login to Gmail account using necessary credentials.
Step 2. On the right-side, go to Gear icon representing Settings of Gmail account.
Step 3. Choose the option “Accounts & Import” and click “Add a Mail Account”.
Step 4. In the next screen, specify CenturyLink email address and tap Next button.
Step 5. Pick the option “Import Emails from my Other Account (POP3)” and tap Next button.
Step 6. Proceed further by mentioning CenturyLink username as well as password in the necessary fields. Simultaneously, select “Leave a copy of Retrieved message on the Server”.
Step 7. Provide POP Server details i.e. pop.centurylink.net. Continue by clicking Add Account button.
Step 8. Click the No option and press the Finish button.
By implementing the steps above, users will be able to manually transfer CenturyLink email to Gmail account. But it is not easy as it appears to be. There are some drawbacks which you should consider first before implementing the process manually.
Drawbacks of using Manual Approach
- Gmail is an online service where server may suddenly goes down without any notification; this could disrupt the process forcing users to start the entire process again.
- Time-consuming and complex steps can take users lot of time and efforts.
- It is recommended to implement the process under experts assistance as the steps are quite technical and confusing.
How to Transfer Emails from CenturyLink to Gmail Account Directly?
The simple and effective way to transfer emails from CenturyLink to Gmail is MacMister Email Backup Software Mac & Windows. The tool has more than 30 webmail sources from where users can select CenturyLink, specify CenturyLink login details and choose Gmail as a saving option. After implementing these three simplified steps, CenturyLink users will be able to successfully and directly transfer CenturyLink email to Gmail account.
Moreover, the application possesses an intuitive interface which both technical and non-technical users can manage effortlessly. Also, there are numerous features available that users could use as per their requirements to get the desired results. However, the software also has a free demo version that users can use to check the process to transfer emails from CenturyLink account to Gmail for free.
Working Steps to Transfer Emails from CenturyLink to Gmail on Mac
Step 1. Download, install, and run CenturyLink to Gmail Backup Tool for Mac on Mac OS.
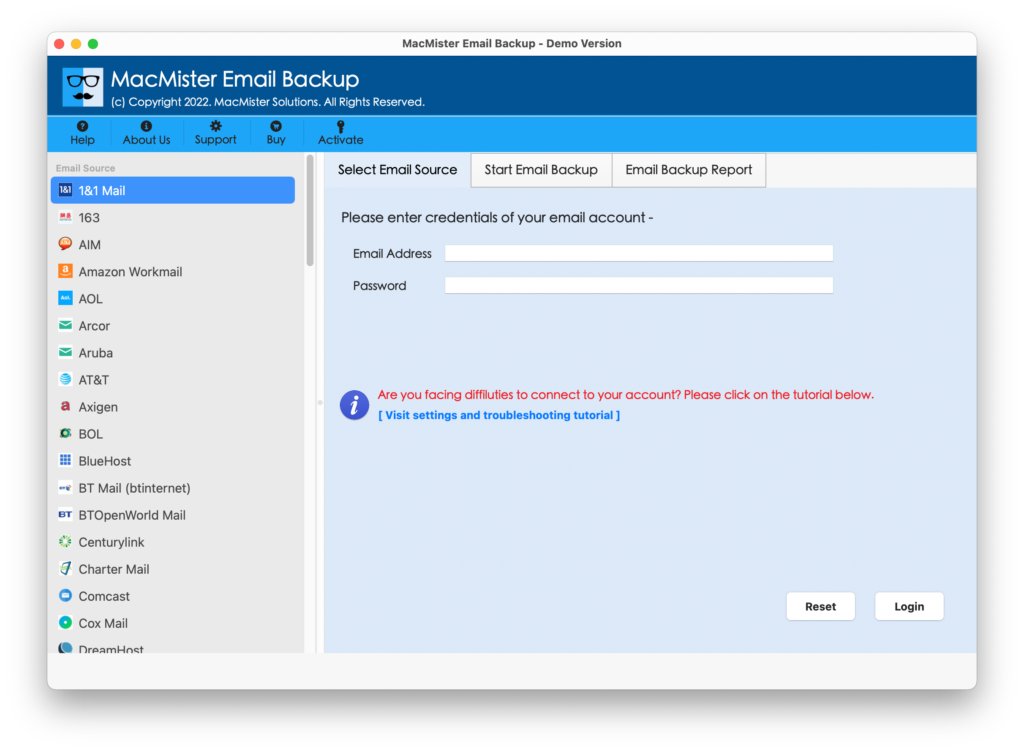
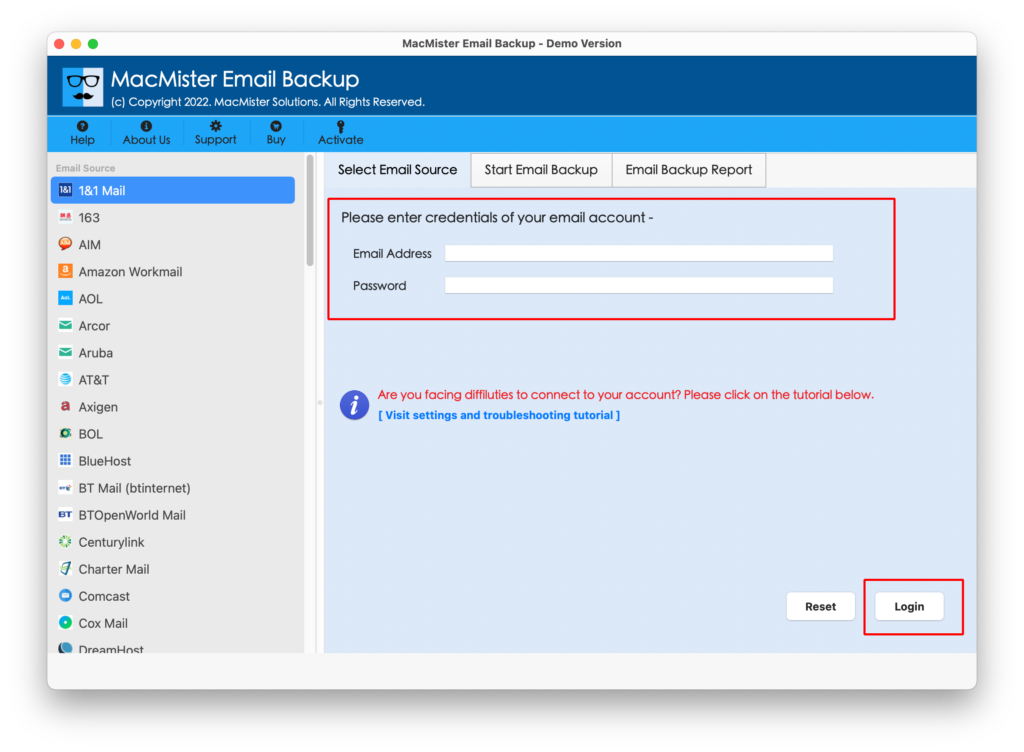
Step 2. Select CenturyLink option from the left and add CenturyLink credentials in the required fields. Tap Login button.
Step 3. The application will verify CenturyLink account and list all CenturyLink mailboxes on the left pane of the tool.
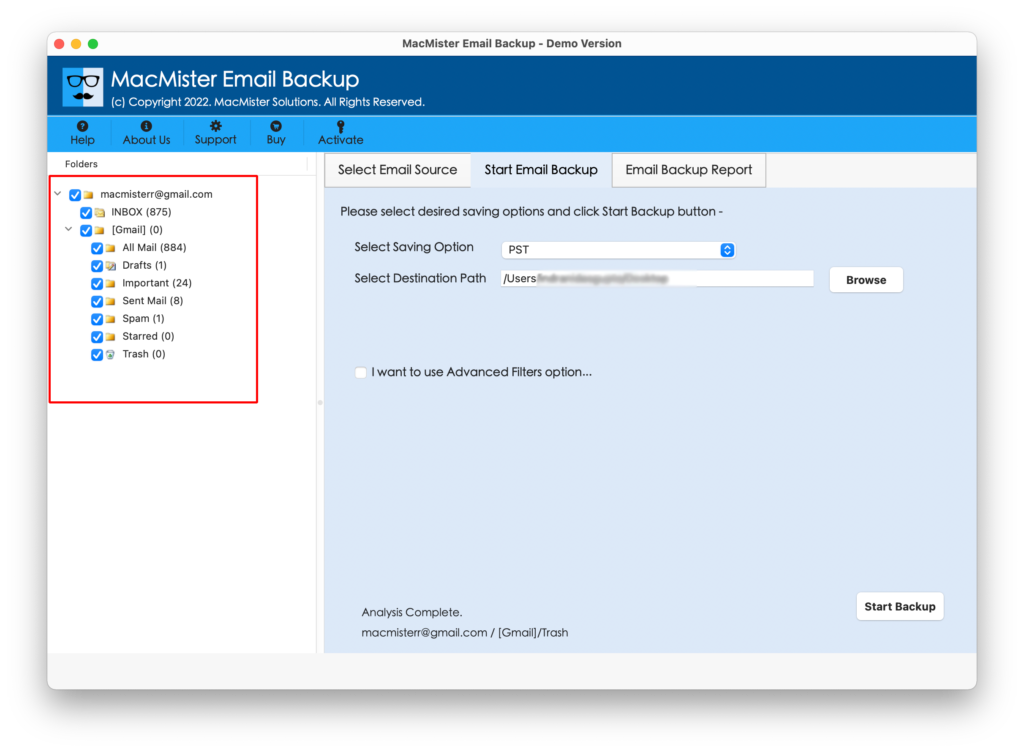
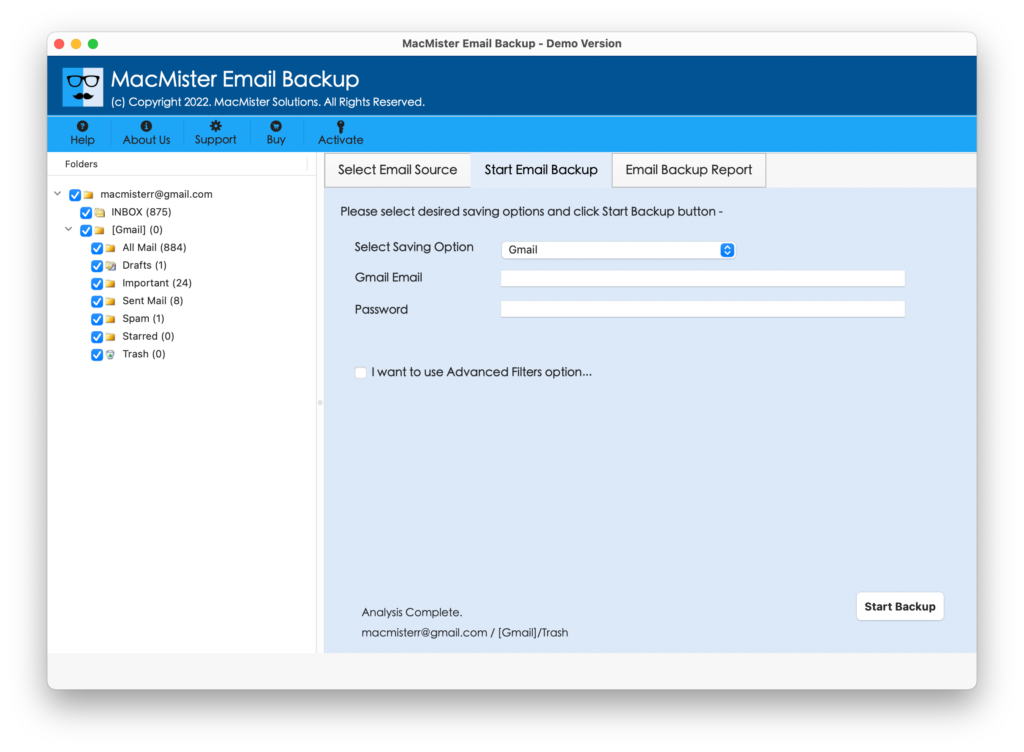
Step 4. On the right, click Select Saving Options, and choose Gmail from the list.

Step 5. Add Gmail login details (email address & app password). Use filters if you want to transfer CenturyLink email to Gmail of a particular month, date, subject, etc. Last, tap Start Backup button.
Step 6. The application will show Email Backup Report which displays the backup status of CenturyLink emails.
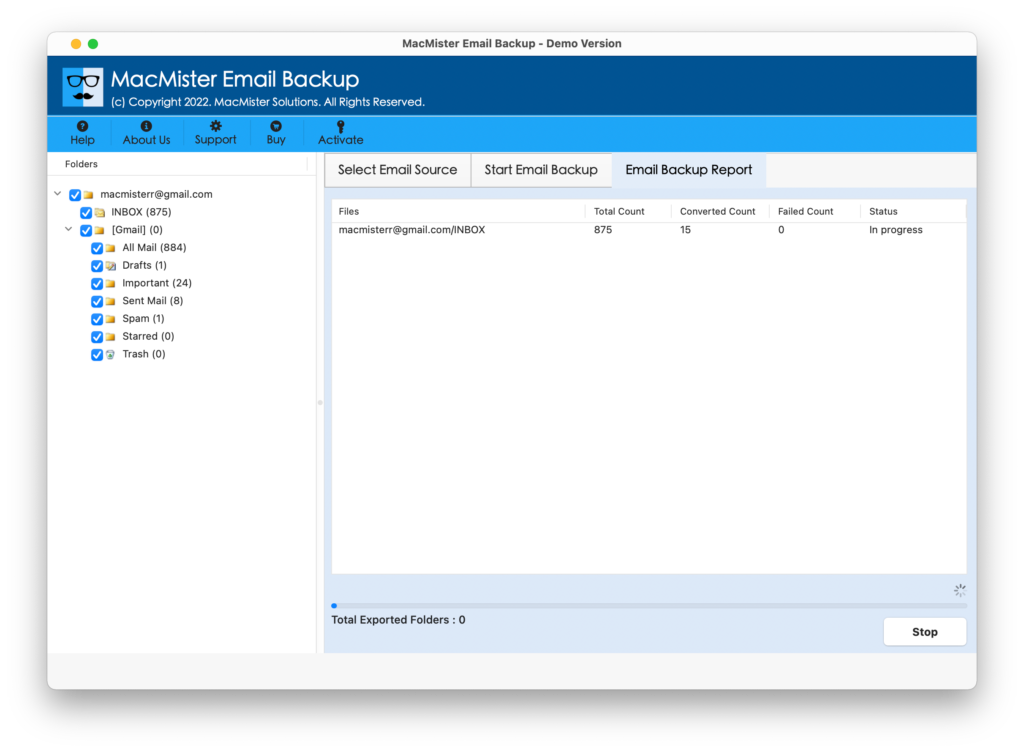
Once the process terminates, the tool will show the notification confirming that the process is completed successfully. Click on OK and open Gmail account to check the transferred emails. However, you will see that each and every email is accurately appearing. The content, layout, and formatting properties are also precise and correct.
Moreover, the steps are simple, safe to use, and time-saving. So, users can keep their worries away and make use of a solution to securely transfer emails from CenturyLink to Gmail with attachments.
Epilogue
In the segment, we have highlighted different approaches to resolve “how to transfer emails from CenturyLink to Gmail with attachments”. First is a manual method that includes lengthy steps and need expert’s support for the same. Second, is a direct method that is secure, time-saving, reliable, and friendly. It also provides trial edition that users can download and use for free. It allows to transfer first 25 emails from CenturyLink to Gmail free of cost. Moreover, the app has 15+ more options in which users can transfer CenturyLink emails. However, users can choose the suitable method and transfer CenturyLink emails to Gmail as per their requirements.