Overcoming Apple Silicon Factory Reset and Formatting Errors!
When one moves away from a device or prepares it for use by another person, this is usually done with the help of a factory reset. For Apple Silicon Macs powered by M1, M2, M3, or even newer models of Apple silicon processors, this is done using handy recovery tools provided by Apple. But at times, the procedure can prove to be a very complex one.
Apple Silicon Macs employ a sophisticated security model that is deeply connected with hardware components of the computer. Formatting or resetting the startup disk can often lead to error messages, inactive disks, and partitioning issues. When standard ways of recovering do not work, a particular approach to fixing the problem is needed.
This article will provide you with information about the causes of formatting and reset errors on Apple Silicon Macs, recovery solutions, and MacMister Data Shredding app, the ultimate solution for computer sanitization.
Why Apple Silicon Resets Are Different?
It used to be quite simple to erase the old Macs running on Intel processors, by simply booting into Internet Recovery mode and erasing all partitions of the hard disk via Disk Utility, followed by installing a fresh version of macOS. But this is no longer true with Apple Silicon Macs, since they have got a completely new memory architecture which uses a secure hardware enclosure named as Erase All Content and Settings (EACS). While this memory architecture helps in offering top-notch security against any sort of tampering, yet it also requires strict operations.
- Encryption Keys: Apple Silicon uses hardware-based encryption keys for storing the data. In case the keys are orphaned or corrupted in the process of wiping, then the storage controller of Apple Silicon will lock the drive in order to keep the data safe.
- Firmware-Based Recovery: macOS recovery system is integrated within the firmware of the computer, and not on a separate partition of the hard disk. In case there is any mismatch or corruption within the partition or snapshot, then it will not allow you to format the drive.
- Activation Lock Interlocks: Security protocols ensure that the disk cannot be wiped if there is no ability to communicate with Apple’s activation and Find My servers during the reset process.
Common Formatting Errors During Resets for Apple Silicon
In case of a factory reset failure on an M-series Mac, the following annoying error message typically comes up:
Error 1. “Error occurred while preparing the update. Failed to personalize the software update.”
Reason: This is the most common error code seen on Apple Silicon Macs. It arises when the recovery assistant tries to connect to Apple’s activation servers for signing a new macOS version but cannot establish a connection due to network issues, corrupt storage snapshots, or poorly formed container maps.
Error 2. “Erasure failed” in Disk Utility:
Reason: When you try to erase the main “Macintosh HD” partition while in recovery mode, the live container or system snapshots fail to unmount, causing the “Erasure failed” permission denial message.
Error 3. Boot loop and support codes (-1008F, etc.):
Reason: Your Mac is unable to boot from the recovery assistant to internet recovery because of a security policy that prevents partition modifications.
Standard Troubleshooting Steps for Apple Silicon Macs
Prior to applying third-party utilities, consider these native techniques for removing formatting blocks:
Method 1: Using the Native “Erase All Content and Settings” Assistant
Assuming your computer is able to boot into macOS, skip using Disk Utility altogether as Apple’s native tool will take care of secure cryptographic erasing behind the scenes:
- Launch the System Preferences app from your dock or the Apple menu.
- Select General > Transfer or Reset from the menu bar.
- Schedule to Erase All Content and Settings.
- Provide your admin username and password as required by the wizard.
Method 2: Accessing Recovery Assistant Properly
Should your Mac computer not start up or be unresponsive:
- Turn off your Mac computer.
- Hold down the Power button till the prompt “Loading startup options” appears onscreen.
- Select the gear icon under the “Options,” and then click on Continue.
- Choose an administrator account, and then provide your password, should there be one. The screen will then allow you to use the built-in erase assistant application.
Overcoming the Error using MacMister’s Advanced Solution
In instances where native methods of drive repair do not work or the error codes are so stubborn that they do not allow you to format your drive, there comes a point where the troubleshooting process ends. In case you are selling your computer and want to ensure that absolutely all of your corrupted sectors, stubborn snapshots, and personal files are erased, a specialized tool becomes a necessity.
MacMister Data Wipe Software for Mac is where such a necessity gets fulfilled. The utility is specifically designed to overcome any locking mechanism put into place at system level and wipe away your storage devices.
Why Choose MacMister Data Removal App?
- Specifically tackles the issue of locked partitions, active snapshots, and stubborn metadata blocks, which prevent native Disk Utility wiping from working properly.
- Features highly efficient wiping protocols (like DoD 5220.22-M or NIST protocols) to guarantee that all your files and system data become unrecoverable after wiping.
- Designed with a sleek graphical user interface that helps guide you through the wiping process and makes it easy, without using difficult Terminal commands.
- Perfectly tailored to run on internal boot volumes as well as external storage devices.
Step-by-Step Guide: Wiping Your Drive Using MacMister
When the native utilities cannot format your Apple Silicon Mac, using an appropriate application guarantees a clean slate:
Step 1. Firstly, download and install the app on your Mac.
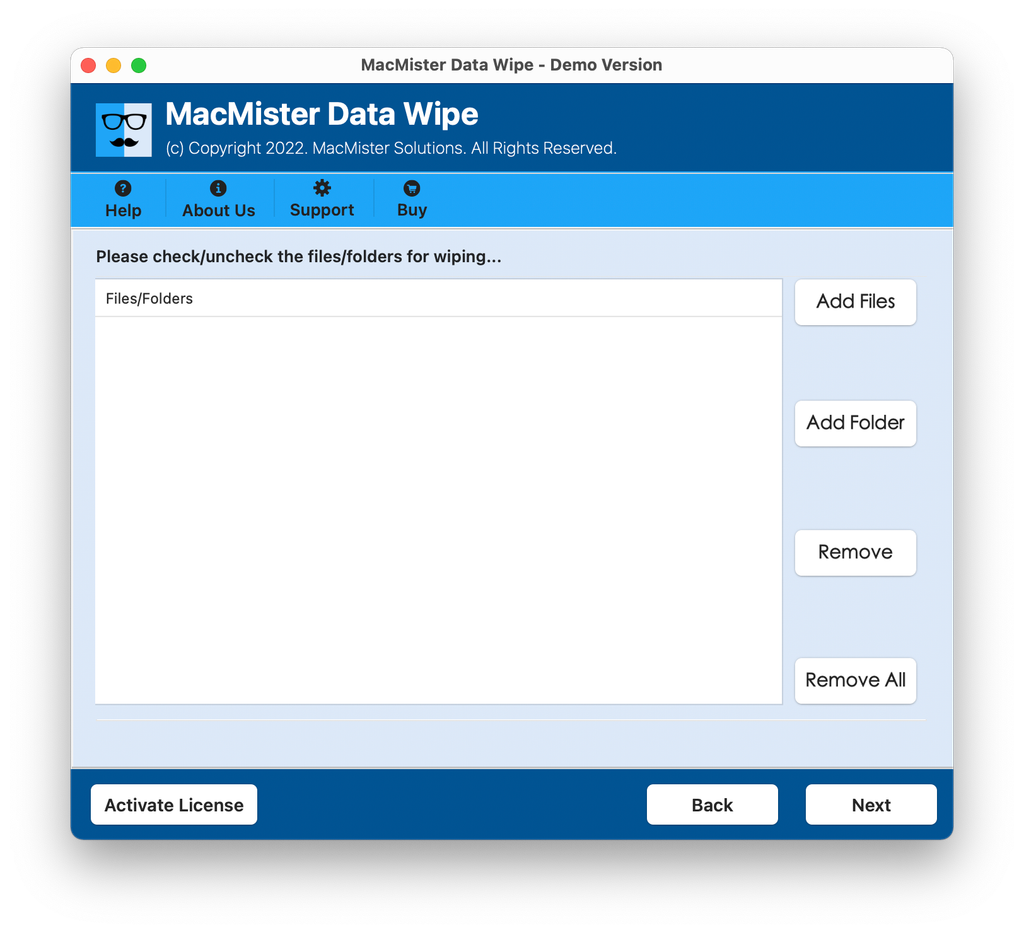
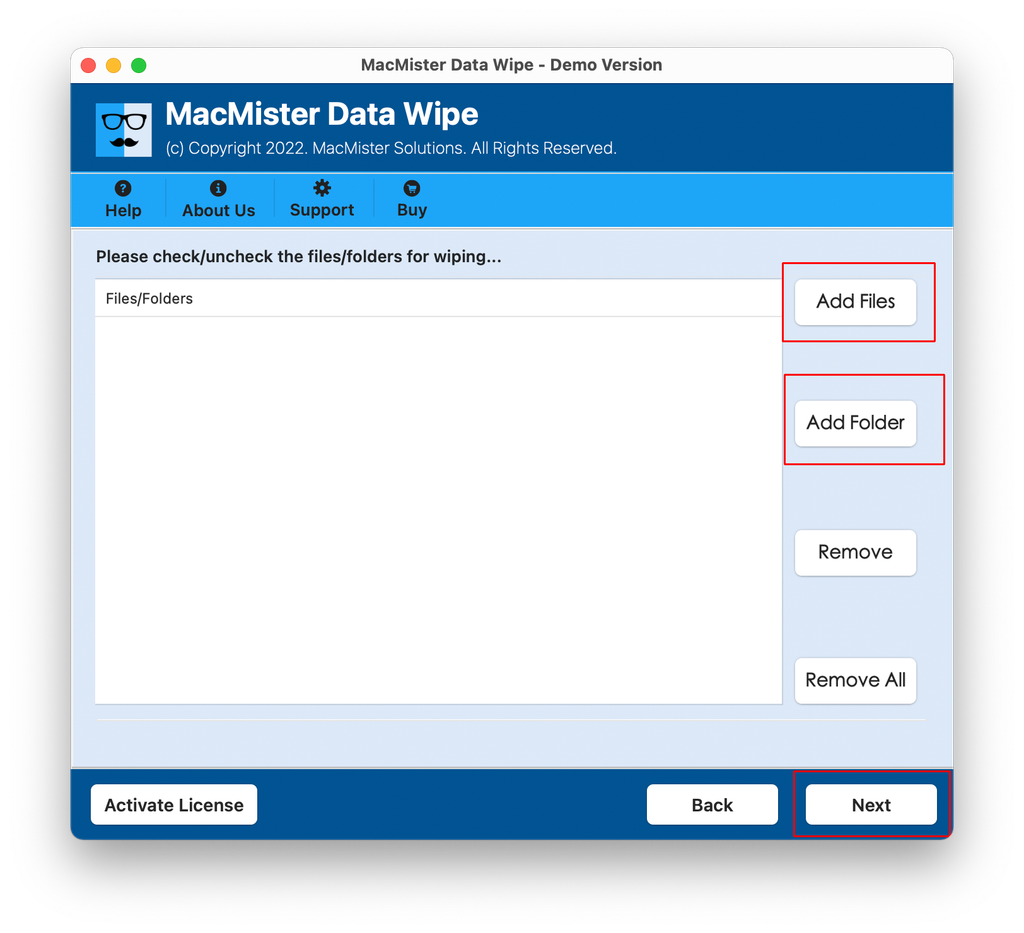
Step 2. Use Add File(s)/Add Folder buttons to load files on the application that need to be shredded.
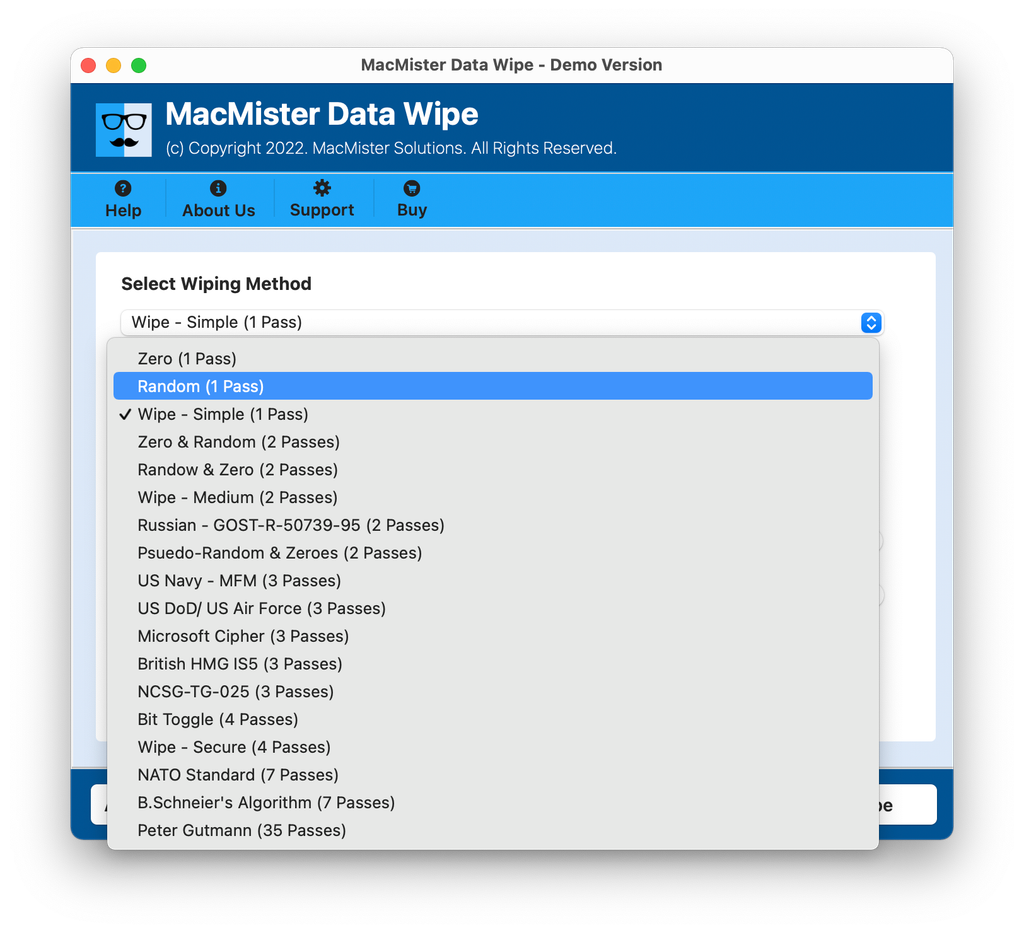
Step 3. Choose required wiping method in order to perform the removal according to the requirements.
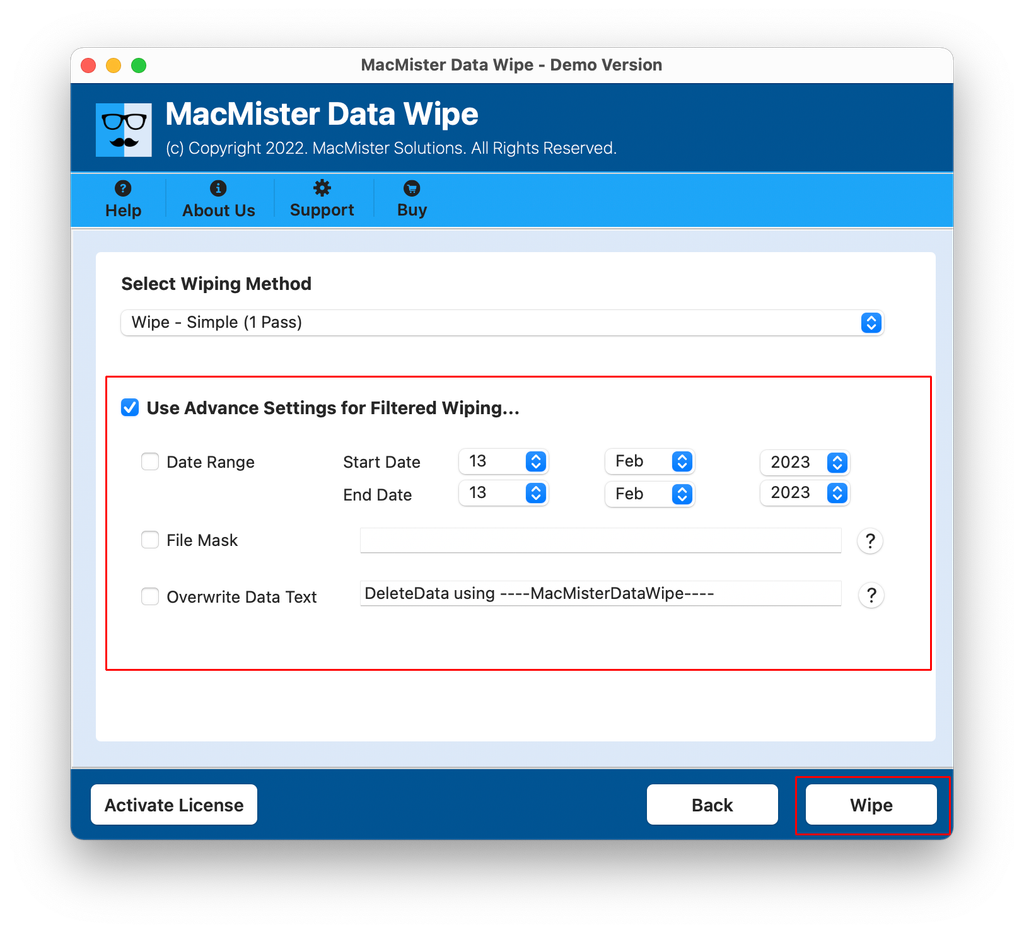
Step 4. Apply required filtering to wipe specific files from MacBook and tap Wipe button.
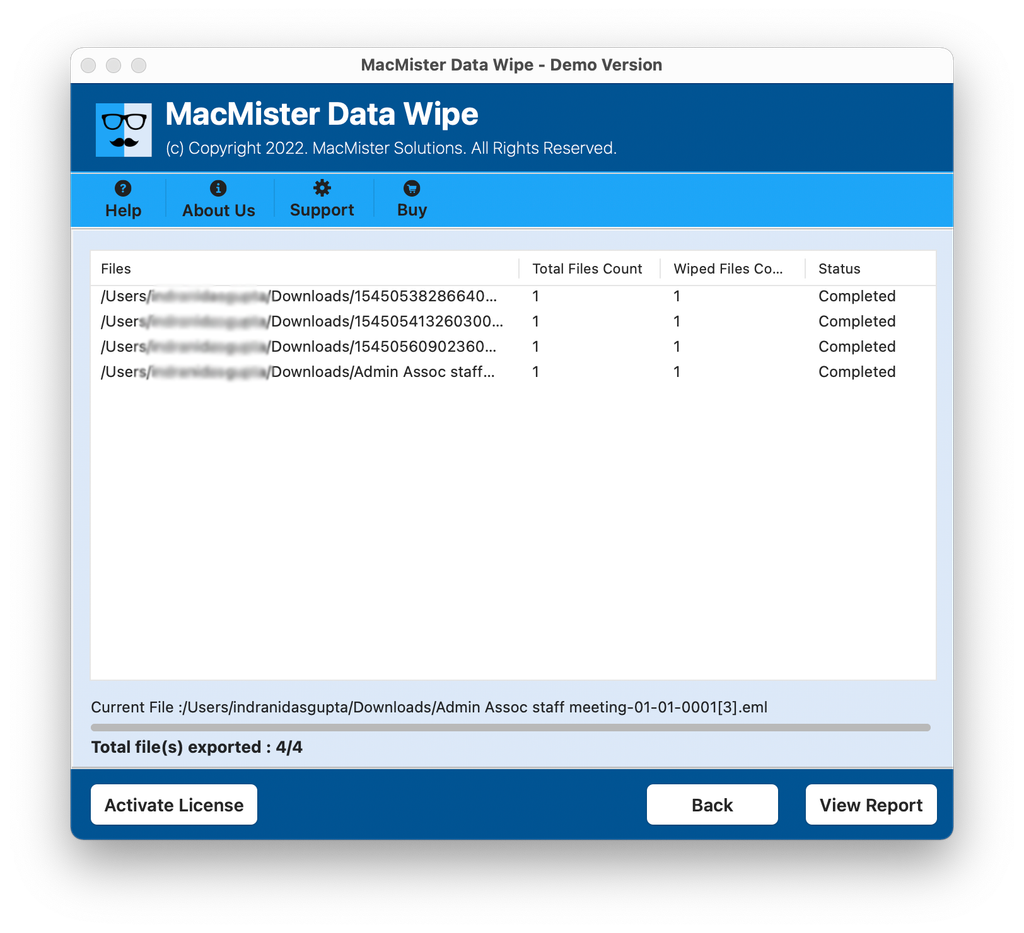
Step 4. Check the live process and track the ongoing wiping status.
Conclusion
Issues in formatting, together with resetting problems in Apple Silicon Mac, can certainly be a difficult hurdle to overcome because of security and firmware locking up that hinder a smooth operation. Even though the built-in function “Erase All Content and Settings” from Apple does a wonderful job during ordinary conditions, persistent partitioning problems need something more effective than usual. Utilizing a tool like MacMister Data Erasure tool will definitely help you accomplish your task.