How to Delete All Junk Files at Once on a MacBook Air
The MacBook Air is known for its wonderful design, portability, and incredible speed. But as the time passes, the best Apple Silicon or Intel-powered Mac could start lagging. The main reason behind limited disk space and decreased performance is the build-up of junk files.
Junk files include caches of the operating system, logs, leftovers, outdated iOS backups, web cache, localizations, and duplicate files. If left alone, these useless files eat up storage space of your Solid State Drive (SSD), making it harder for macOS to be indexed and updated smoothly.
The following is an in-depth tutorial about detecting, targeting, and deleting junk files from your MacBook Air from basic macOS tools to advanced automated solutions
Understanding What Causes “Junk” on macOS
Before eliminating any fules, one must first know what takes up space internally:
- System & User Caches: Files created by macOS and external apps to help increase speed. These become outdated over time and slow down the system’s performance.
- Application Logs: Log files created by various apps every time something happens or some type of problem arises.
- Language Files (Localizations): There are many languages supported by macOS. Every application uses many language files that you never use.
- System Junk Files: When you delete an application by dragging it to the trash bin but without deleting support files.
- Large and Old Downloads: Large installer images (dmg files), huge PDF files, zipped folders, and duplicate files.
- Bin / Trash Bin Files: The files deleted from your computer but not yet erased from your trash bin.
Method 1: Use Built-in macOS Storage Management Tools
The company has embedded built-in software utilities to analyze the drive space without requiring any third-party software installation.
Step 1: Storage Recommendations
Step 1. Click the Apple menu on the top-left side of your screen.
Step 2. Choose System Settings (About This Mac for older macOS versions).
Step 3. Select General > Storage.
Step 4. macOS will analyze your SSD and show you its used storage in color codes.
Step 2: Enable Automated Cleanup Features
In the Recommendations section, you should customize your storage with a couple of switches:
- Store in iCloud: Store photos, documents, and messages in iCloud and keep only recently used files on your SSD.
- Optimize Storage: Remove movies and TV shows purchased from Apple TV automatically.
- Empty Trash Automatically: Permanently delete files stored in the Trash for more than 30 days.
Step 3: Review Categories Manually
Click the Information (i) icon located beside categories such as “Documents,” “Applications,” or “macOS/System Data”:
- Check your Large Files and Downloads.
- Delete files that you don’t need anymore.
Method 2: Manually Clean Caches, System Logs, and Residuals
In case you like being in charge of file directories on your computer, you may manually clean system caches using Finder.
Steps for Cleaning User Cache
- Launch Finder.
- Hit Shift + Command + G to launch the “Go to Folder” window.
- Type ~/Library/Caches and hit Enter.
- You will see a folder that contains tens of cache folders for various applications.
- Use Command + A to select all files stored in these subfolders or choose individual folders corresponding to applications you do not need anymore.
- Move them to the Trash bin.
How to Clear System Logs
- Launch Finder and use Shift + Command + G keyboard shortcut.
- Enter ~/Library/Logs in the Go to folder field.
- Locate and delete any old log files in the trash.
- Repeat the process for /Library/Logs directory.
Method 3: Clear Browser Junk and Temporary Web Data
A web browser keeps large chunks of cache, cookies, and browsing history. Removing them would save storage space and boost your privacy online.
Safari
- Launch Safari and open Settings by pressing Command + ,.
- Click on Privacy and choose Manage Website Data.
- Click Remove All to delete web cache and cookies.
Google Chrome
- Launch Google Chrome and hit Command + Shift + Delete.
- Specify All time for the time range.
- Tick Cached images and files and Cookies and other site data.
- Click Clear data.
Method 4: Comprehensive & Permanent Solution
The quick way to delete all the junk files on MacBook Air is MacMister Data Wipe for Mac Tool. The application is programmed with Add File(s)/Add Folder buttons with the help of users can add required junk files/folder on the tool for deletion. The interface of the software is simple and user-friendly. Both professional and non-professional users can utilize it and implement the process in few seconds. Even, the three-step procedure will take only three seconds of users to finish the whole process.
Moreover, the application has many features that users may take the help of to delete junk files on MacBook according to their requirements. However, a free demo is also available with the help of users can check the software process in detail.
Working Steps to Delete Junk Files on MacBook Air
Step 1. Download and run the app on MacBook Air.
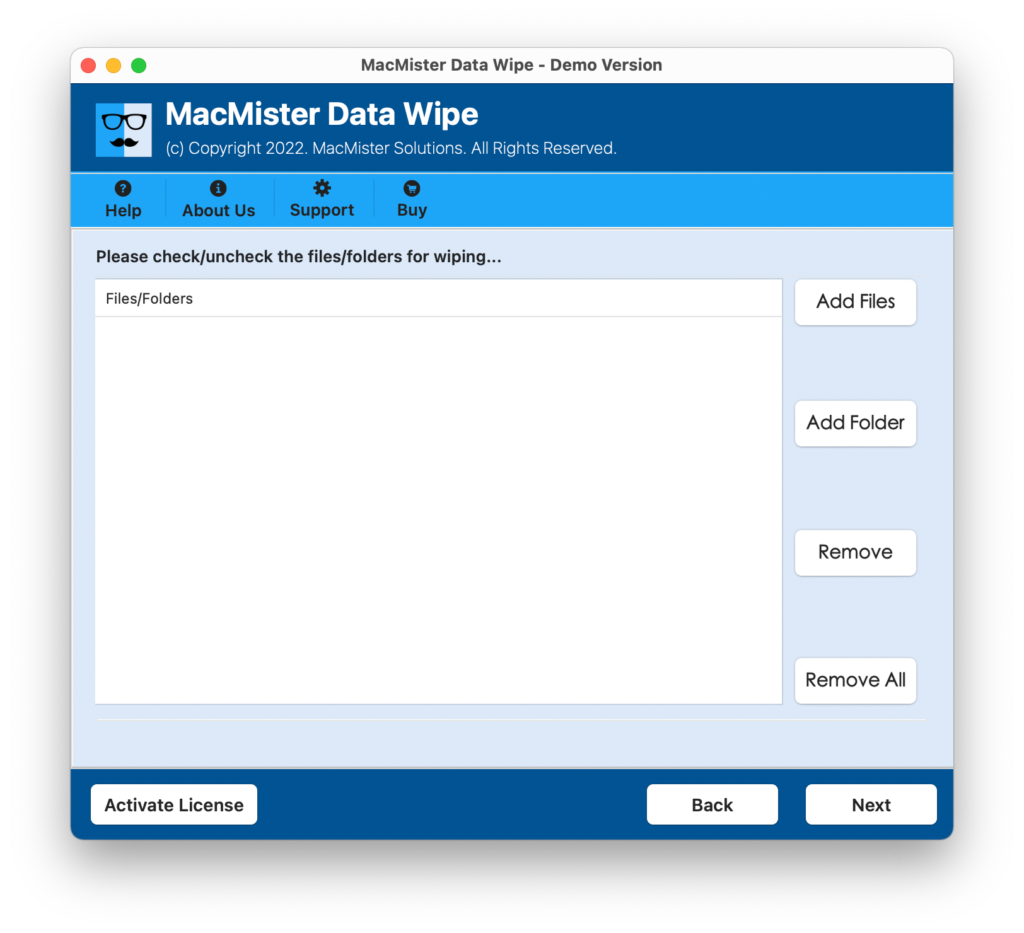
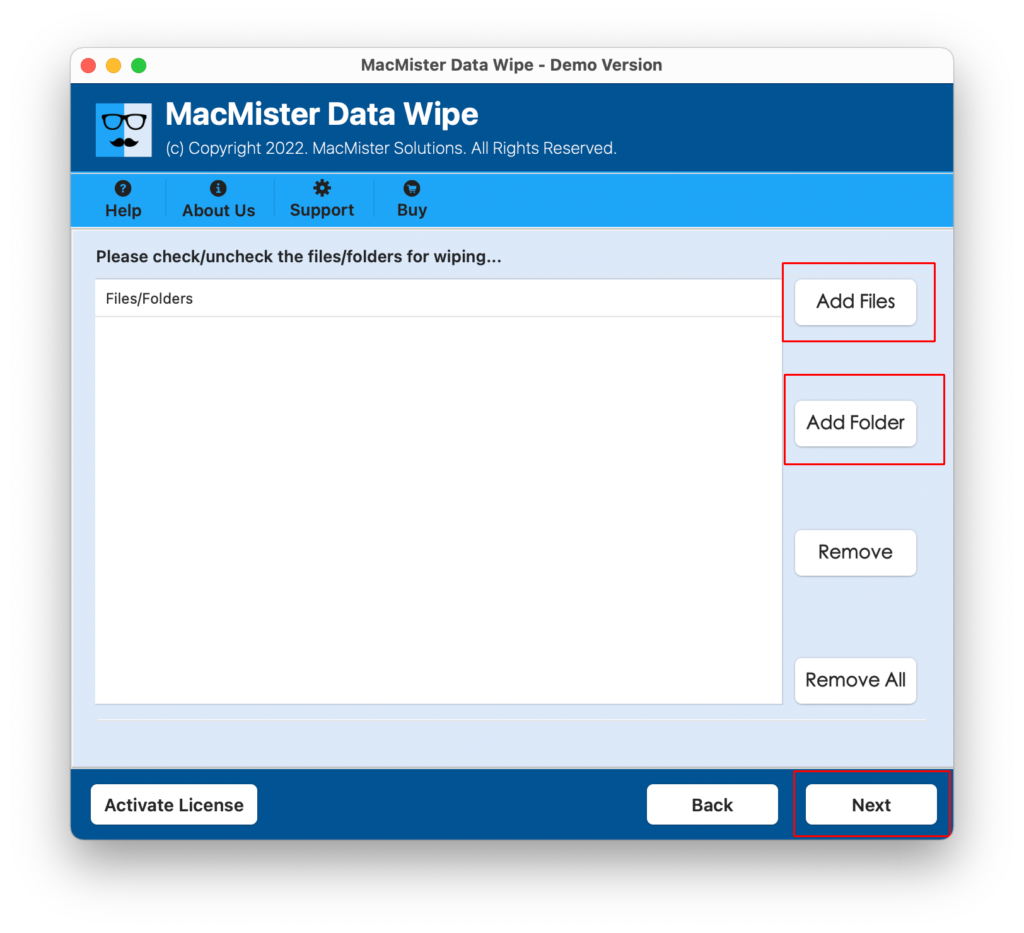
Step 2. Take the help of dual buttons i.e. Add File(s)/Add Folder to load required junk files/folder on the tool. Click Next.
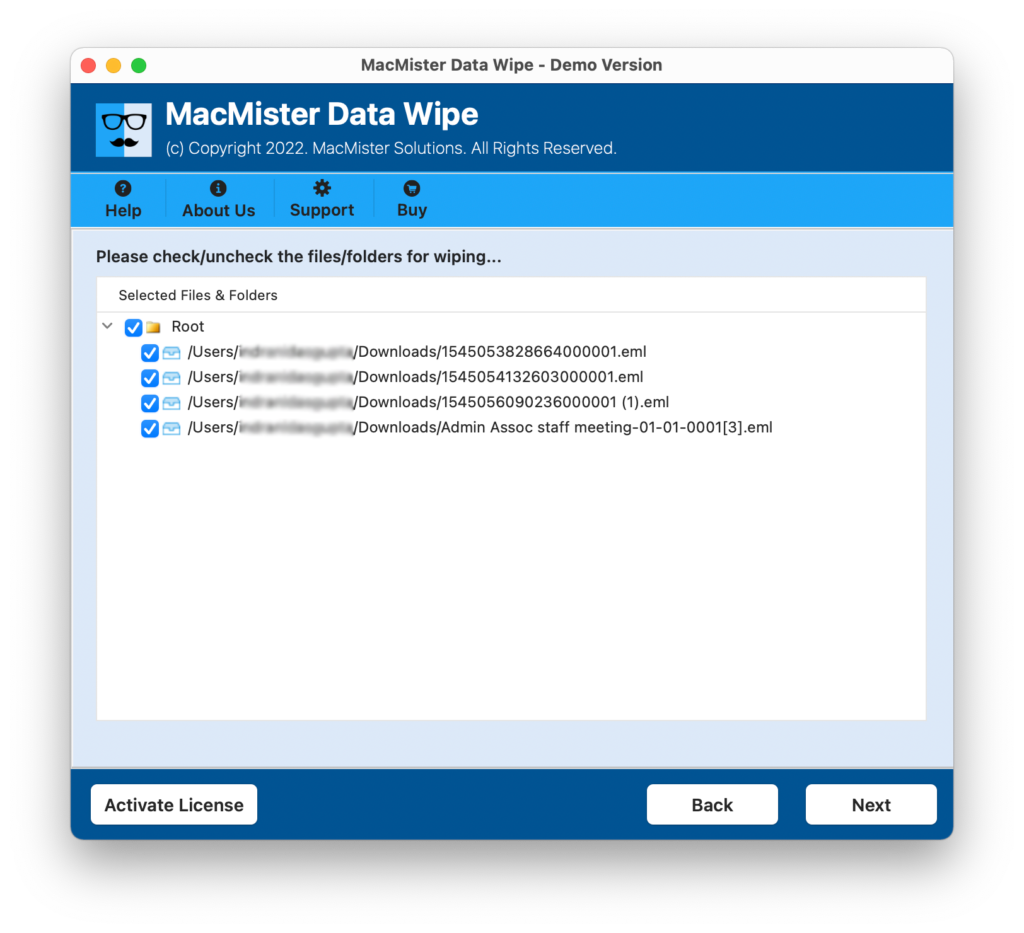
Step 3. The application will display all the chosen files on its pane with checkboxes. Verify them and press the Next button to proceed.
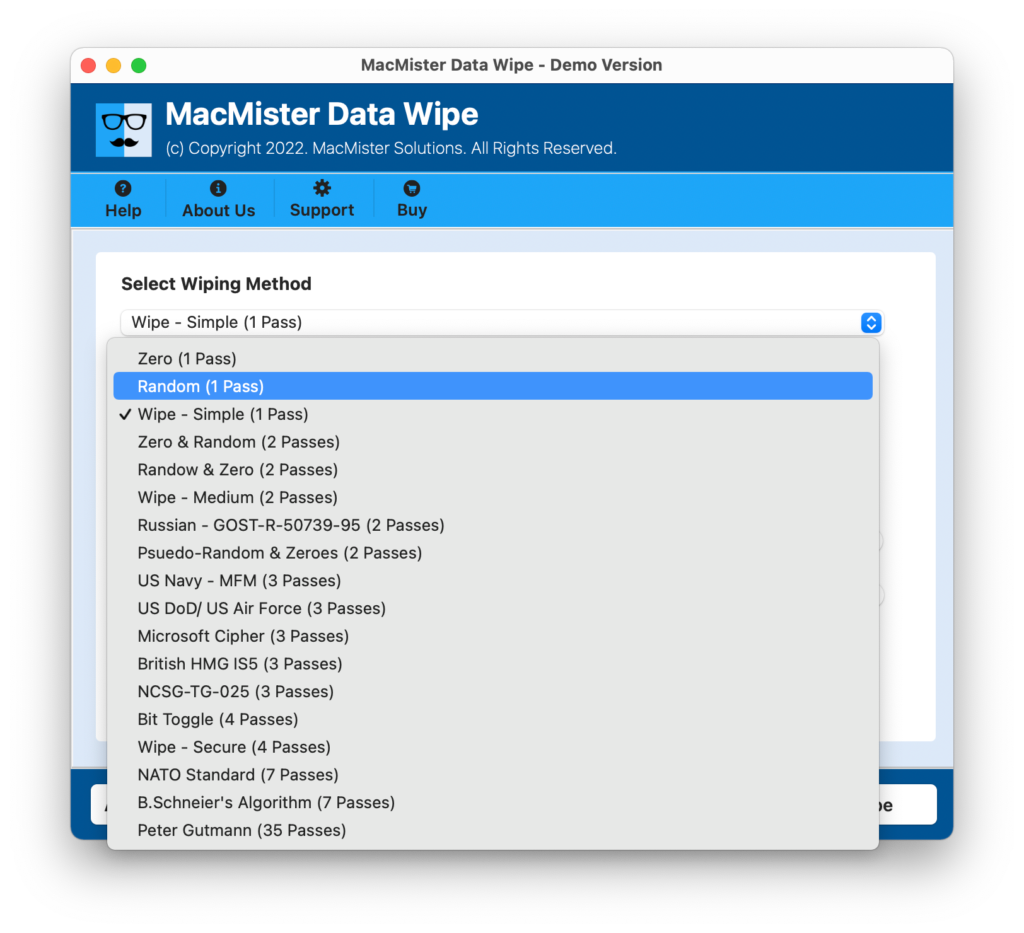
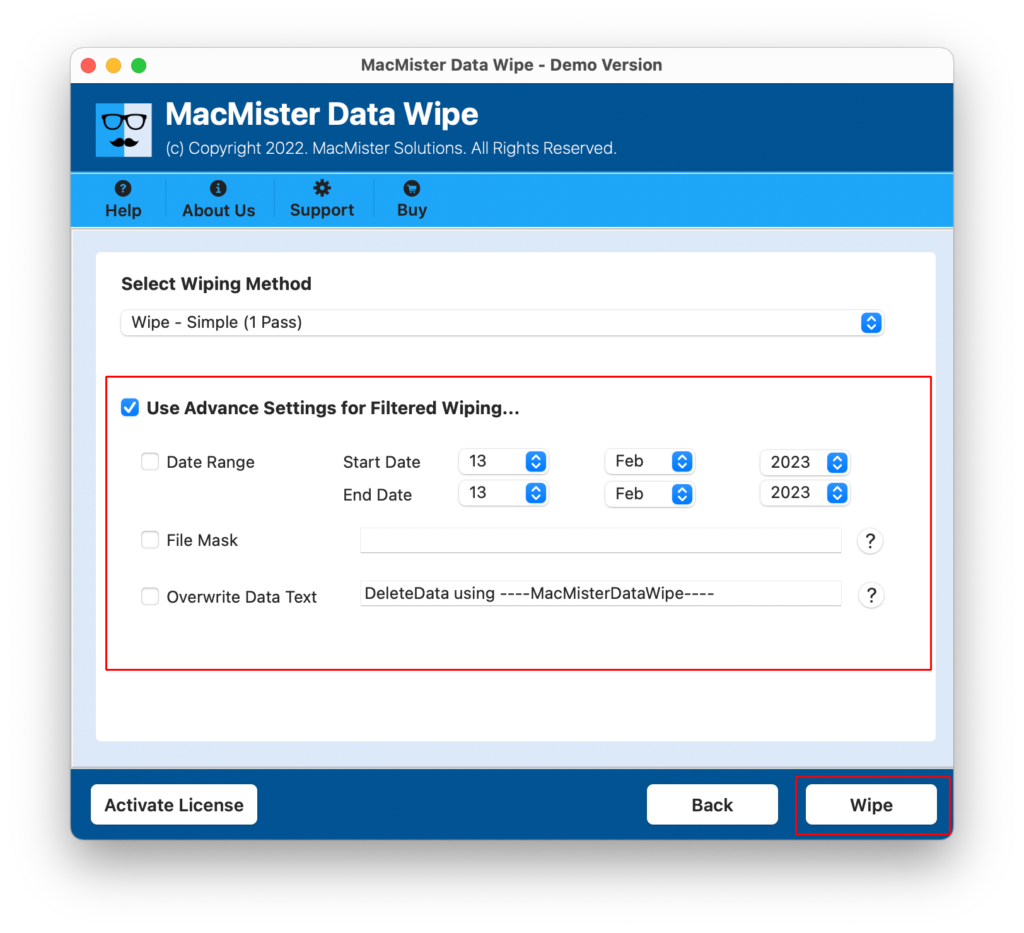
Step 4. Choose the necessary wiping method from different wiping options.
Step 5. Apply filtering if you need to delete junk files as per your preferences. Last, hit the Wipe button to start the wiping process.
Step 6. Check the live wiping progress and track the wiping status.
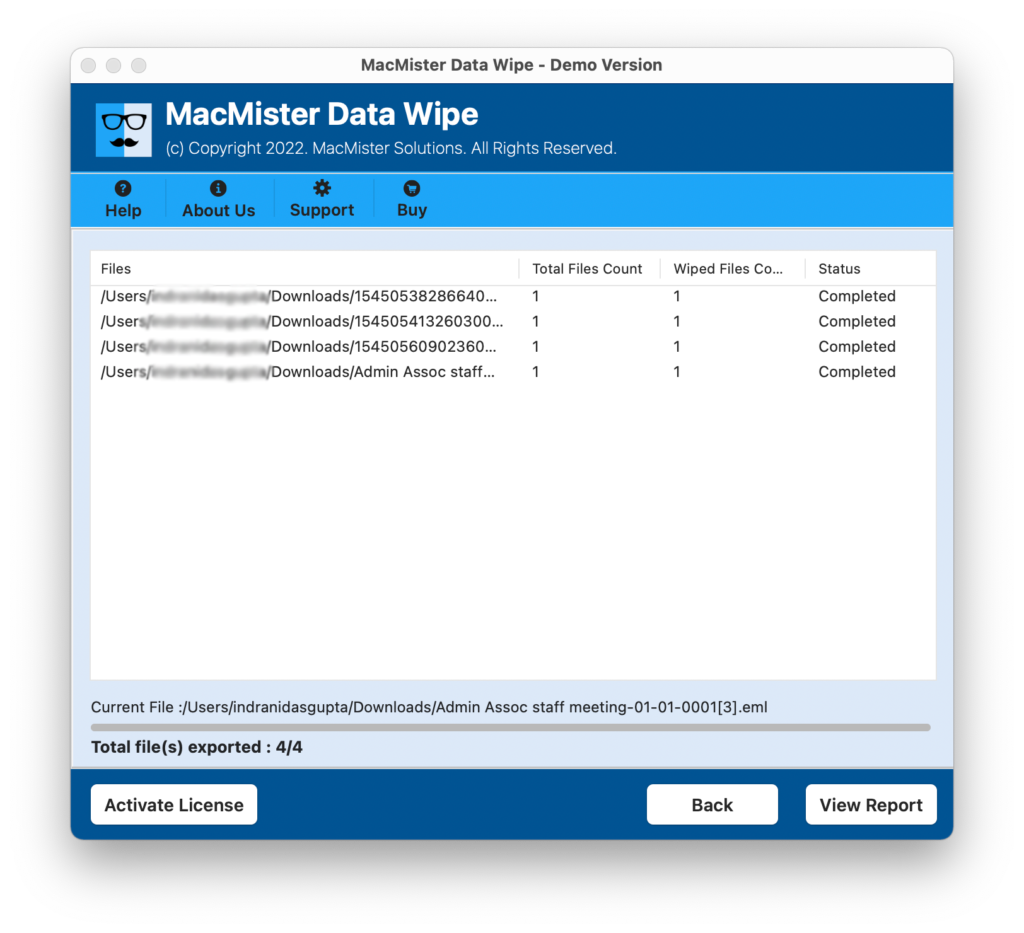
The process will end with a pop-up and then the tool will show log report that will display the wiping details of junk files. You can save the file for future purpose (if needed).
Why to Opt MacMister Wiping Utility?
- Helps erasing the data by overwriting it with the use of highly complex algorithms (such as Zero Pass, Random Pass, US DoD 5220.22-M, and NATO). It ensures that your junk data, cache, and sensitive files can never be recovered.
- Allows you can select individual junk folders, whole folders, and even secondary drives for erasing in a batch process.
- Compatible with all latest macOS versions and works seamlessly on both Apple Silicon (M1/M2/M3/M4) and Intel MacBook Air.
- No technical knowledge about command lines is required to sanitize your files and disks.
Epilogue
In the blog, we have discussed an advanced process to fix “how do I delete all my junk files at once”. You may explore multiple methods discussed above and perform the necessary task without any issues. However, MacMister Data Erasure Software for Mac is surely one of the best tools to delete junk files from Mac at once. The application offers many beneficial features such as wiping options, filtering, dual buttons and more. Also, its interface is simple and easily manageable by all types of users. Download its free demo to check the process in detail.