How to Export Emails from Outlook Mac App in Bulk?
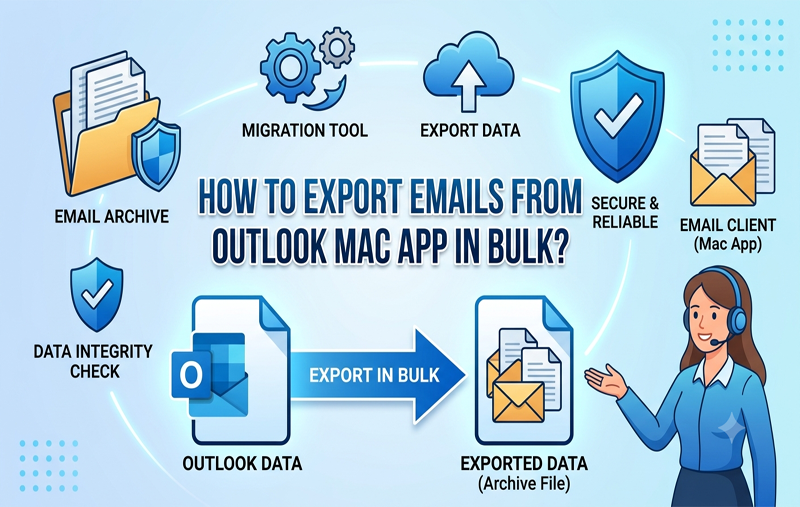
Managing a busy inbox in Outlook on Mac is just part of the daily part these days. But sometimes, you gotta free up some space on the server, wrap up old projects, or shift your data to a new place. When that happens, you really need to know how to export emails in bulk from the Outlook Mac app.
Moving a few emails here and there isn’t hard, but exporting them all at once requires a plan. You wanna keep the folder structure intact, save those attachments, and protect the metadata too. This piece is gonna look at the native ways to do that on macOS, and it’ll show you a pro method for easily converting bunches of emails all at once.
Why Export Outlook Mac Emails in Bulk?
To understand why people often need to export lots of emails at once, we first need to look at the reasons behind it.
- Hard drives can fail and cloud services might go down, so having a local backup of important messages makes sense for recovery in such cases.
- If you’re in a company with lots of emails, they might limit how much you can store. This means exporting old emails can help you save space and keep those archives safe on your computer.
- When moving from Mac Outlook to other clients like Apple Mail or Thunderbird, you’ve got to transfer that info over too.
- Plus, certain industries need to hang onto email records for years due to audits and legal stuff.
Method 1: The Primary Way – Exporting to an OLM File
Microsoft Outlook for Mac lets you export your emails, contacts, calendars, tasks, and notes into a single .olm file. Here’s how to do it:
- First, open Outlook on your Mac. Just make sure you’re using the classic view; the “New Outlook” can get a bit tricky with hiding stuff you need.
- Then, look at the top menu bar and click on Tools, then pick Export.
- In the pop-up box, check the Mail box and any others you need like Contacts or Calendar. Hit Continue after you’re done.
- Next, choose where on your Mac you want to save the archive. Name your file something memorable and hit Save.
- Outlook does its thing, exports your stuff, and when it’s done, just click Finish. Simple, right?
Note: The native OLM method is great for basic backups, but it has its limits. OLM files can only be easily opened by Outlook on Macs. Trying to view these emails on a Windows computer or in another client, or converting them to standard PDFs, requires a converter first. Without it, standard OLM files just don’t work.
Method 2: The Manual Drag-and-Drop (For Smaller Bulk Batches)
If you just need to move a handful of folders or a couple hundred emails, you can use macOS’s drag-and-drop feature.
- First, create a new folder on your desktop, like “Archived Emails”.
- Next, open Outlook for Mac, click to select the emails you want – you can press Cmd + A to pick all in a specific folder – then drag and drop them right into that new folder.
The downside? This method changes emails into .eml files which everyone can read, but it doesn’t keep your folder structure intact. Also, it gets really boring if you have tens of thousands of emails spread across lots of folders. Plus, attempting that could lead to app crashes, so be prepared!
Method 3: The Ultimate Professional Solution
When native methods fail because of huge data volumes, needing different file formats, or the switch to “New Outlook,” where exporting is limited, you need a specialized tool. The MacMister OLM Converter for Mac handles bulk email exports from Outlook for Mac efficiently and securely. It’s a highly recommended professional utility for the job.
Main Reasons for Choosing the Application
- MacMister differs from the native tool because it locks you into OLM format; instead, it converts Outlook data into PST, MBOX, EML, PDF, MSG, HTML, and other formats.
- One big headache in bulk migration is losing your folder structure, but this tool keeps your inbox, sent items, and custom folders in place.
- It also preserves all email properties like attachments, inline images, Bcc/Cc fields, formatting, and timestamps.
- You can upload multiple large OLM files at once, which saves hours of tedious work.
Steps to Bulk Export and Convert Using MacMister:
Step 1. Download and run the application on a Mac OS.
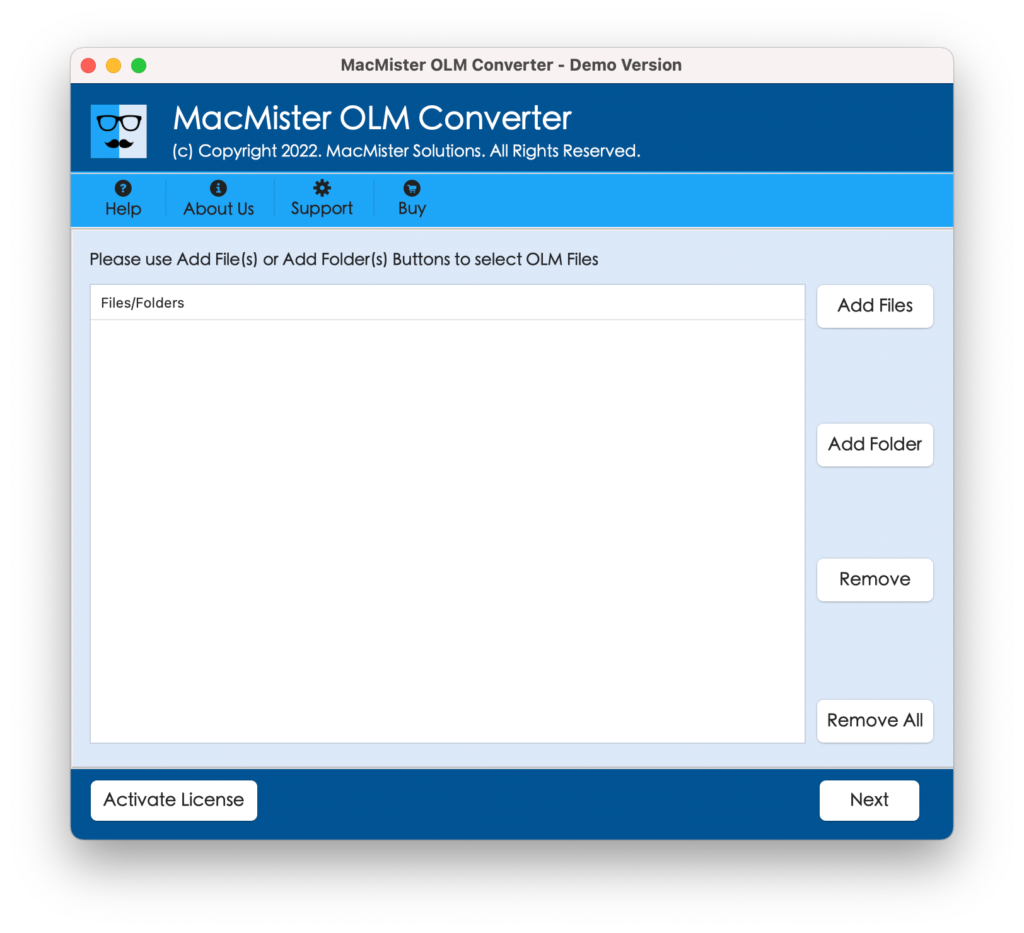
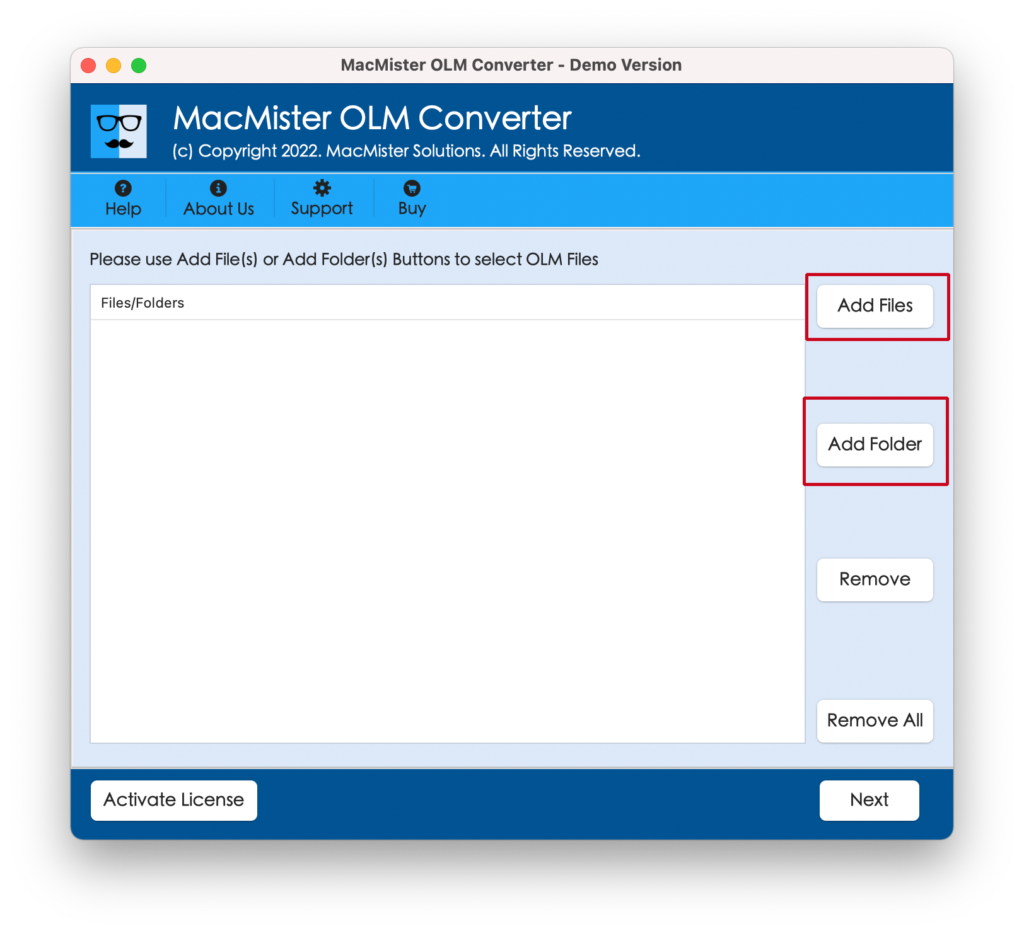
Step 2. Click Add Files or Add Folder to load the OLM files you wish to export in bulk.
Step 3. Preview your selected database folders on the software dashboard for verification and click Next to proceed.

Step 4. Choose required saving type from Select Saving Options.
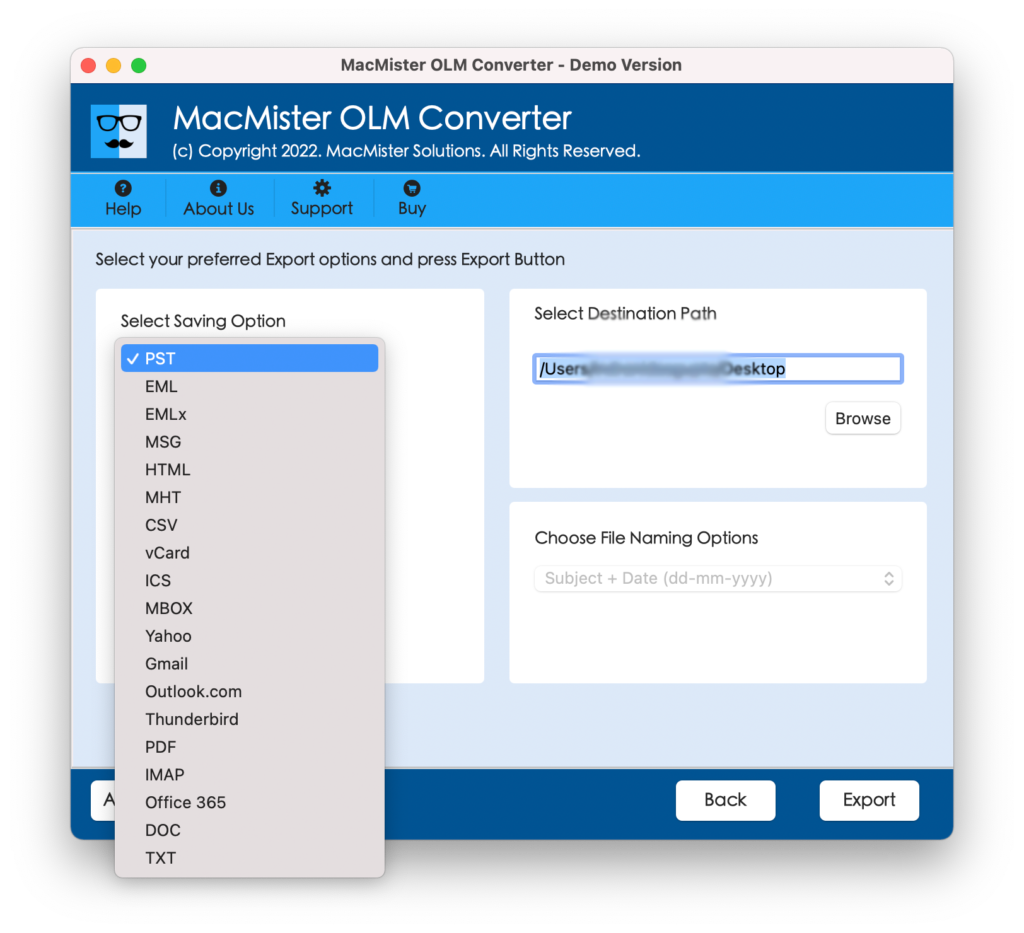
Step 5. Set sub-options of a selected saving type according to the requirements. Tap Export.
Step 6. Now, go through the live conversion report appearing on the screen and track the live bulk export of OLM files.

Conclusion
Bulk exporting emails from the Outlook Mac app isn’t as hard as it may seem. For a simple backup on the same machine, use Outlook’s built-in OLM export feature.
If you need more flexibility though, try a dedicated tool like professional solution for Mac. This ensures your data is secure, the format works, and things move smoothly. Choose the method that fits your needs best to keep your important info safe and sound.