Having an iPad with a 16 GB of storage requires the backup of iPad to external hard drive to gain more device storage. In case you have two iPads or trying to transfer files from one iPad to another. Or, use external hard drive to backup iPad data.
You can take help of iCloud storage but its free version will not help you much. Note. Even, the iPad is configured with iCloud and so iCloud will accumulate more device storage.
But no worries, because in the next section, we will explain multiple approaches that will help you to backup iPad to external hard drive. Let’s check that out!
Method 1. Backup iPad to External Hard Drive using iTunes
(Windows Computer)
The backup can take lot of storage space on your iPad. That is why majority of iPad users prefer iTunes for backup. iTunes will backup and save the data everytime it connects with the iPad.
However, if you are looking to transfer iPad backup to external hard drive, then you can generate a visual link with your iTunes where the backup is kept and an external drive where the backup will be moved.

Follow the steps mentioned below and know the procedure to backup iPad to external hard drive:
- Connect the iPad to the Mac system using USB cable.
- Open the Command Prompt by using Win+R key and press Enter.
- Enter the following - mklink /J “C:\Users\\AppData\Roaming\Apple Computer\MobileSync\Backup” “E:\”
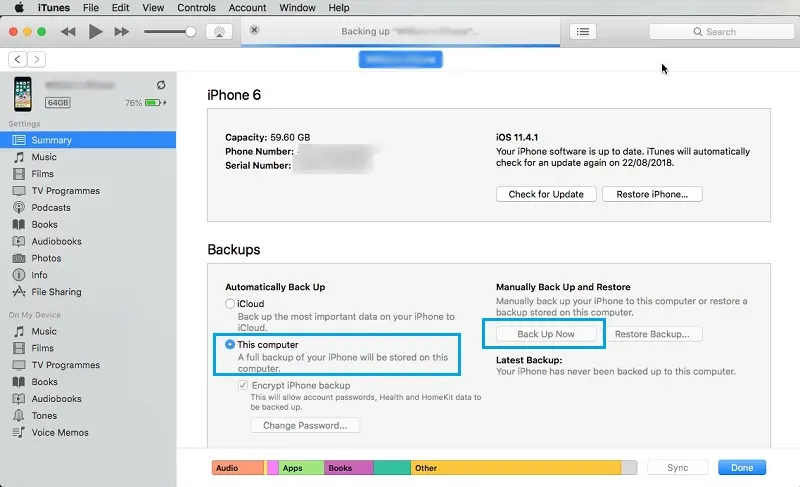
- Take iPad backup to iTunes. On iTunes window, go to iPad device and navigate to Summary Pane. Go with the option This Computer appearing under Backups and click Backup Now.

Wait for the backup to finish. The iPad backup successfully stored to external hard drive.
You can repeat the steps if you wish to backup iPad to external hard drive again in future.
(Mac Computer)
Whenever iTunes connects with the computer, it will automatically take a backup on your device. But, you can also manually take a backup of your device any time. If you are using iOS 3.0 or later then iTunes can encrypt the backup and safeguard your data.
- Connect iPad using USB cable to your Mac machine.
- Go to iTunes app, and choose the device icon appearing on the top-left of iTunes window.
- Click the Summary.
- Tap Backup Now (appearing below backups). Note. To encrypt the backups, choose “Encrypt” [device] backup”, enter the password, click Set Password.
Now, check the backup stored on the system, go to iTunes >> click Preferences >> and select Devices. You will see that the encrypted backups have a lock icon in the backup list.
Method 2. Backup iPad using Mac System
- Connect iPad to Mac using USB cable.
- From the Finder sidebar, select iPad.
- Click on General appearing at the top of the Finder window.
- Choose “Backup all of the data on your iPad to this Mac”.
- Encrypt the backup data and lock it with by applying the password.
- Tap Back up Now.
Note. Use the Finder for iPad backup, macOS 10.15 or later needed. And, with earlier macOS versions, you can use iTunes for iPad backup.
Method 3. Backup iPad without Computer

- Connect iPad with the external drive with the help of USB lightening adapter.
- Open the required app whose data you want to transfer and select the required files from the same.
- Click Share icon and select Save.
- Now, select the connected external hard drive which will be shown as ThumbDrive.
Conclusion
We really hope that the above-mentioned three methods can help you to backup iPad to external hard drive on Mac & Windows. You can choose any suitable method and perform the necessary process without any difficulty. Moreover, there is also another way to make a space on your iPad device by wiping the unnecessary database after taking the backup. Try MacMister Data Wipe Tool for Mac, download it on a Mac system, choose the external hard drive and clean the required files. You can try the free demo of the app and check the entire procedure for free.

Secure and effective method to permanently wipe Mac hard disk drive data on Mac OS.