How to Import OLM to Outlook Windows with Ease?
Are you shifting to Windows platform from Mac and before that want to take care of essential OLM files? Thinking about making the file suitable for Outlook Windows and thereby wondering how to import OLM to Outlook Windows supported format? Continuously looking or an easiest way to perform the desired process? If yes, then you are definitely at the right place because in the write-up we have discussed some approaches that you may undertake to import OLM to Outlook Windows.
Importing OLM to Outlook Windows has never been an easy task. Although Microsoft Outlook is compatible with both Mac & Windows operating systems. Still, users face challenges when they try to access OLM files into Outlook Windows. Because, on Windows, Outlook has a different way of storing users database. It creates PST file after user exports important data items from their email account.
So, how to import OLM to Outlook Windows, let us understand the process in detail.
Know Multiple Ways to Import OLM to Outlook Windows
There are two different ways to import OLM to Outlook Windows –
- The Direct Method – Trending Approach
- The Manual Method – Traditional Approach
However, manual method is free of charge and is suitable when there are few OLM files to import. Whereas, the direct method is easier, safe, and reliable to use. It does not possesses any file size limitations and deliver original results in few seconds.
Method 1. Trending Way to Import OLM to Outlook Windows
In order to import OLM to Outlook Windows, it is must to convert OLM to PST first. And to perform the same, make use of MacMister OLM Converter for Mac & Windows. However, you will find numerous tools but make sure to pick the one that is certified, easy-to-use, and hassle-free. The software is user-friendly, reliable, and highly secure. It is programmed with an environment which is effortlessly manageable by all types of professionals and non-professional users.
The operational steps are safe, simplified, and less in number. Moreover, the application has powerful features so that users can import OLM to Outlook Windows as per their requirements. The tool also has a freeware version with the help of users can check the process to import OLM to Outlook Windows.
Working Steps to Import OLM to Outlook Windows Supported Format on Mac
Step 1. Download and open OLM to PST Converter on Mac OS.
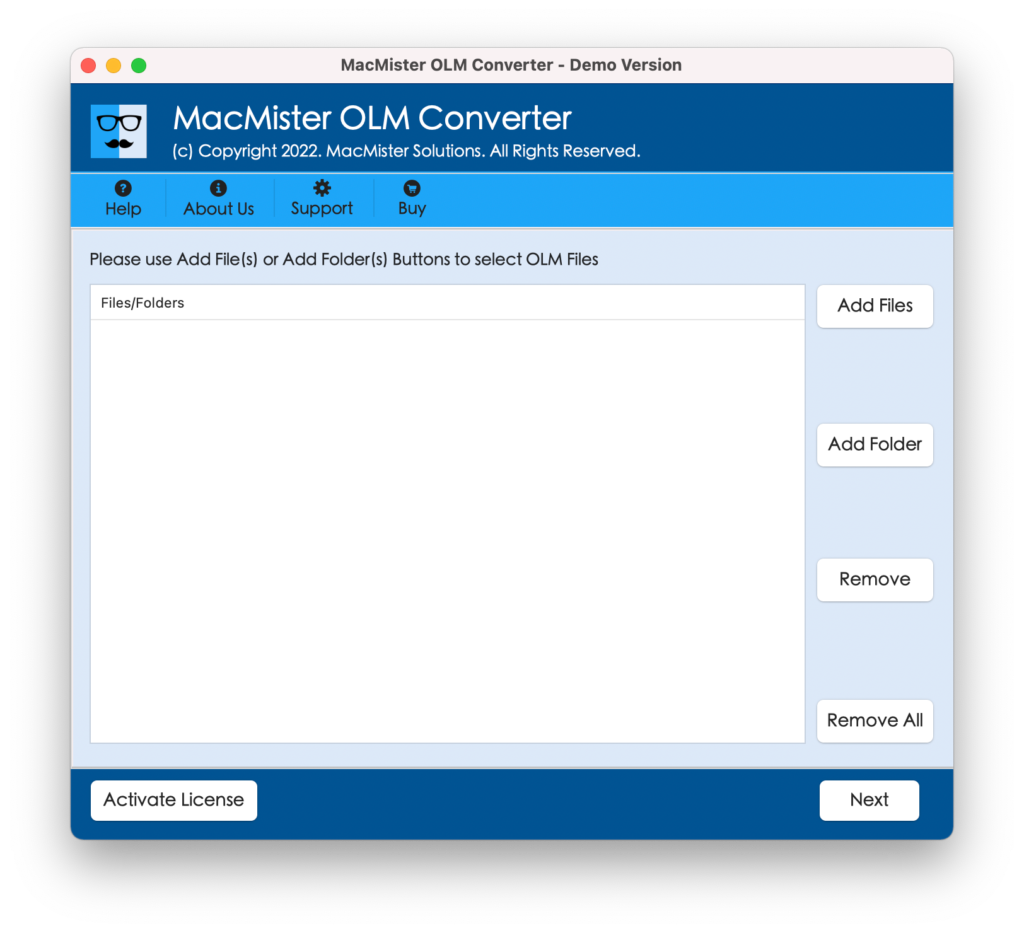
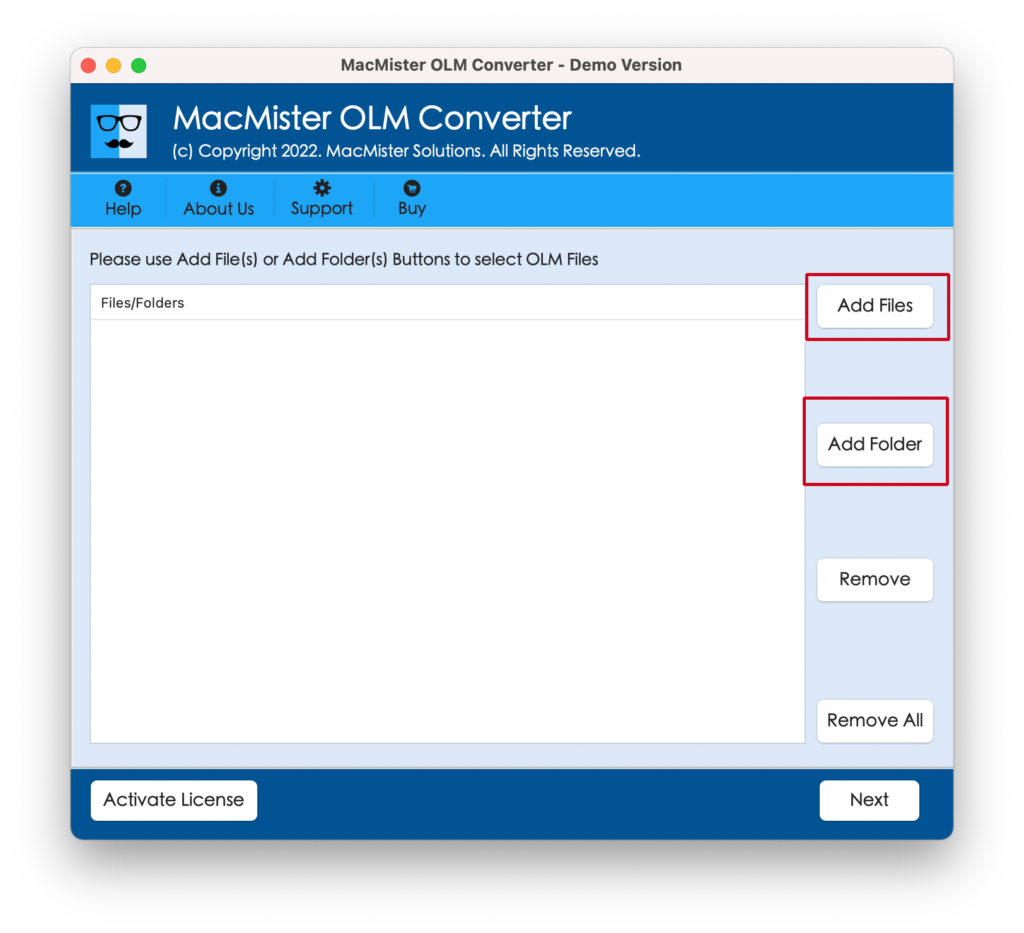
Step 2. Add the required files folder on the tool by using Add File(s)/Add Folder option and click Next.
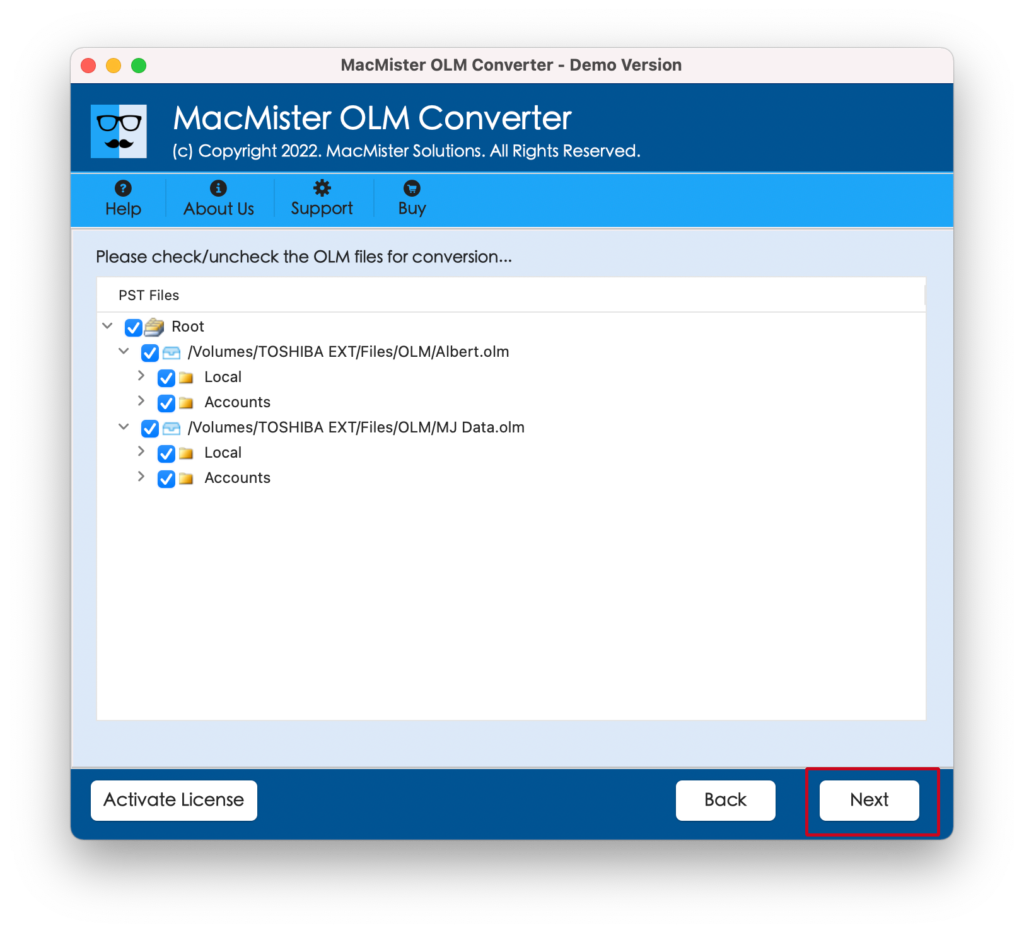
Step 3. The application will show the list of OLM files on its pane one-by-one. The listed OLM files will appear with selected checkboxes. You may do the selection according to your requirements to import selected OLM files to Outlook Windows. Click Next to continue.
Step 4. Click Select Saving Options and choose PST format from the menu.

Step 5. Set the other PST options according to the requirements and click Export button to start the process.
Step 6. The Live Conversion Window will display that will show the ongoing conversion progress of OLM files.
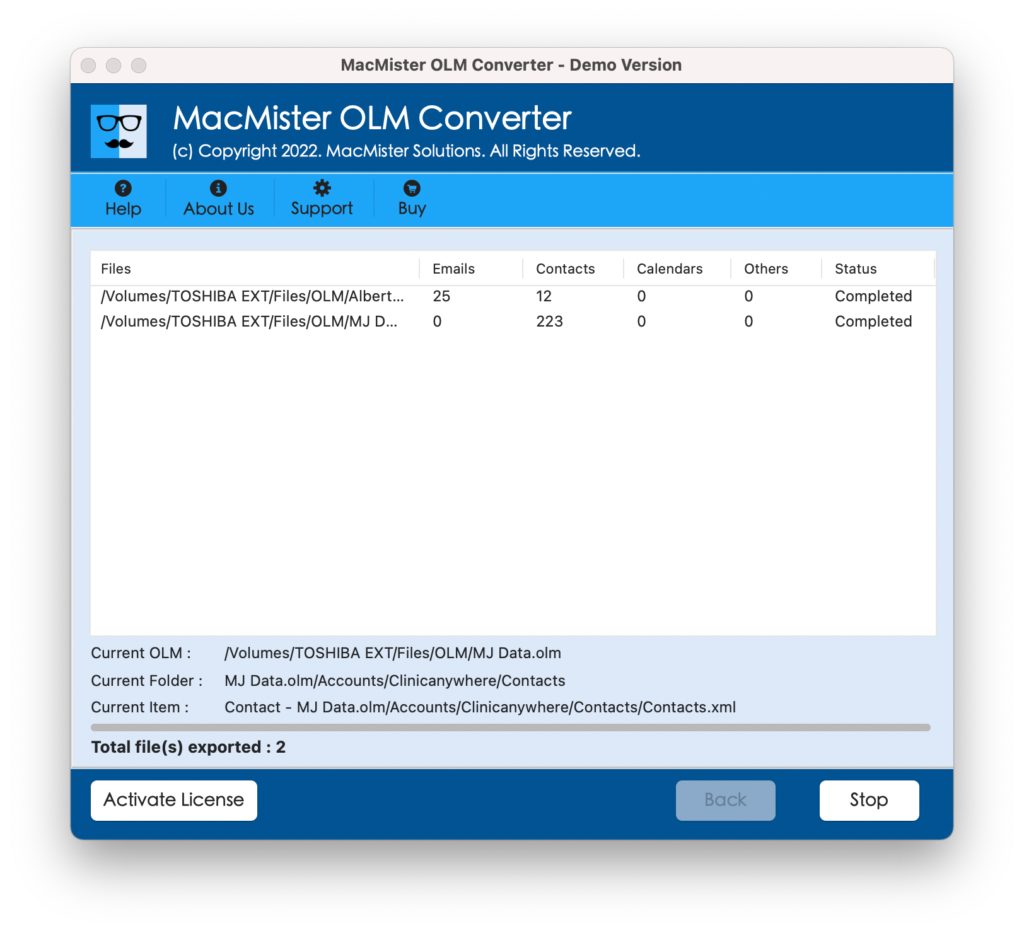
The process will finish in few seconds and show Conversion Completed pop-up confirming that the conversion is successfully completed. Click on OK and check the steps to import the received PST files in Windows Outlook.
Guide to Import PST in Windows Outlook
Follow the steps to import converted files into Windows Outlook –
Step 1. Go to Microsoft Outlook on Windows.
Step 2. Navigate to File. Click Open & Export. Choose Import/Export.
Step 3. Take Import from another program or file as an option and click Next.
Step 4. Opt for Outlook Data File (.pst) option and click Next.
Step 5. Add the converted PST files, click OK and then hit Finish button.
The files are successfully imported in Windows Outlook. Now, open the required file to check the results. However, you will see that the PST folder structure as well as PST data is completely accurate after conversion.
Method 2. Traditional Way to Import OLM to Outlook Windows
To import OLM to Outlook Windows manually, IMAP Server plays an important role. It works as an intermediate between both Mac & Windows operating systems as it stores the entire data of users.
Step 1. Create an email account on IMAP Server such as Gmail
Note. Users can use old email account for the process, just make sure that IMAP option is enabled.
Step 2. Set up IMAP Server Email Account in Mac Outlook
- Open Outlook on Mac.
- Tap + button displaying on the left side to add a new account.
- Click the email address pane and specify the following details – email address, password, and Gmail account username.
- Provide incoming server as imap.gmail.com.
- Go with the Use SSL Connect option and mention Outgoing Server as smtp.gmail.com.
- Verify both the options displaying under Outgoing Server.
- Enter 465 in the Outgoing Port and tap Add Account.
- A yellow button will be seen on the left side of the screen confirming that the connection is established. If it turns green, it means that the password is correct and the connection is successfully established.
Step 3. Move Mac Outlook Data to Email Account
- Choose the necessary mailbox to transfer and right-click on it. Click Copy.
- Select the necessary folder in Gmail where you want to transfer the Outlook data.
- Now, the message start uploading, you can see the status from the navigation pane at the bottom.
- After the data successfully uploaded, press Ctrl+F5 to Refresh Gmail.
Step 4. Configure the same account in Windows Outlook
- Run Windows Outlook and go to File, click Info, select Account Settings.
- Tap New icon appearing in a currently opened Window.
- Select the Additional Server Type option.
- Select Internet E-mail option and provide the details – Email Address, Password, and Username.
- Choose IMAP as an Account Type.
- Enter Incoming Server as imap.gmail.com.
- Enter Outgoing Server as smtp.gmail.com.
- Hit More Settings.
- Choose Outgoing Server requires authentication option appearing in Outgoing Server tab.
- Mention 993 as Incoming Server Port in Advanced Tab.
- Select SSL as encryption type.
- Specify 465 as Outgoing Server Port.
- Click OK.
- Select Test Account Settings and press Finish button.
Step 5. Transfer Outlook for Mac File to Windows Outlook Mailbox
Email account is now connected to Windows Outlook, now users will be able to access OLM in Windows Outlook.
Epilogue
In the write-up, we have mentioned different ways to import OLM to Windows Outlook with all the data items. The first approach is direct, simple, and friendly. It has the ability to securely batch import OLM files to Windows Outlook with emails, contacts, calendars, and other items. And besides Windows Outlook, users can use the same solution to import OLM to MBOX, EML, EMLx, CSV, MSG, DOC, IMAP, G Suite, Gmail, and more.
Whereas, the second one is complicated. It is recommended to operate it under expert’s assistance. Also, the process is suitable when there are few OLM files. However, one can pick the solution as required and implement the process accordingly.